Overview
Riven Documentation v1.0
Version: 1.0
Author: ArrowTheme.
Designed by: mad_velikorodnov
Install WordPress
If you haven't have a working version of WordPress, you need to install it first in order to install Riven theme. You can find many instructions to install WordPress in WordPress Codex or the Instructional Video created by Woo Themes. Below are some helpful links for you about WordPress information.
- WordPress Codex - This link provides overall information about WordPress and WordPress installation guide.
- Instructional Video - Guide to install WordPress video created by Woo Themes.
- First Steps With WordPress - Multiple useful topics about WordPress.
- FAQ New To WordPress - Common questions about WordPress.
1. Install Theme
1.1 Installation
- Requirements for Theme
You can click here to find out more about requirements of WordPress.
Below are three requirements for working version of WordPress, php, and mysql.
- WordPress 4.0 or higher.
- PHP 5.4 or higher.
- MySQL 5 or higher.
You also need to make sure that your host can comply with follow requirements. We recommend using WP Engine or Blue Host for all your hosting needs.
- Your web host has the minimum requirements to run WordPress.
- Your host are running the latest version of WordPress.
- You can download the latest release of WordPress from official WordPress website.
- Always create secure passwords for FTP and Database.
- Recommended PHP Configuration Limits
Low PHP configuration limits can cause many issues. When related issues occur, you need increase your PHP limits to a minimum as follows:
- max_execution_time 180
- memory_limit 128M
- post_max_size 32M
- upload_max_filesize 32M
1.2 Theme Installation
- Install new theme manually via FTP Client
In order to add a new theme to your WordPress installation, pleae follow these basic steps:
- Download the zip package of Riven theme in ThemeForest
- Unzip Riven.zip package which you can find inside Theme files folder.
- Connect to your FTP server and navigate to the WordPress installation folder. Go to wp-content/themes/ and upload Riven folder.
-
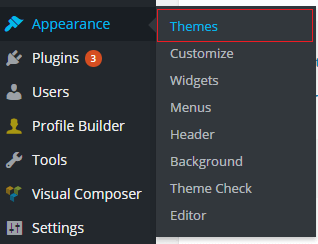
Open WordPress admin panel (navigate through web browser to the folder where you have installed the WordPress e.g www.your_domain.com/wp-admin/) and go Appearance > Themes on admin sidebar. Activate Riven theme.
- Install Theme via WordPress Admin Panel
-
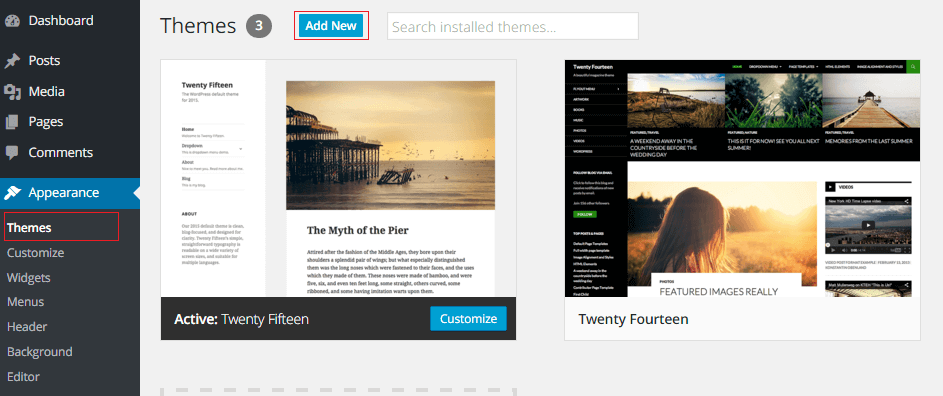
Open WordPress admin panel (e.g www.your_domain.com/wp-admin/) and go Appearance > Themes on admin sidebar and click "Add New" button.
-
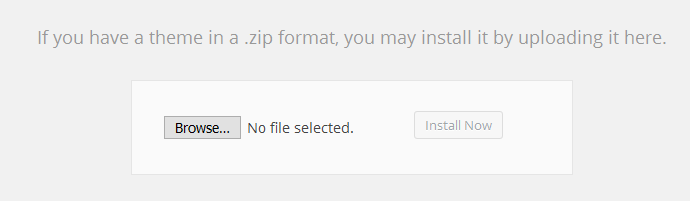
After that, click Upload Theme link and upload zip package of Riven theme.

-
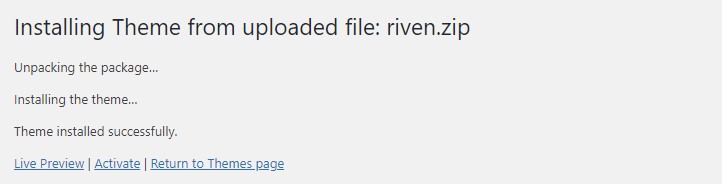
Once uploading theme is finished, it will install theme automatically.
You can click Activate link or go to Appearance > Themes on admin sidebar to activate theme.
Once theme is installed, you need to install Required Plugins to get full working features.
1.3 Plugins Installation
- First method
Install plugins via "Begin installing plguins" message.
After installing and activating the theme you will see the message about installing required plugins at the top of the page.You should click Begin Installing plugins link in order to install needed plugins for Riven theme.
You will be redirected to Install Required Plugins page, here you will find all of the theme required plugins. In order to install these plugins, you just need to check all of them and select install then click apply.
- Below are list of required plugins for Riven.
-
ArrowTheme Importer
-
Contact Form 7
-
Dynamic Featured Image
-
MailChimp for WordPress
-
One Page Navigator for WPBakery Page Builder
-
Regenerate Thumbnails
-
Riven Post Types
-
Riven Shortcodes
-
Slider Revolution
-
Redux Framework
-
Ultimate Addons for WPBakery Page Builder
-
WPBakery WPBakery Page Builder
-
WP User Avatar
- Second method
Install plugins via WordPress Admin Panel.
Besides, you can install some plugins for Riven by navigating Plugins > Add New in admin sidebar. After that, enter plugin name to search plugin and click "Install Now".
When installation process is done, you can click Return to Required Plugins Installer and select active then check all plugins to active these plugin.

- Third method
Install plugins manually (Via FTP)
If you want to manually install plugins, you can follow some basic steps below.
- Download your WordPress Plugin to your desktop and extract plugin folder if it is a zip archive.
- With your FTP program, upload the Plugin folder to the wp-content/plugins folder in your WordPress directory online.
- Go to Appearance > Plugins and find the newly uploaded Plugin in the list.
- Click Activate to activate it.
After finishing plugin install, you need to configure the plugins.
1.4 Plugin Configuration
- WPBakery Page Builder
WPBakery Page Builder for WordPress is drag and drop frontend and backend page builder plugin that will save you tons of time working on the site content. You will be able to take full control over your WordPress site, build any layout you can imagine – no programming knowledge required. Moreover, now you can choose either work on a backend or move your page building process to frontend and instantly see changes you make.
You can see here for more details.
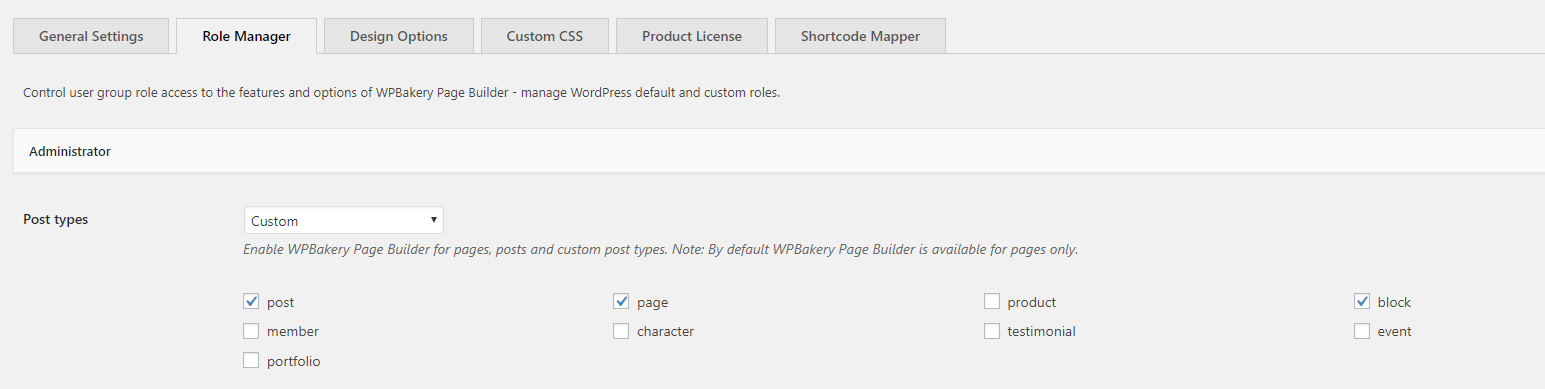
After installing the WPBakery Page Builder, please go to WPBakery Page Builder > Role Manager. In the post types field, you should select Custom and check 'block', 'post' and 'page' checkbox . After making the changes, remember to click Save Changes button.
- MailChimp for WP
Go to MailChimp for WP > MailChimp to access general setting page of MailChimp. You should connect to your mailchimp account by entering API Key.
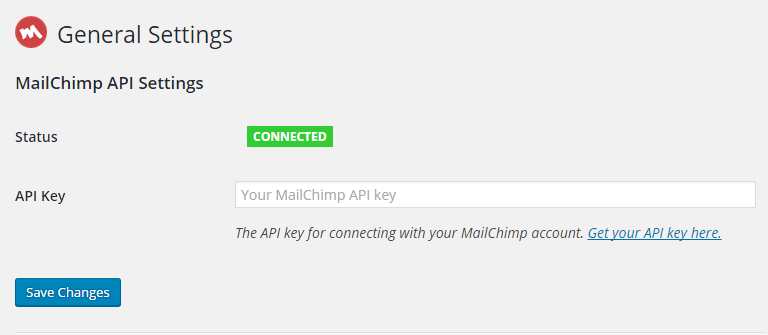
Also, in order to make MailChimp Form work effectively, you should navigate to MailChimp for WP > Forms in admin sidebar and click Save Changes.
For detail instruction, please click MailChimp for WP.
- Avatars
Go to Avatars > Settings to access general setting page of Avatars.
Interative approach to set avatar for Awesome User Experience
- Step 1: Select "Choose images"
- Step 2: when selected, will show up as pictured below. Then, select "Choose images"
You can select images that you like
- Step 3: . After the changes, remember to click Save Changes button.
1.5 Demo Installation
- First Method
Install demos via Riven option.
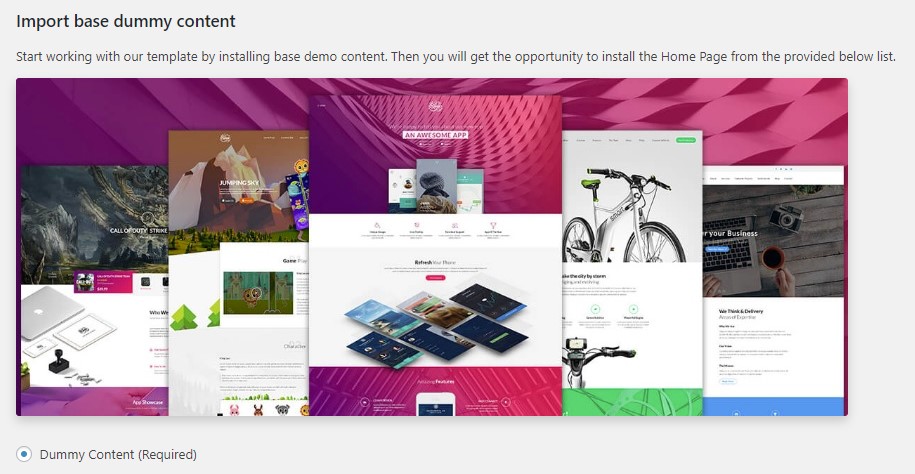
The First, You must active plugin ArrowTheme ImporterWith Riven theme, you will be able to import several demos seperately. Riven contains 22 awesome demos for you to choose. Let select which one you like and click install to start import process.
Before installing demos, remember to check all PHP configuration to ensure your server meets all requirements for a successful import. Please read Install Theme > Installation for all requirements.
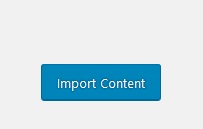
In order to import demo, you must import dummy content. After import dummy content successfully, you can choose which demo version you want and click Import Content as normally.
After that, click button Import Content
Note: If this method don't work with your server, you can try import all demos by second method.
- Second Method
Install demo via All-in-One WP Migration plugins.
Remember that your site database will reset entirely after using this method.
Please follow steps lised below to import demo.
- Step 1: Install and activate All-in-One WP Migration plugin to use this method.
- Step 2: Download Demo backup file.
- Step 3: Upload backup file to wp-content/ai1wm-backups folder.
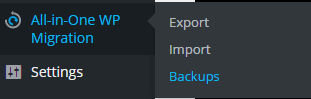
- Step 4: Navigate to All-in-One WP Migration > Backups on admin sidebar
.
- Step 5: Click Restore button and wait for few seconds. You will see success message after click continue.
- Step 6: Login to the site with account: Username: admin, Password: admin. After login with this account, you can change username and password back to your credentials.
- Step 7: If you want to change demo version, you should select demo in Theme Options > Import Demo > Import Demo on admin sidebar. Please read the message and click OK.
- Third Method
Import demo data manually.
Note: Please remember to install all needed plugins before import demo data. If you have not install plugins, please see Plugins Installation to finish that step.
-
Import Data
- Step 1: Navigate Tools > Import and click on WordPress link. This will bring up a pop up box that allows you to install the plugin directly through your website.
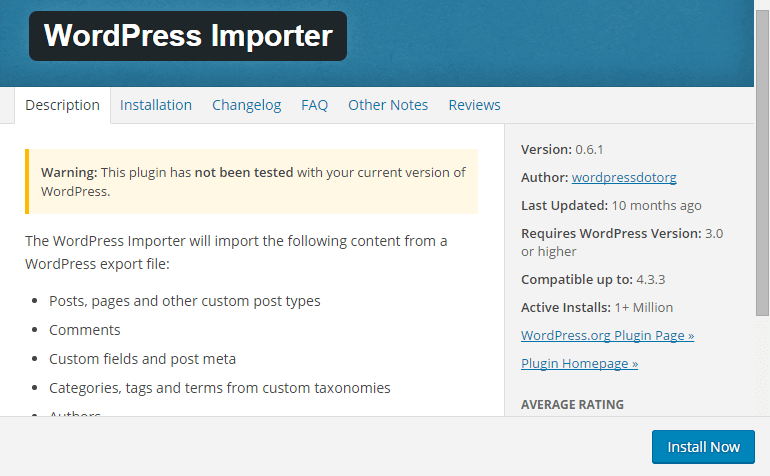
- Step 2: After click Install Now button, you should activate plugin by clicking Activate Plugin & Run Importer.

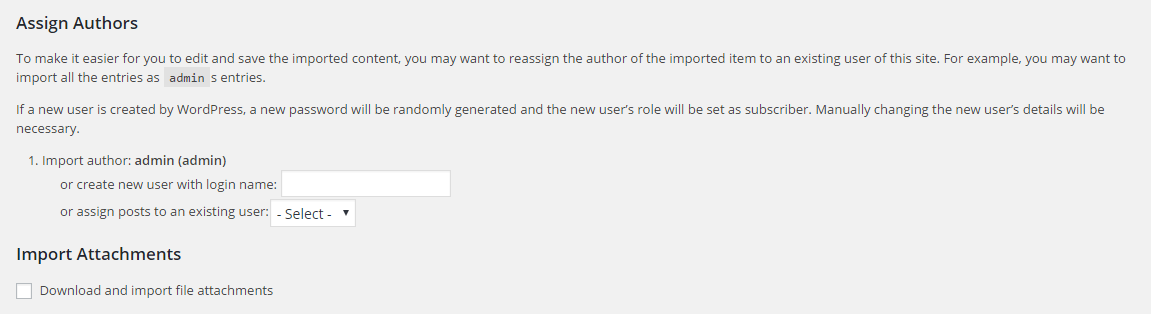
- Step 3: After that, you will be taken to the import page. This is where you upload the XML file which will be found in Riven folder / import/ to import data.

- Step 4: You will then be given the option to assign imported authors to existing authors on your website or create a new account for each author’s posts. Also, there is an option for you to download attachments. If you select this, WordPress will attempt to import all of the images that are attached to the posts and pages you are importing.
- Update the Menu sub
Riven supports custom menus, you can make modifications to them from the Menus option. Menus can contain links to Pages, Posts, Categories, Custom Links or other content types.

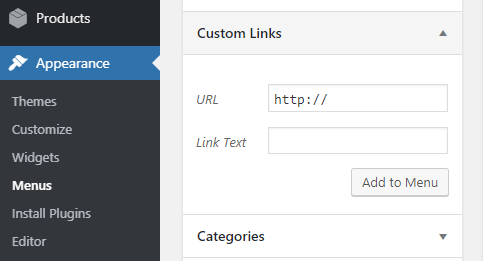
a) If you want to add a link to your social media profile or another location. You use the custom link option.
- Simply click on the custom link tab in the left-hand column to expand it. You will notice that it only has two fields. The first one is for URL where you will need to add the actual link you want to add. The second field is labeled link text where you will add the anchor text for the link.
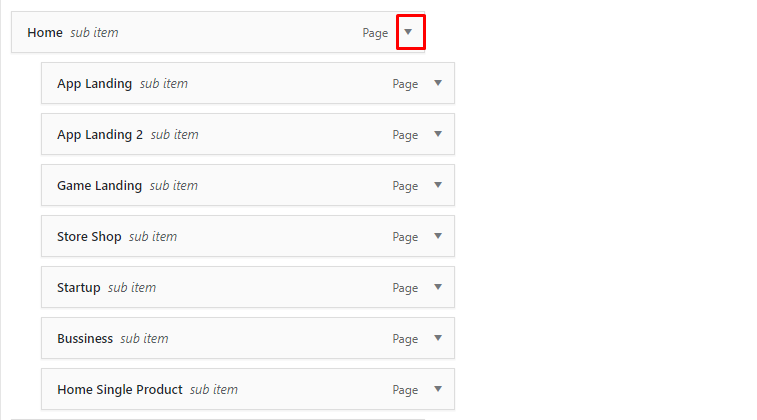
- Drag each item into the order you prefer
b) All menu items can be edited by simply clicking on the downward arrow next to a menu item.
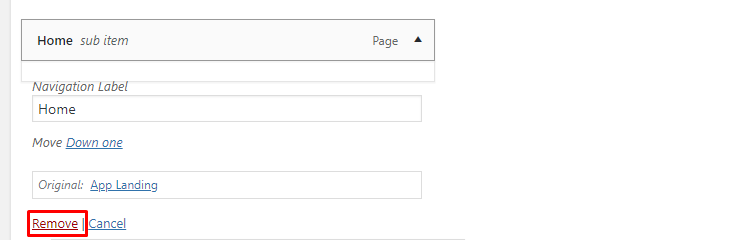
c) You can remove a link in the same way you edit them. Just click on the downward arrow icon next to a menu item, and you will notice a red Remove link.
2. Build Your Site
2.1 Build Your Site
Please read carefully Theme Installation / Plugin Configuration before perform these follow configurations.
2.2 WP Configuration
- WordPress Configuration
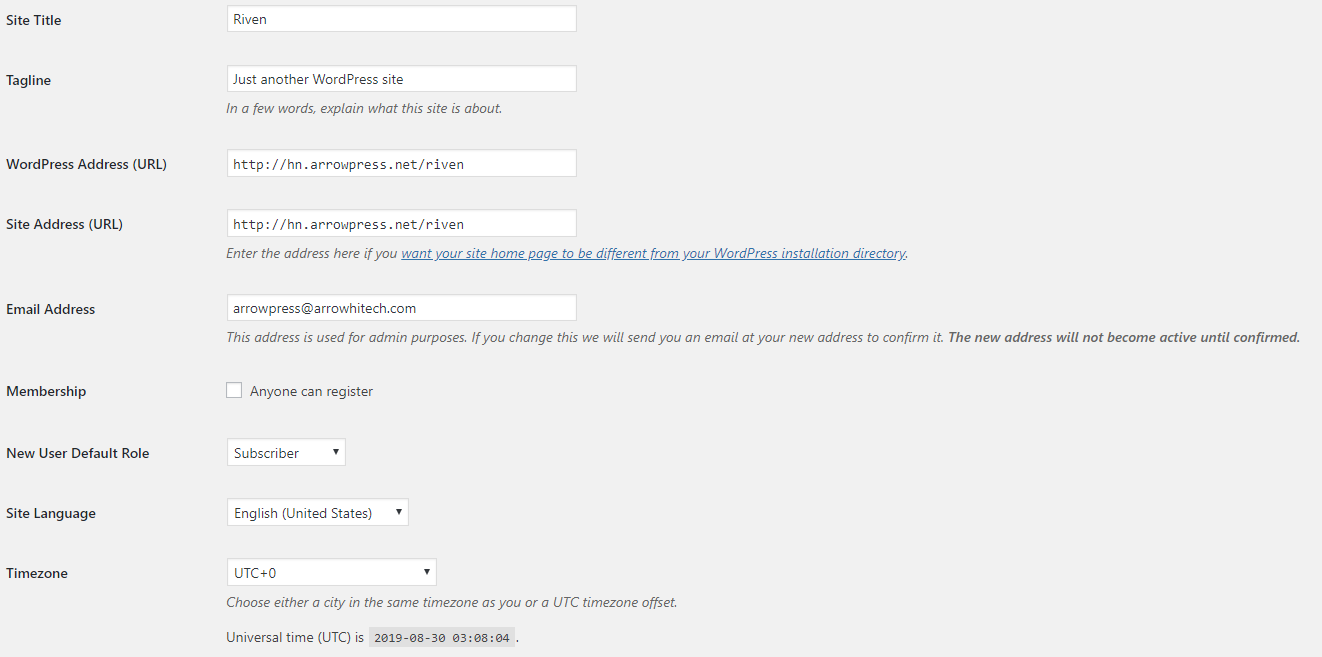
You can adjust WordPress settings as follows:
You can set Site Title in Settings > General in admin sidebar.
-
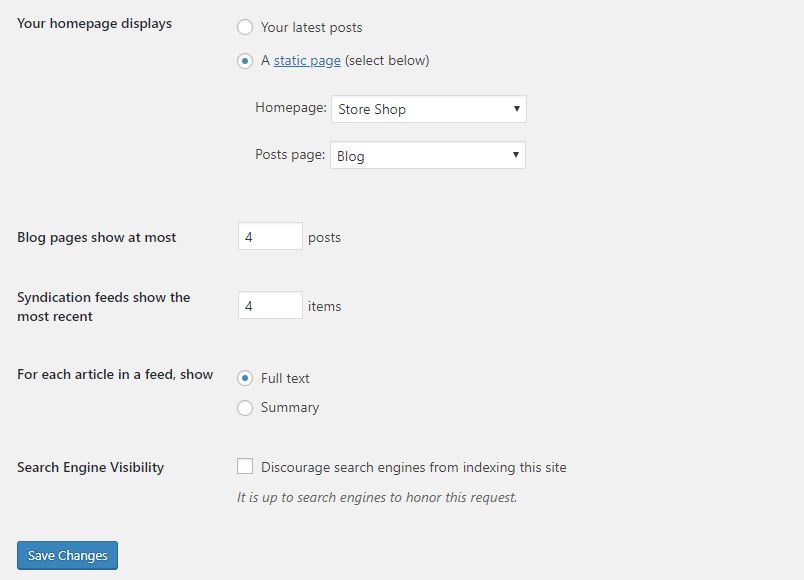
In Settings > Reading page, You can set number of posts to show in blog pages and select page for Front Page and Posts Page .
-
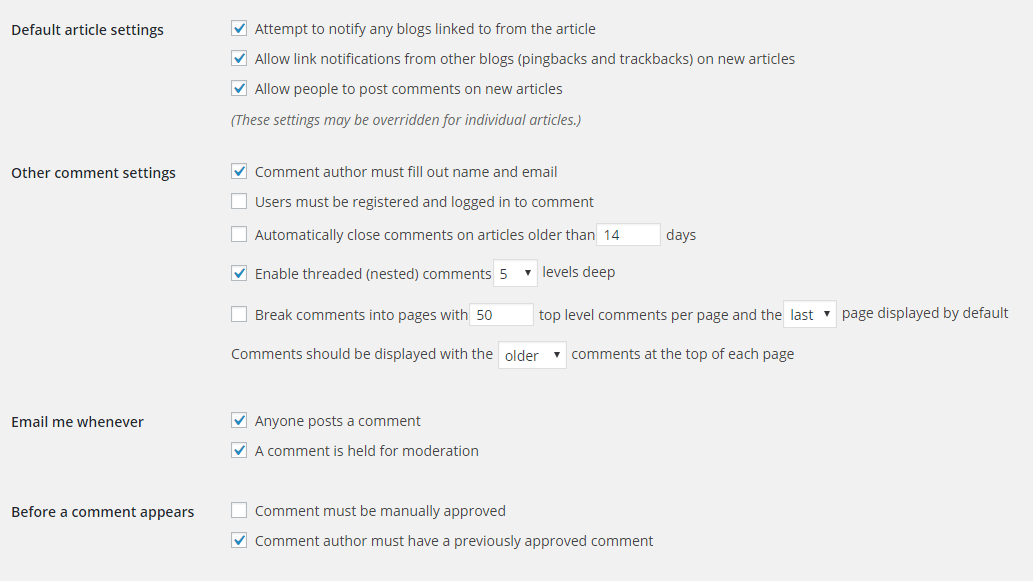
Discussion settings in Settings > Discussion provide a lot of options for you to explore such as "Default article settings", "Other comment settings". Also, you should choose max 5 levels deep for nested comment display effectively.
-
You should ensure that a non-default permalink setting is selected, e.g. Month and name in Settings > Permalinks.
2.3 Theme Options
As you can see in the screenshot below, Riven provides several usefull options for you to explore. You can find all options after clicking Riven link in the top page or in the admin sidebar.
You can see Theme Options for more details.
2.4 Menu Setup
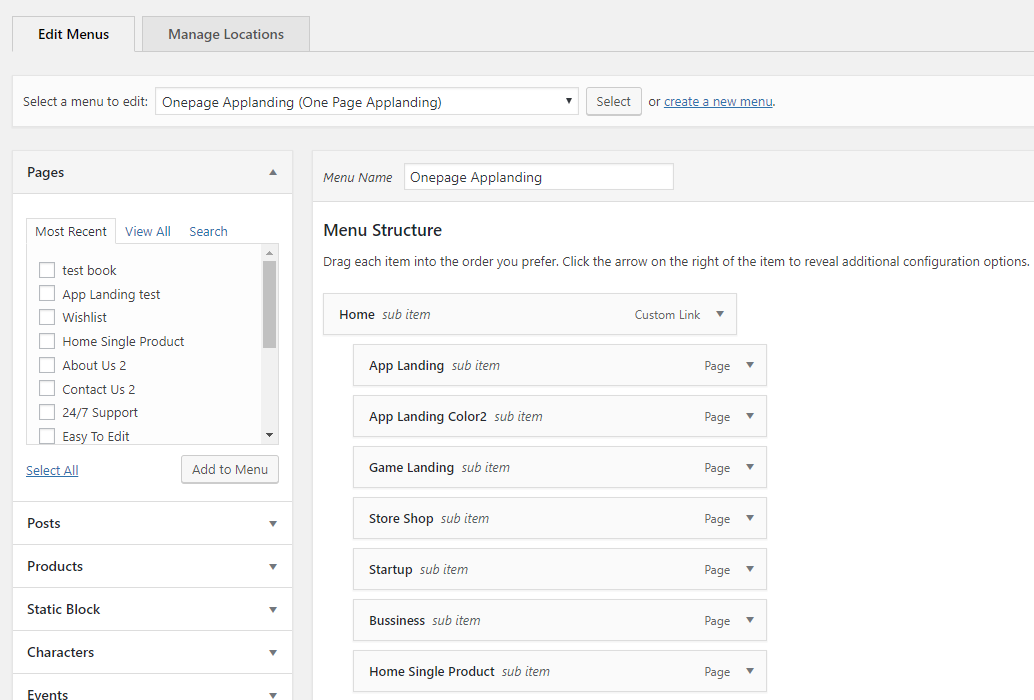
- Create New Menu
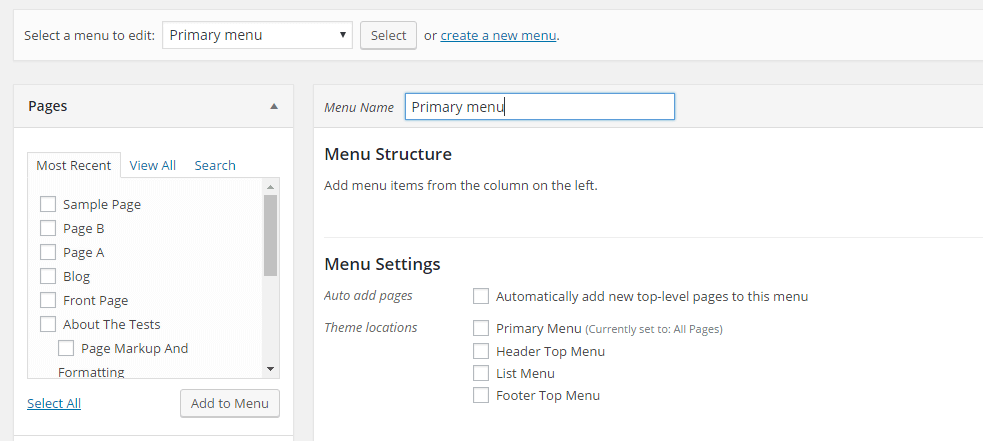
In order create new menu, you can navigate to Appearance > Menus in admin sidebar then click Create a new menu link. Give your new menu a name and click "Create Menu" button.
You can add new menu item by dragging item you prefer from the column on the left.
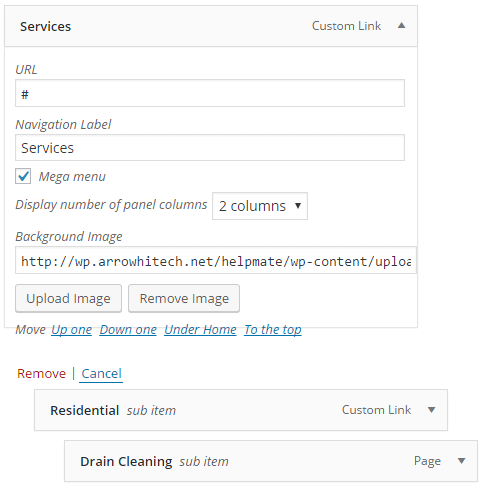
If you want to enable mega menu for your menu item, you should check "Mega Menu" box and choose number of columns to display. Also, you can upload background image for mega menu item.
After that, remember to assign theme location for your new menu.
- Create Custom Menu Links For One-Page Websites
To create custom menu links for One-Page Websites . Please follow steps below:
- Step 1: Activate One Page Navigator for WPBakery Page Builder
Open WordPress admin panel and go Plugins > Installed Plugins on admin sidebar
- Step 2: Select "Activate" One Page Navigator for WPBakery Page Builder Plugin

Then, WordPress admin panel will appear as follows
- To create a custom menu link, you will need to add a new link to your menu using the Appearance > Menus tab in your WordPress Dashboard
- Once you have created a new menu and assigned it to your new menu location
- You can choose theme location: One Page Gamelanding or One Page Applanding
- You can start adding links to your header. In this case, we will be creating a custom link by clicking the "Link" tab on the left hand side of the page
- Drag each item into the order you prefer. Click the arrow on the right of the item to reveal additional configuration options.
- We need to link to the ID that we assigned to our section earlier. In this case, You can add any "nameID" that you like. We can link to that ID by creating a URL pointing to "/#nameID"
- Remember to enter "nameID" of one page must match the "nameID" that you added earlier
You can use this same method to create as many custom links as you want. Simply enter a URL of "#/" followed by the ID that you want to target.
2.5 Header Setup
Go to Riven > Header in order to access header setup page.
General, Riven supports 6 types of header with general options like enable header sticky and header sticky in mobile. Beside some same options, each header will have their diferent options.
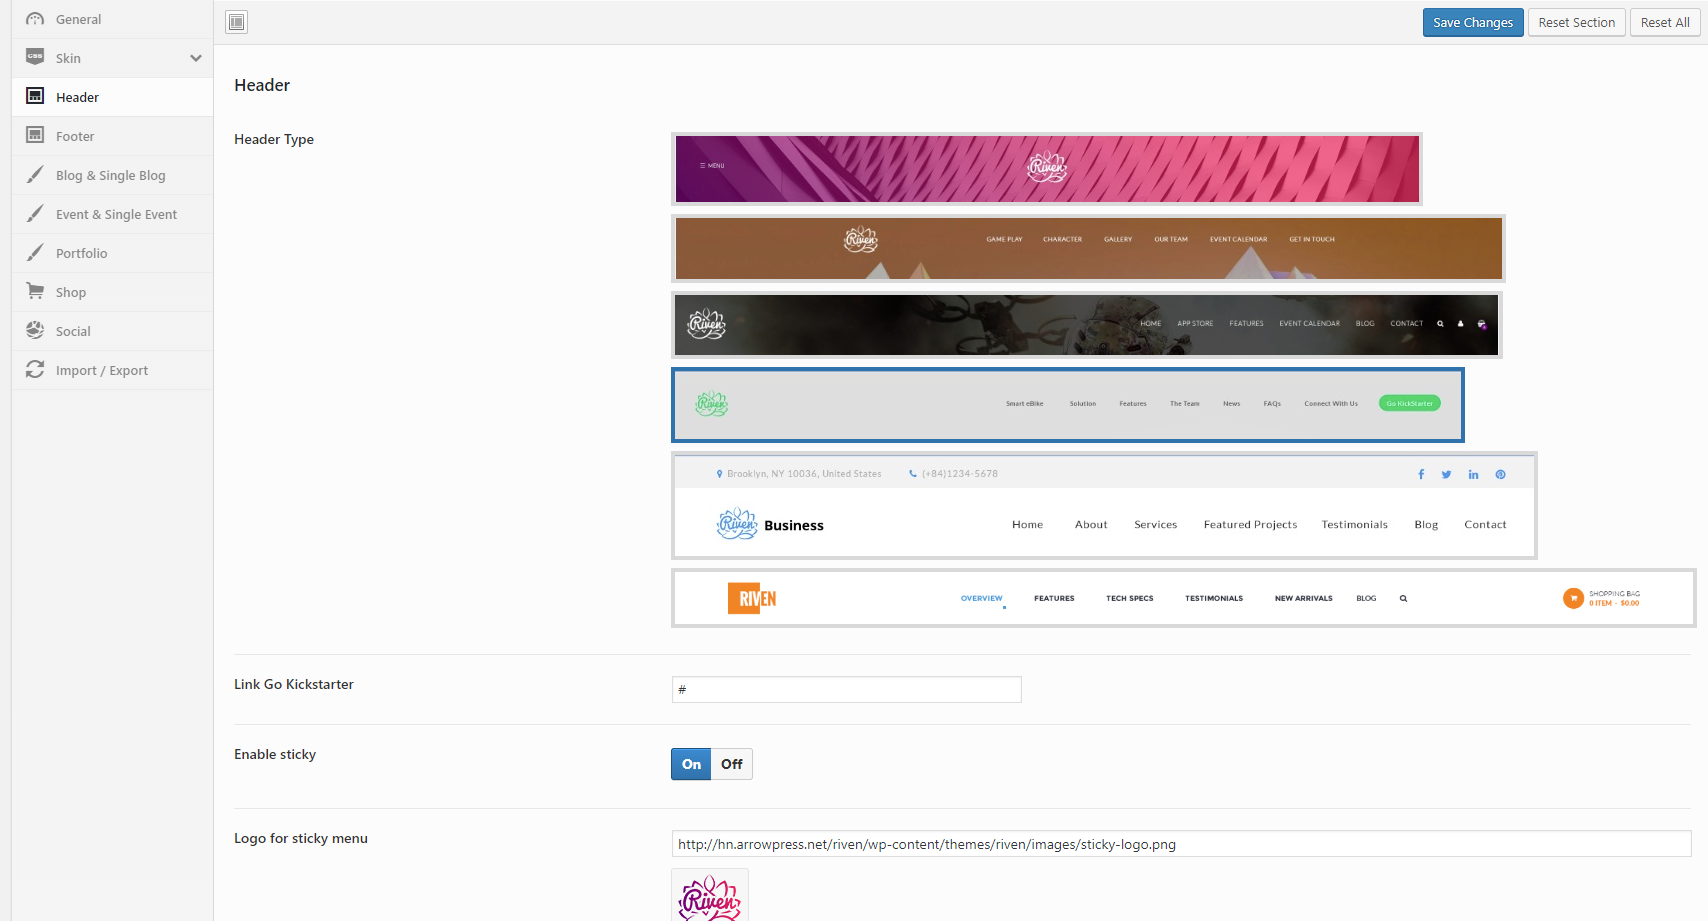
To find out more about these options, you can go to Theme Options > Header.
3. Theme Options
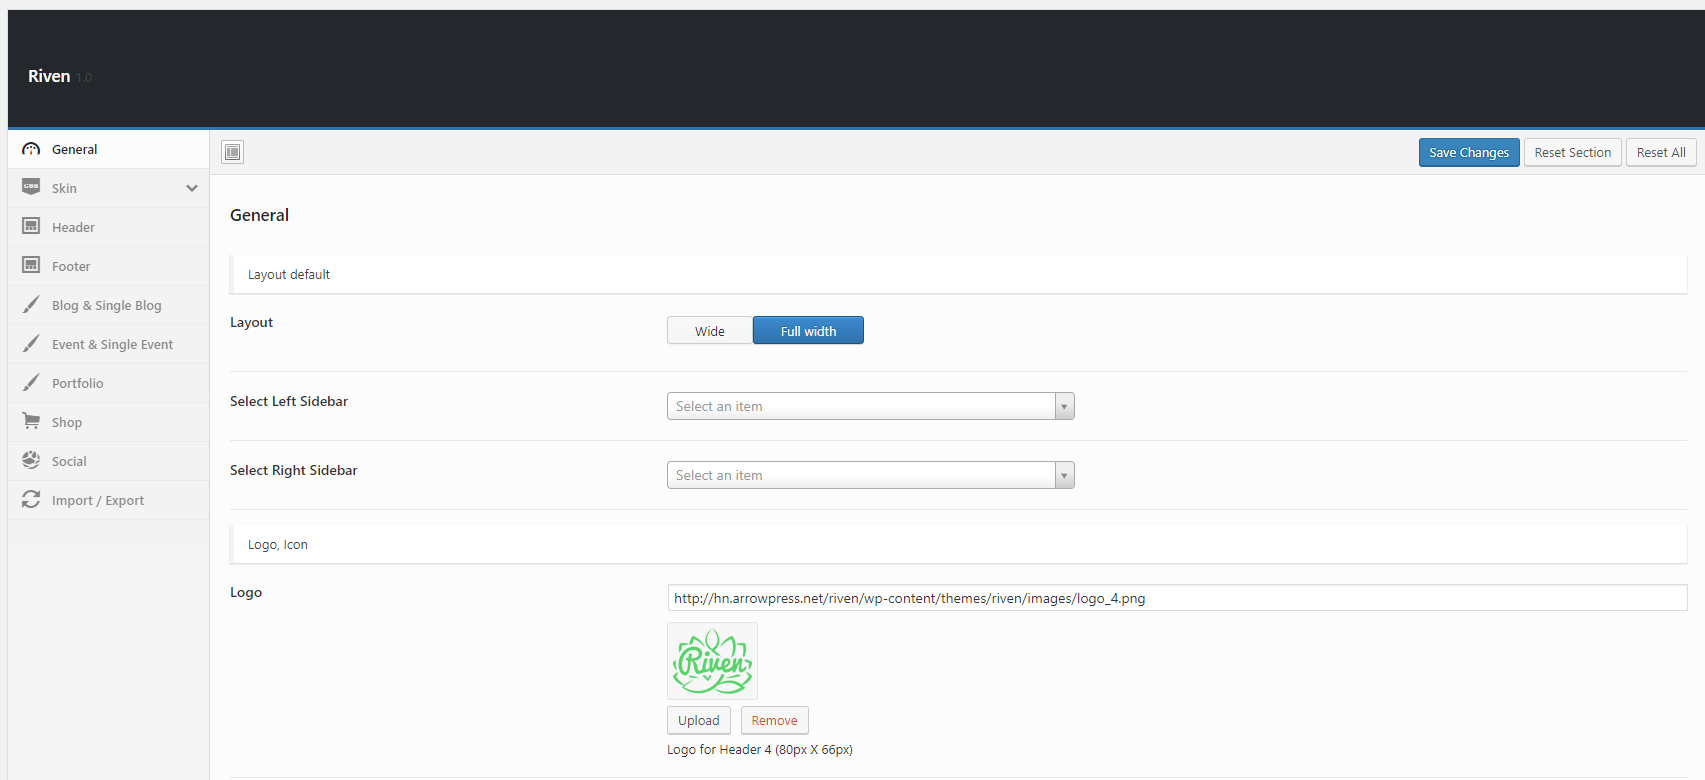
Riven provides many options for you to customize your page effectively. These options are organized into logical tabbed sections which will be very easy for you to navigate. Because of the sizable amount of options, we cannot go over them in full detail here in our documentation. We encourage you to please take some time and navigate through each tab to see what we offer. See below for screenshots and short descriptions of Riven Options panel.
- There are 2 ways to access theme options.
1) Click Riven links in the top of page.

2) Click Riven in admin sidebar.
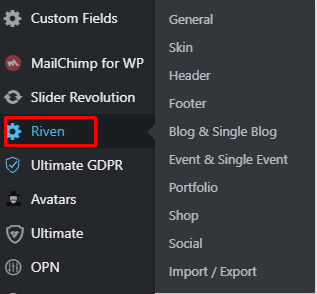
- After that, you will see a logical tabbed sections including a lot of tabs for you to discover. Below sections will go through each tab in detail for you.
3.1 General
- In this tab, you will see options for layout, sidebar, logo icon, favicon and options for bottom content. Specifically, there are 2 possible sidebar position for you to select either left or right or event you can choose to hide your sidebar. For logo customization, you can freely to upload your desired logo image. Below will be a screenshot about these options.
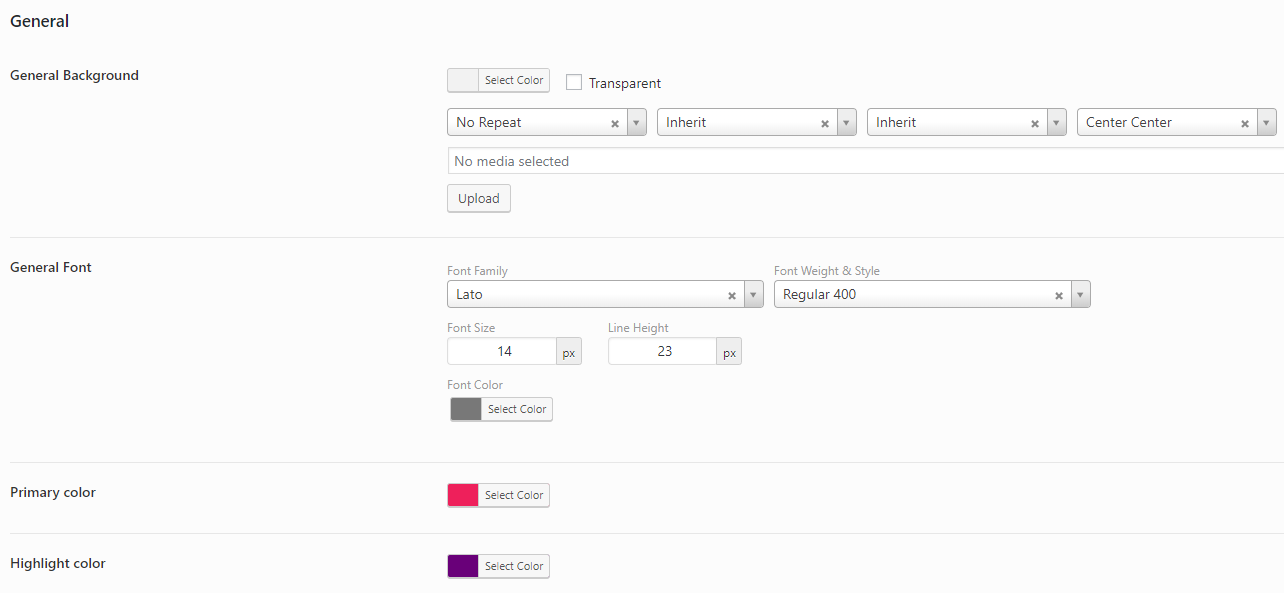
3.2 Skin
There are 6 sub-tabs:
General: After navigating to this sub-tab, you will see some options for you to set background color or background image. Furthermore, general font for your website is customizable with several google font family available as well as font weight, font style, font size and line height.
Footer: You also can change background color for footer.

-
Breadcrumbs: Riven provides option for you to modify background image. .

-
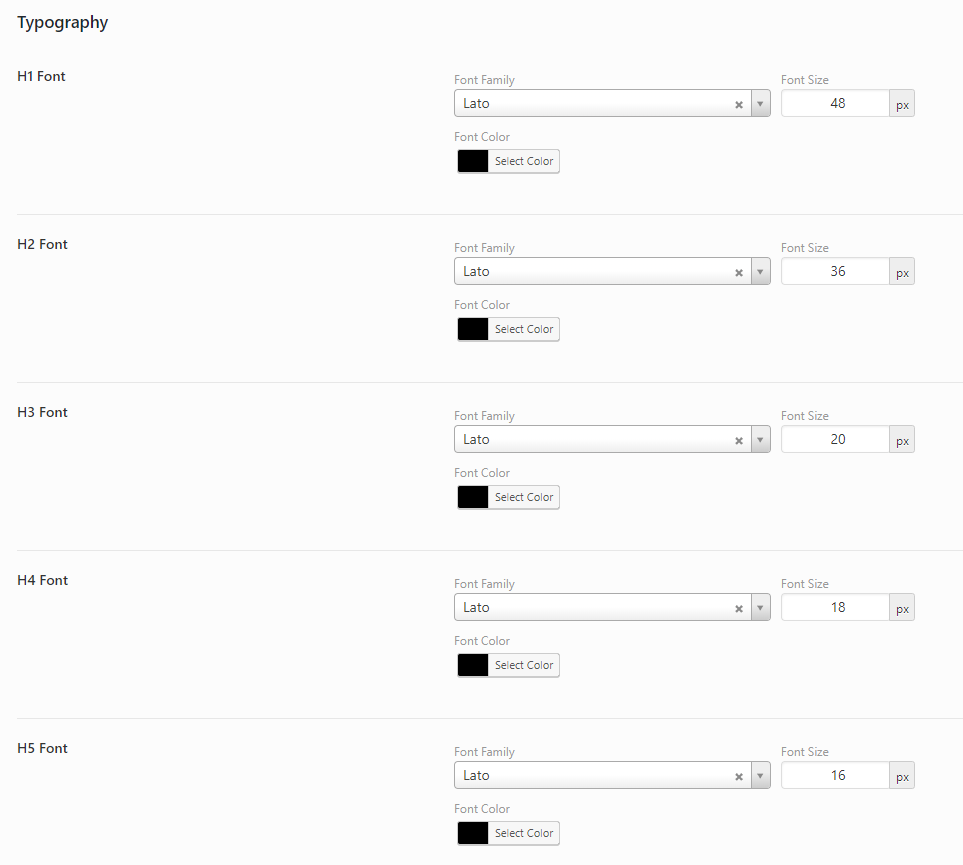
Typography: Riven provides several choices to modify color as well as font family and font size of h1, h2, h3, h4, h5 and h6 font.
-
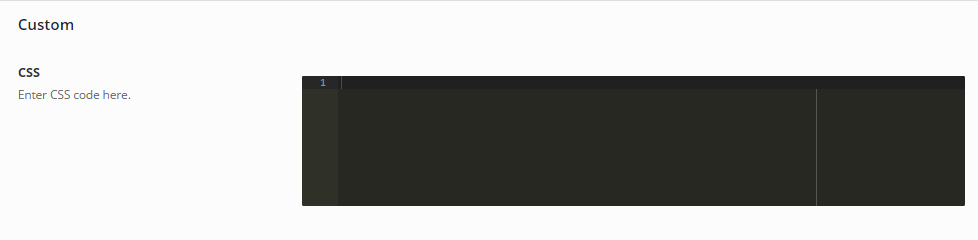
Custom: this tab allows you to enter your custom css code.
3.3 Header
These options enable you to change header appearance with 2 types of header. Besides, there are existing selection for you to decide whether or not to display account links, search form in header. Also, Riven provides option to enable or disable sticky menu. Note that this option is only available for header type 2.
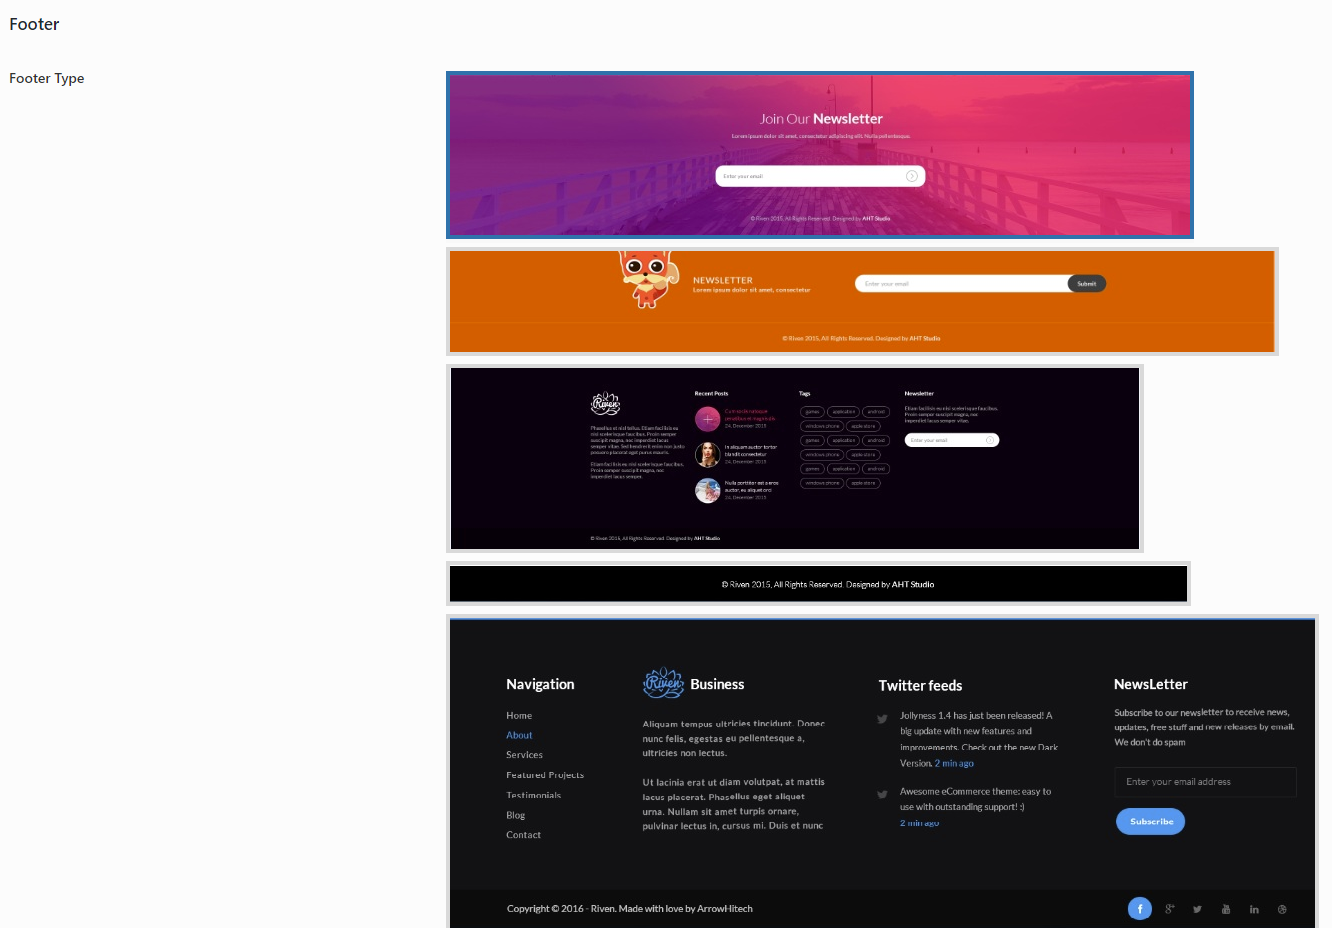
3.4 Footer
- Riven supports 5 options for you to modify you footer display including change copyright text.
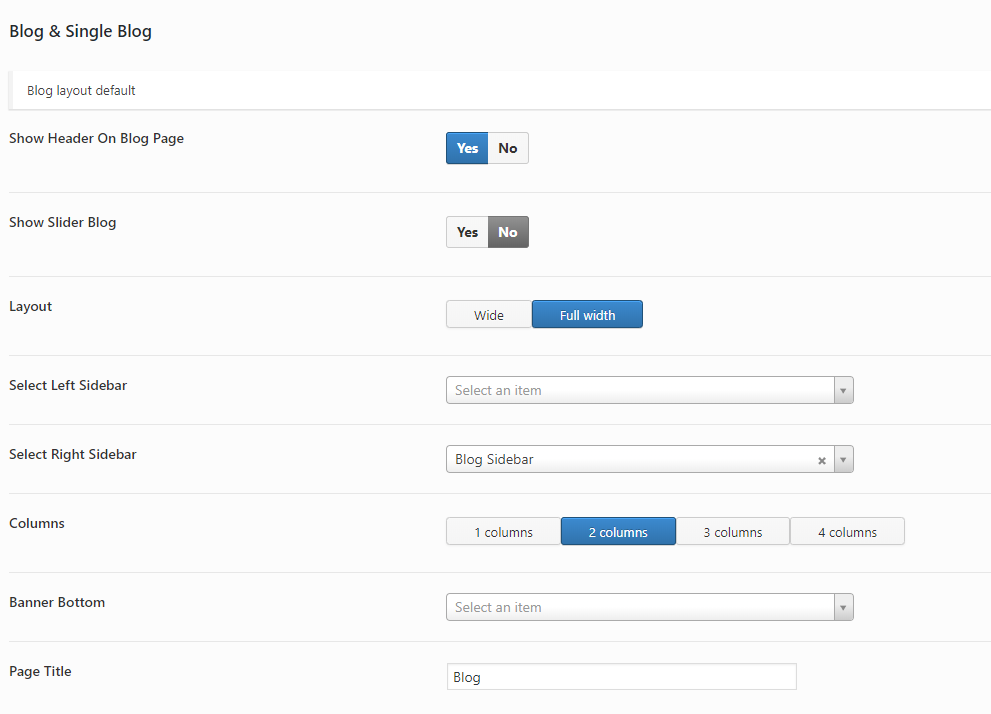
3.5 Blog & Single Post
Riven gives you multiple selections for blog and single post.
For blog layout default, You can change sidebar positions (Left, right) as same as option in "Page" tab. Also, riven allows you to choose sidebar content and number of blog column to display. Furthermore, changing page title is also enable for you.
For blog list page, Riven lets you to select type of pagination either pagination or load more button.
For single post, you can change background image for textarea in comment.
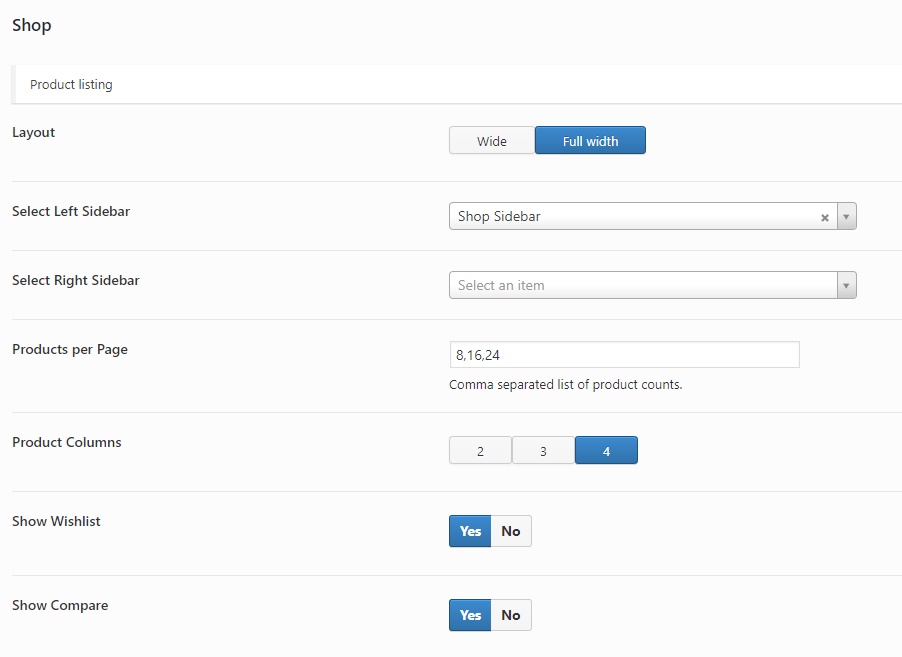
3.6 Shop
- Product listing page
Beside some options for layout, Riven allows you to change number of products to display per page.
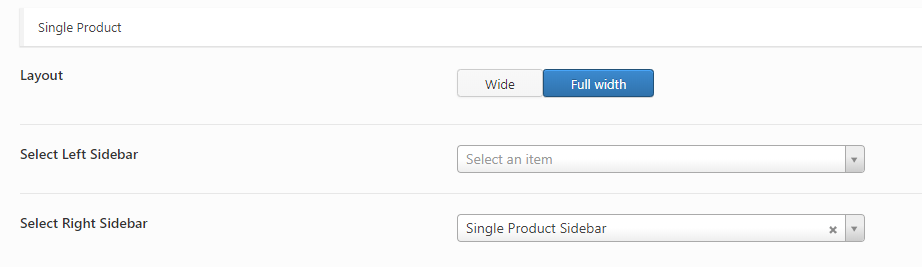
- Single product
For single product page, you also can customize page layout as well as sidebar position. Furthermore, you can choose to display share and wishlist link in single product page. In additionally, you can freely to upload advertisement image to show in the bottom of page.
Please look at sceenshot below to see clearly about these available options.
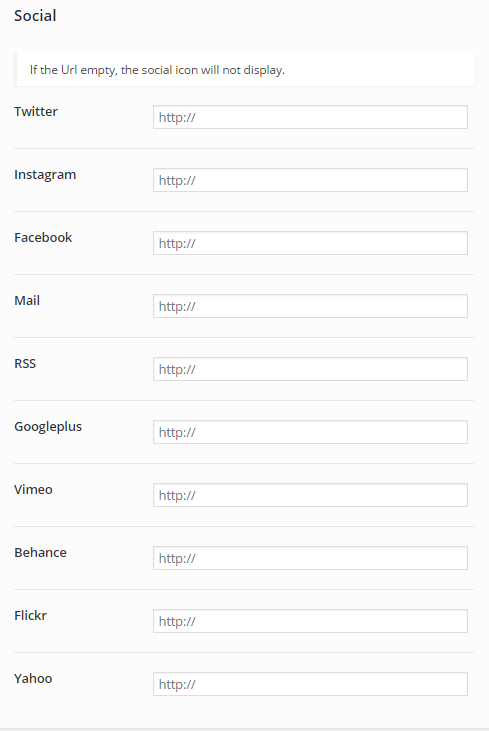
3.7 Social
This tab provides options for you to enter social links whichs display in comming soon tab.
Fist four link are twitter, instagram, facebook and mail will be display in header social icon.
4. Content Types
To use Riven content type, please ensure that Riven Post Types plugin, which allows you to create some custom post types, is already installed. If not, you can install this by following some steps below.
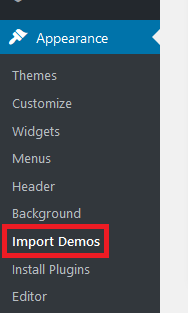
- Navigate Appearance > Install Plugins on admin sidebar.
- You should select and install Riven post types.
- You should activate this plugin.
4.1 Post
- General Information
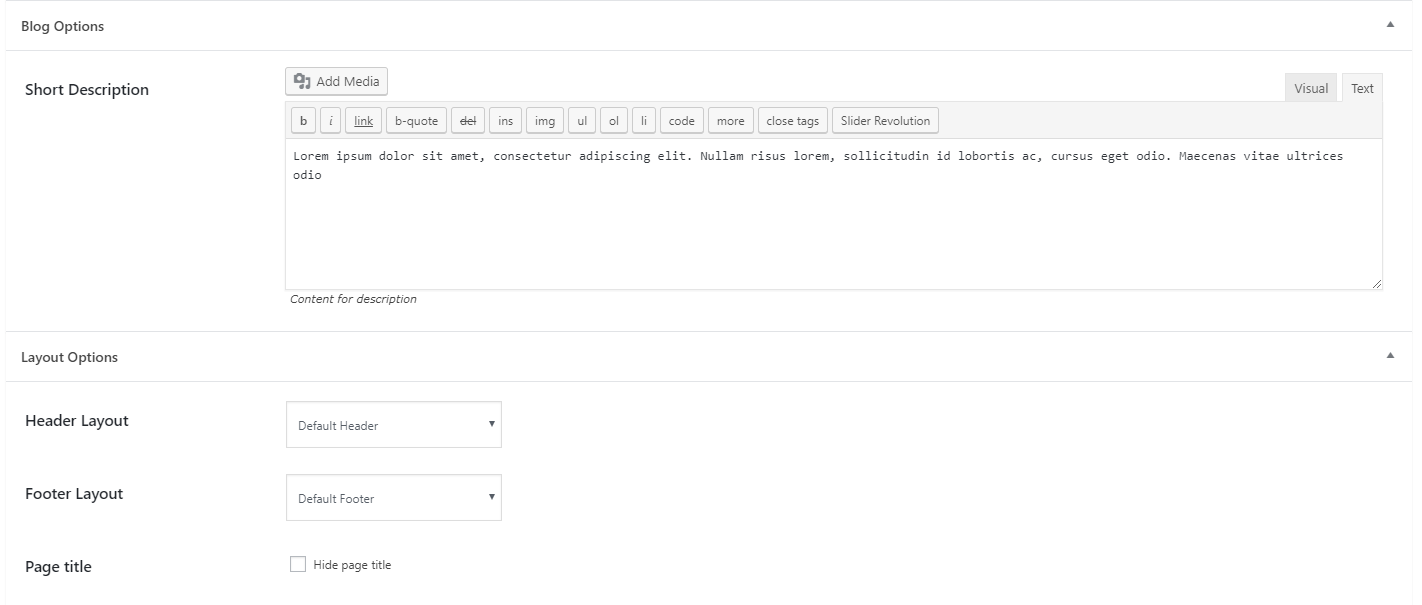
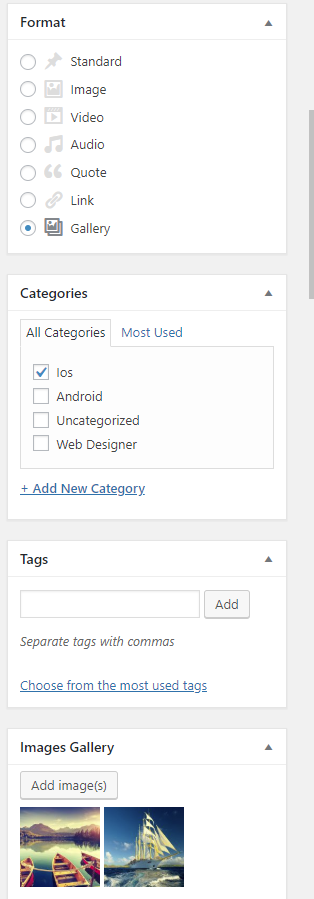
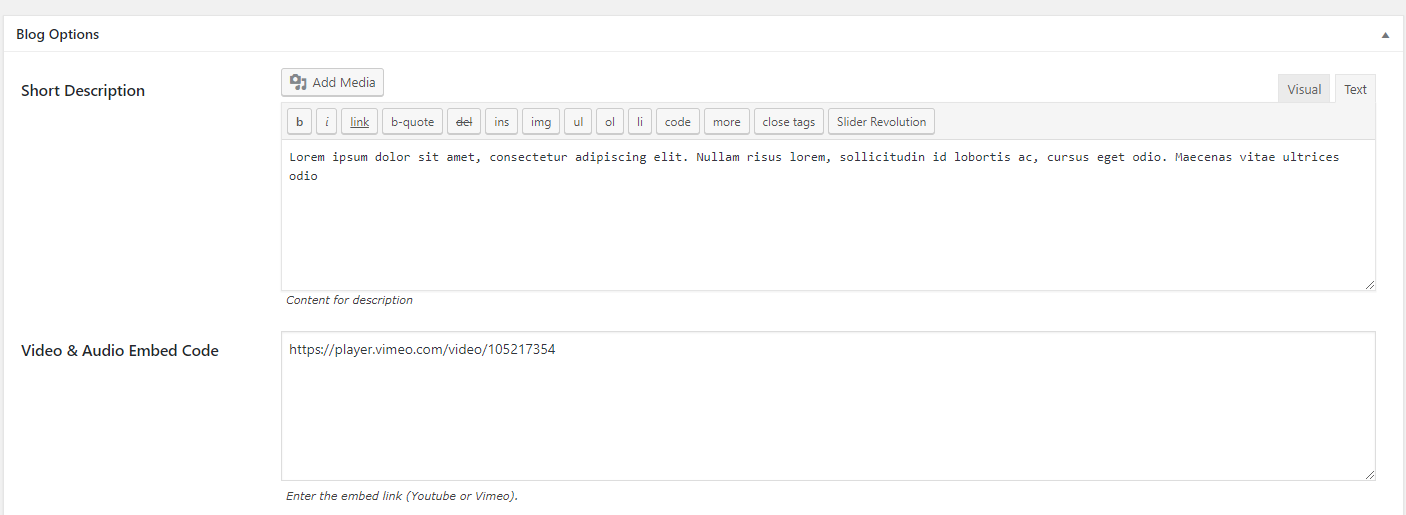
Riven provides many options to present your blog posts, along with different blog layouts. In addition, Blog options will let you to enter short description to display. Particularly, Riven blog provides a lot of blog format such as image, video, audio and gallery.
For blog content type, Riven provides Layout Options box including a lot of options such as choosing header, sidebar and show or hide page title.
- Creating / Editing Posts
Step 1 - Navigate to Posts in your WordPress admin sidebar.
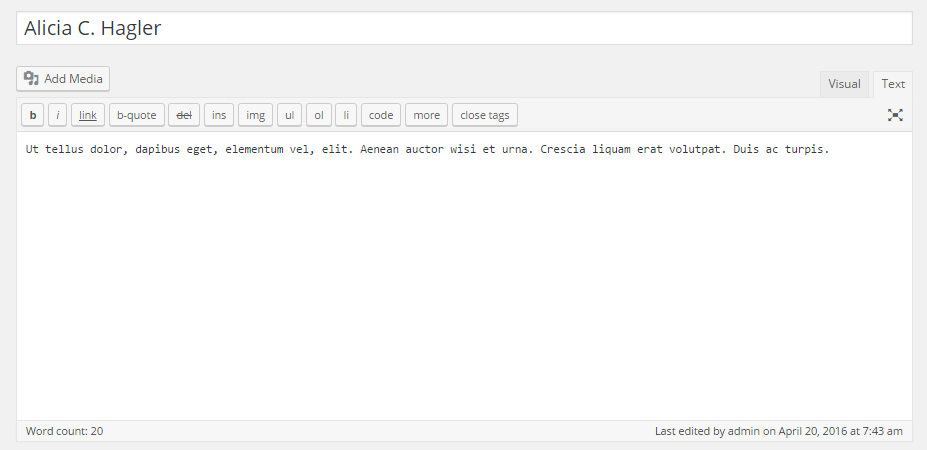
Step 2 - Click on the Add New option to make a new post. Create a title, and insert your post content in the editing field. Beside, you can add post content using visual composer by click "Backend editor".
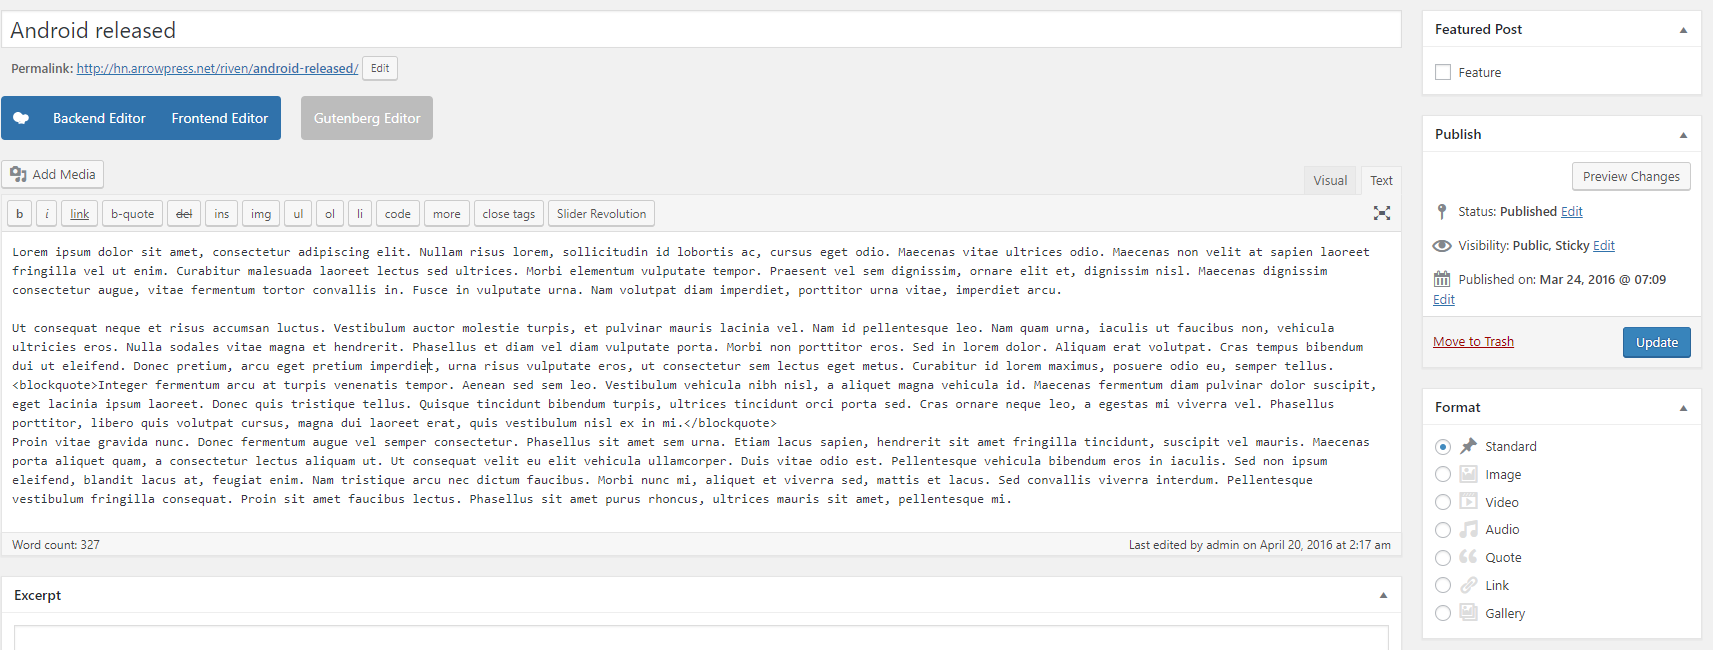
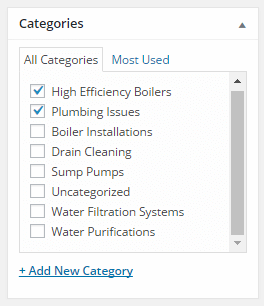
Step 3 - Add Categories from the right side. To assign it to the post, check the box next to the category name.
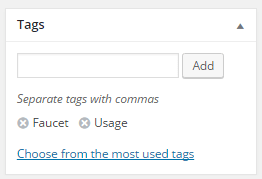
Step 4 - Add Tags from the right side. Type the name of the tag in the field, separate multiple tags with commas.
Step 5 - Add Image Gallery if you want to display gallery slider in its detail page.
In order to add gallery images for your post, you should click add image(s) button.
Step 6
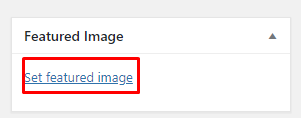
- Add Featured Image if you want. In order to add featured image for your post, click the first Featured Image Box, select an image and click the Set Featured Image button..
- For a Video and Audio post, you need to get Audio or Video embed link and paste it to "Video & Audio Embed Code" textarea in Blog Options box..
Step 7 - Select options for page layout if you want different page layout for your post.
Step 8 - Once you are finished, click Publish or Update in the right side to save the post.
4.2 Members
- Creating / Editing Members
Step 1 - Navigate to Members in your WordPress admin sidebar.
Step 2 - Click on the Add New option to make a new member. Enter member name in title field.
Step 3 - Click the first Featured Image Box, select an image and click the Set Featured Image button.
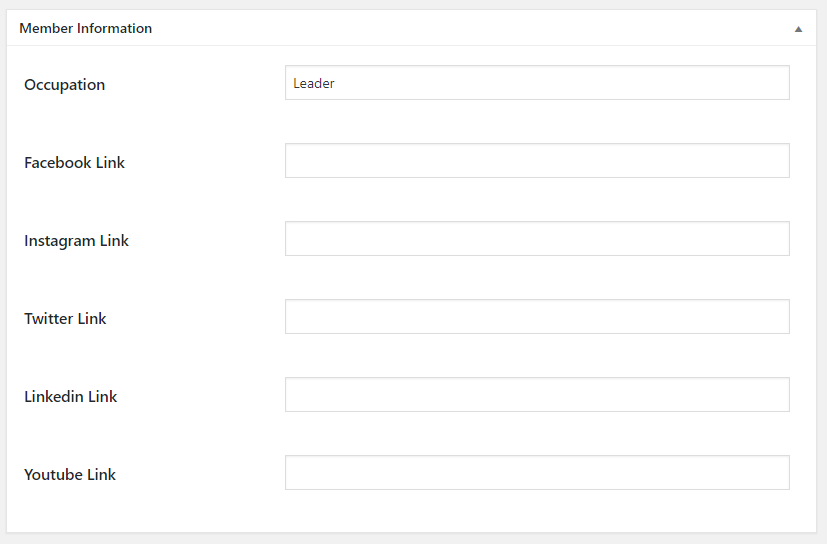
Step 4 - Add additional information for member .
Step 5 - Once you are finished, click Publish or Update to save the member.
4.3 Testimonials
- Creating / Editing
Step 1 - Navigate to Testimonials in your WordPress admin sidebar.
Step 2 - Click on the Add New and then enter testimonial title and content.
Step 3 - Click the first Featured Image Box, select an image and click the Set Featured Image button to set featured image.
Step 4 - Add additional information.

Step 5 - Once you are finished, click Publish or Update to save.
5. Shortcode
Remember to install and activate Riven Shortcodes plugin.
- Please go in Appearance > Install Plugins on admin sidebar.
- You should select and install Riven shortcodes.
- You should activate this plugin.
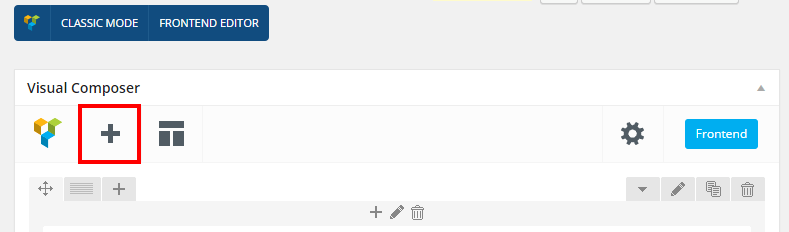
In order to add shortcodes using visual composer, you should enable visual composer editor and select the element you want to add. If you click the following button, will be show the popup.
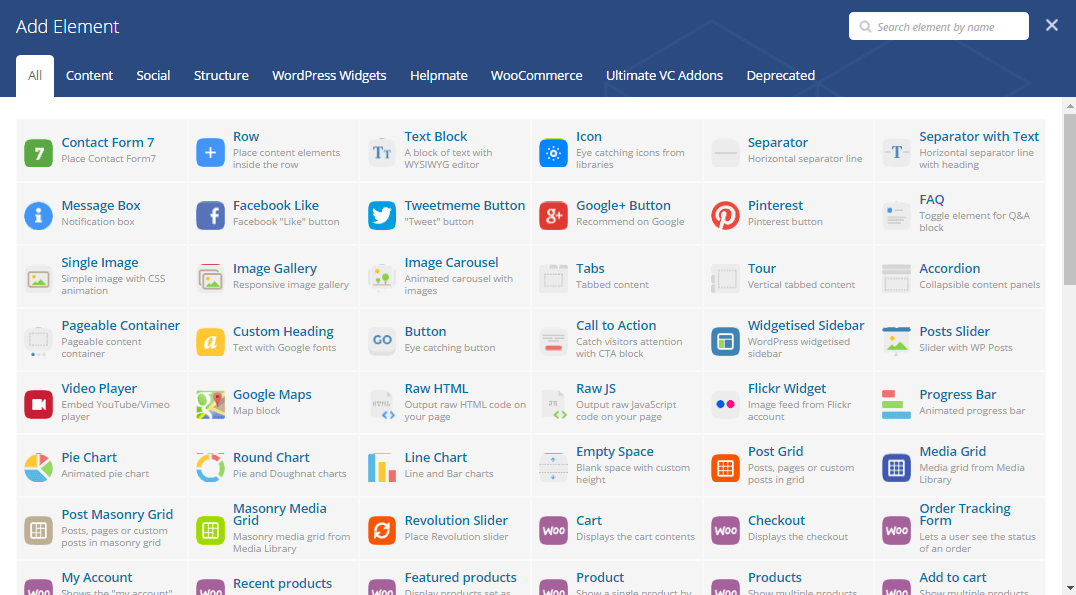
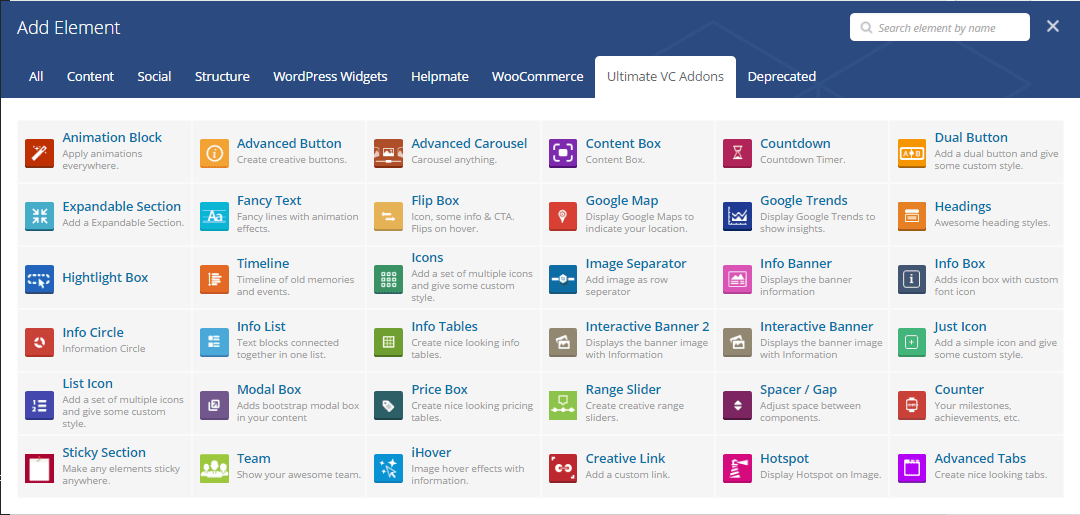
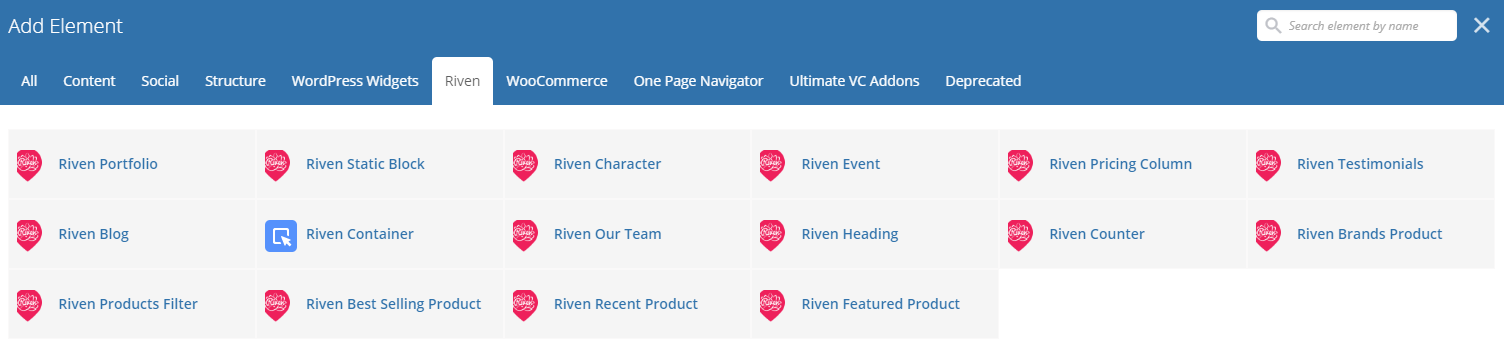
There are several content elements for you to choose. Specifically, Riven enable user to use Utimate VC Addons with several effective shortcodes.
- Screenshot of all elements in Riven
- Screenshot of available shortcodes in Utimate VC addons
- Riven shortcodes
In total, Riven provides 17 effective shortcodes for you. Besides some general settings for extra class, each shortcodes will contain their own options. Below will list detaily all available choices of each shortcodes.
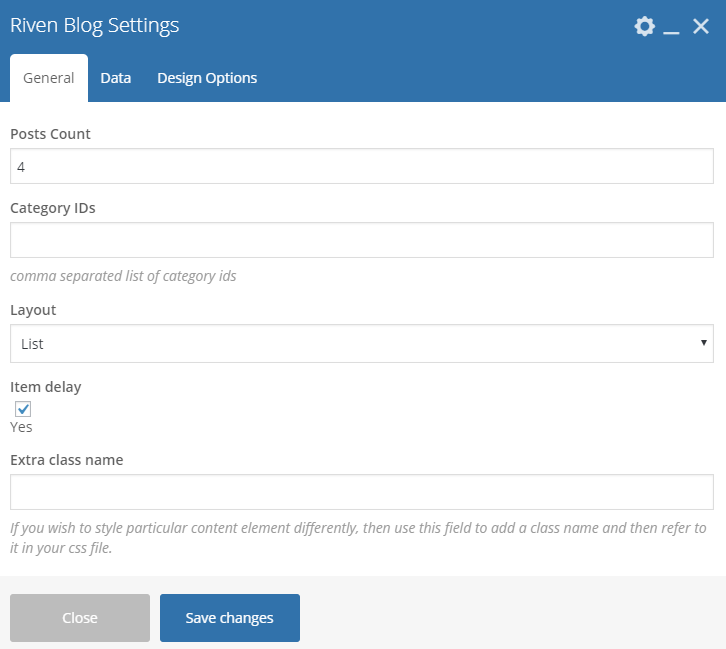
5.1 Riven blog
This shortcodes will help you to display posts into masonry grid. It supports options for enter title, number of post to display and category ids. For layout option, you can choose number of post column to display in desktop, tablet and mobile. In default, there are 3 columns, 2 columns and 1 column displayed on desktop, tablets and mobile respectively.
List of options available in riven blog shortcode.
- Set total number of posts to display.
- Enter category id if you want to display posts by specific category. You can find category ID by navigating Posts > Categories. Select category you prefer and click edit. In the navigation path of broswer, you will see category ID as "tag_ID".
- Enter post column number to show in desktop, tablets and mobile.
- Select a layout (grid,list) to display your posts
5.2 Riven our team
List of options available in riven blog shortcode.
- Enter number of posts to display.
- Select a layout (grid,list) to display your posts
- Select column number to show in desktop, tablets and mobile for block responsive.

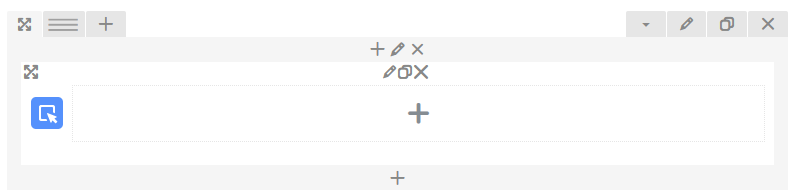
5.3 Riven Container
This shortcode helps you to wrap all the content inside into a container class. After add this shortcode to your content, you can add another shortcode placed inside Riven Container by click "plus" button.
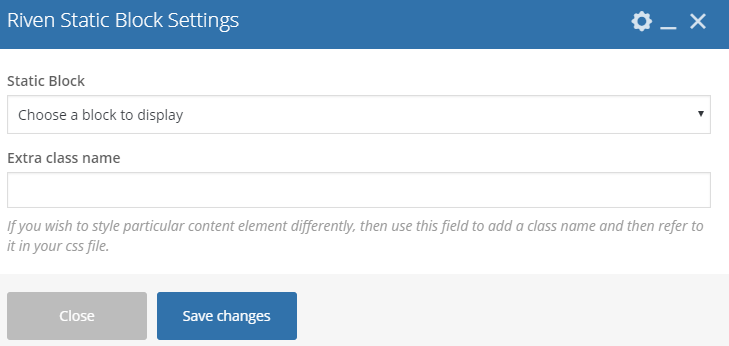
5.4 Riven Static Block
This shortcode will generate all post of "static block" content type for you to select. Specifically, it provides a dropdown containing name of all published static blocks for you to select.
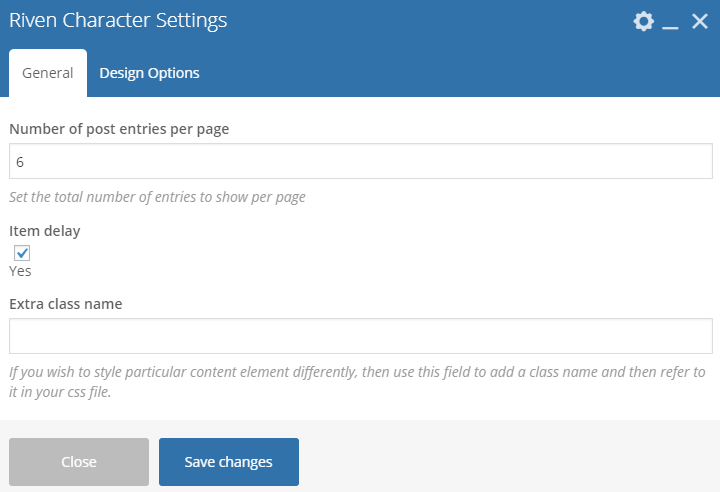
5.5 Riven Character
List of options available:
- This shortcode will help you to display images into slider. Beside some options for changing number of items in different devices and limiting number of items.
- Enter number of posts to display.
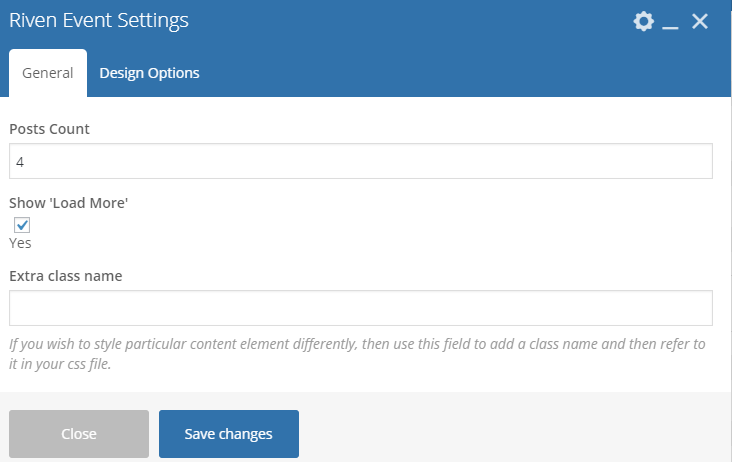
5.6 Riven Event
- Enter number of posts to display.
- Show/hide "Load more" button.
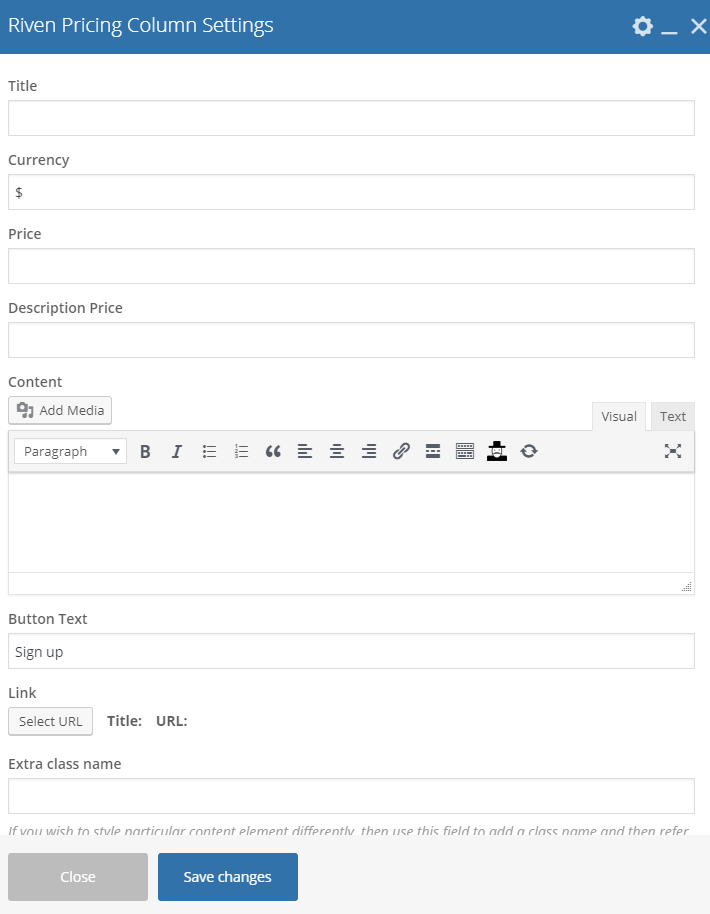
5.7 Riven Pricing Column
- Enter block title.
- Enter type of curency.
- Enter price
- Enter description price.
- Enter currency information.
- Enter name of button to display.
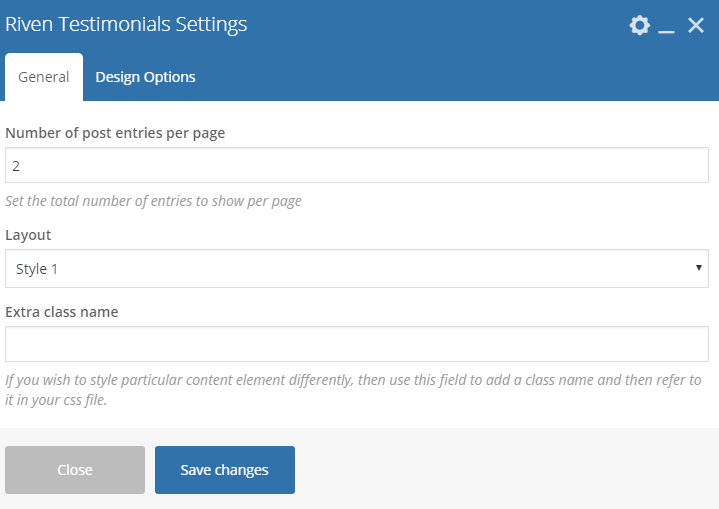
5.8 Riven Testimonial
- Enter number of post entries per page.
- Select a layout (style 1, style 2) to display your posts.
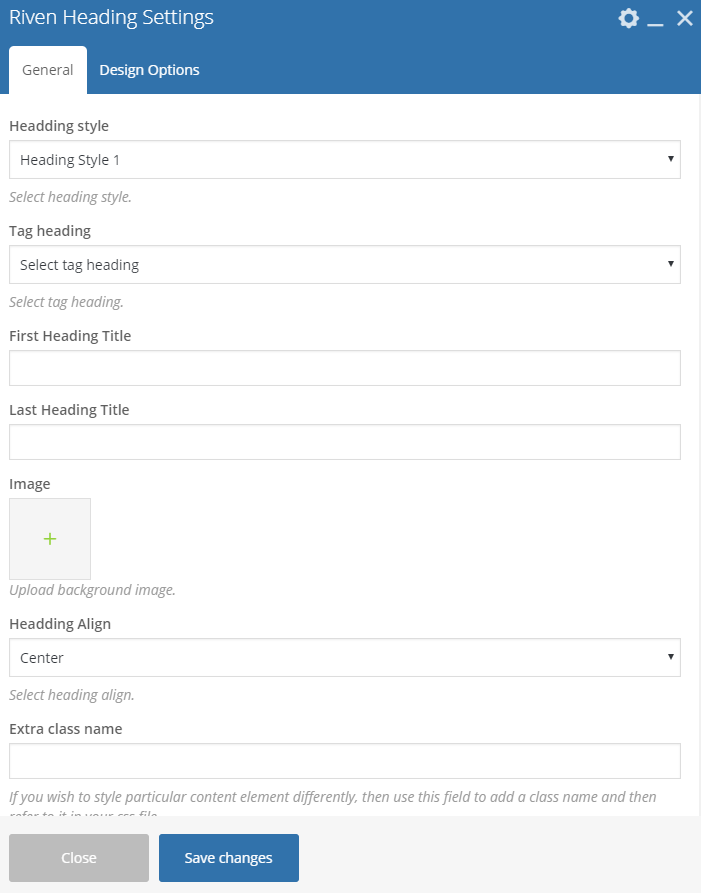
5.9 Riven Heading
This shortcodes will help you to display heading style.
- Select type of heading (Heading style 1 , Heading style 2.
- Select tag heading.
- Enter first heading title.
- Enter last heading title.
- Upload background image for heading (incase of having background image).
- Select headding align (center, left, right).
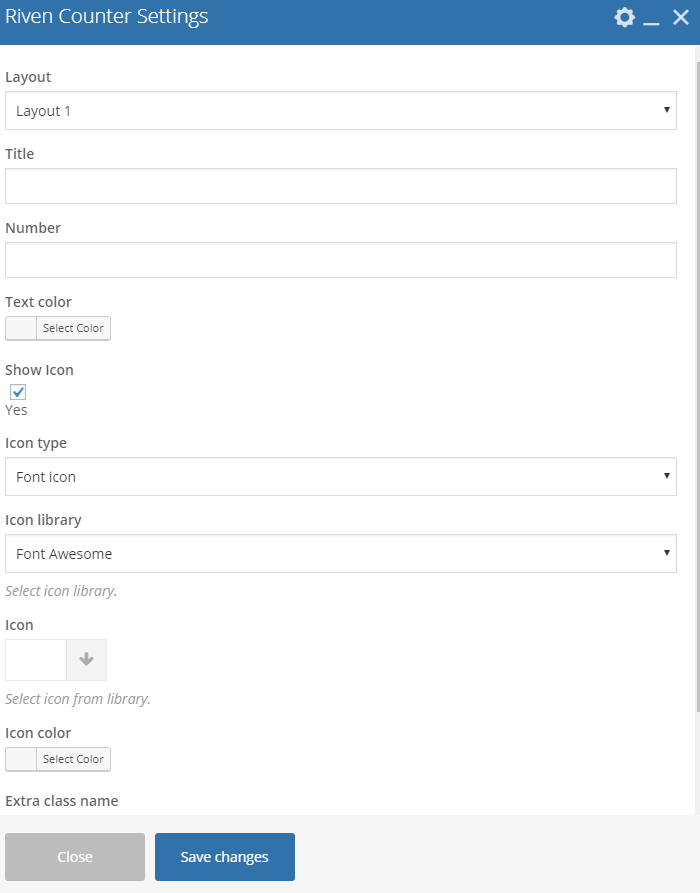
5.10 Riven Counter
- Enter block title.
- Enter number.
- Select text color you want to display
- Show/hide "icon".
- Set text align(left, right or center)
6. Widgets
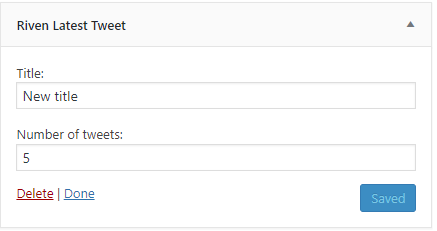
6.1 Riven Latest Tweets
Note: Remember to activate Riven Latest Tweets plugin to use this widget.
This widget will get latest tweets in your twitter account follow Twitter API setting. If you haven't enter API information, please see Settings > Riven Latest Tweets and follow instructions. Riven Latest Tweets lets you change block title to whatever you want. In addition, you will be able to decide number of tweets to display.
- Riven latest tweets widget settings
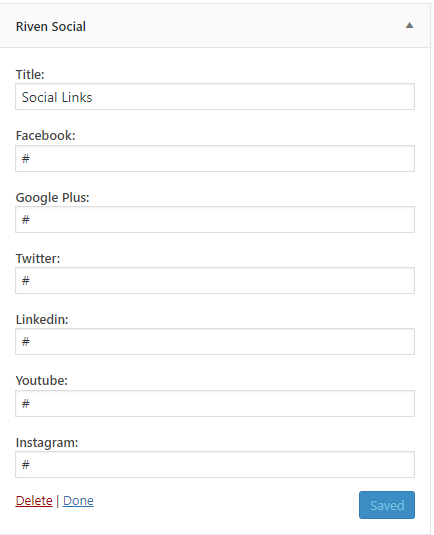
6.2 Riven Social widget
This widget lets you to make change of block title to whatever you want.
- Enter link social you want to display.
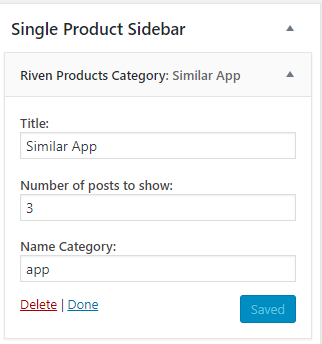
6.3 Riven Products Category
This widget lets you to display products
- Enter title.
- Enter the product number you want to display.
- Enter name category product ( may be empty ).
7. Translation
Use WPML
WPML is the most popular plugin for multi language support. Below you will find documentation their team created for using WPML plugin. If you've purchased WPML and have any questions or issues, please check the links below.
- WPML Plugin - The highly recommended plugin to manage multi-lingual sites
- WPML Forum Support - If you bought WPML then you get free support from their amazing team
- Translating Widgets - Tutorial recommended by wpml team for translating widgets
8. Site Speed Up
We recommend using the WP Super Cache, W3 Total Cache plugins.