Overview
1. Getting Started
1.1 Welcome to Cecile
1.2 Theme Requirements
You can click here to find out more about requirements of WordPress.
Below are three requirements for working version of WordPress, PHP, and MySQL.
- WordPress 4.0 or higher.
- PHP 5.5 or higher.
- MySQL 5 or higher.
You also need to make sure that your host can comply with follow requirements.
- Your web host has the minimum requirements to run WordPress.
- Your host is running the latest version of WordPress.
- You can download the latest release of WordPress from official WordPress website.
- Always create secured passwords for FTP and Database.
- Recommended PHP Configuration Limits
Low PHP configuration limits can cause many issues. When related issues occur, you need to increase your PHP limits to a minimum as follows:
- max_execution_time 180
- memory_limit 128M
- post_max_size 32M
- upload_max_filesize 32M
1.3 WordPress Base Knowledge
- WordPress Codex - This link provides overall information about WordPress and WordPress installation guide.
- Instructional Video - Guide to install WordPress video created by Woo Themes.
- First Steps With WordPress - Multiple useful topics about WordPress.
- FAQ New To WordPress - Common questions about WordPress.
2. Installation
You can install Cecile theme via 2 ways WordPress or FTP
2.1 Via WordPress
Follow these steps below to install Cecile theme via WordPress:
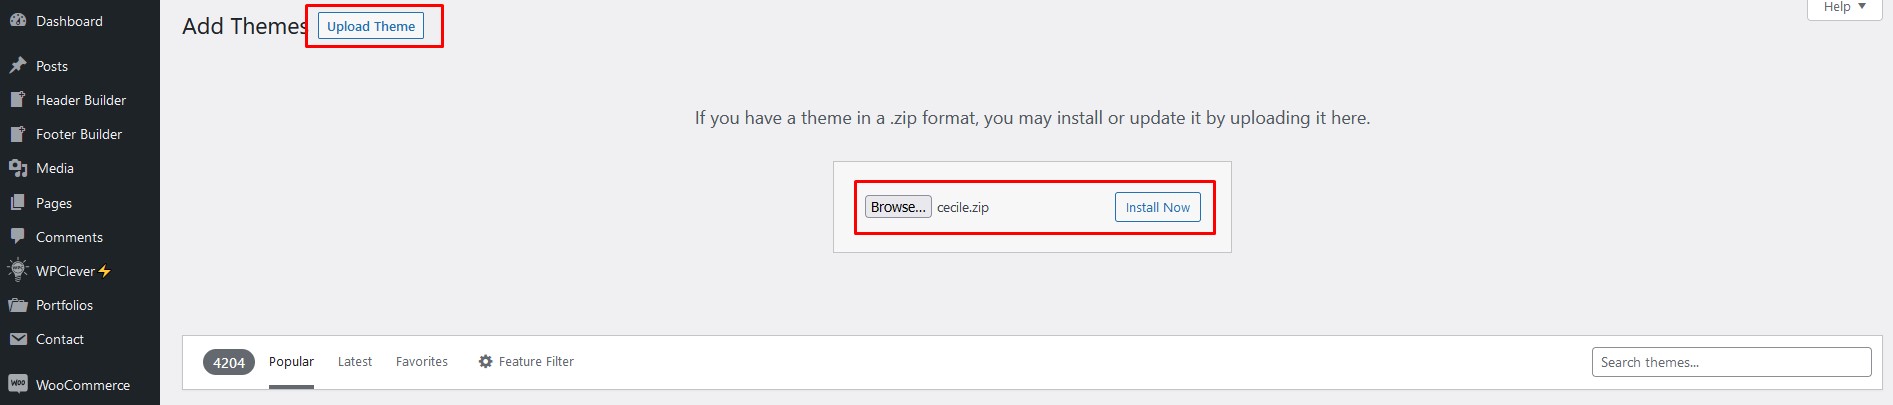
Step 1. Visit Dashboard / Appearance / Add Themes
Step 2. Click Upload Theme.
Step 3. Browse Cecile.zip file (not the theme package zip file) on your computer and click Install Now.
Step 4. Activate Cecile theme.
2.2 Via FTP
Follow these steps below to install Cecile theme via FTP:
Step 1. Login your FTP account via FTP software to access your host web server.
Step 2. Extract Cecile.zip file.
Step 3. Upload the extracted folder Cecile to wp-content/themes folder.
Step 4. Activate Cecile theme in Dashboard > Appearance > Themes.
2.3 Plugins Installation
2.3.1 Install plugins
In order to use the theme, you should install and activate all required plugins such as Arrowpress Core, Easy Appointments, Elementor, Kirki Toolkit. All other plugins which recommended, it's up to you whether to use it or not. For example, if you don't want to use Shop features, you can deactivate and delete all WooCommerce plugins.

- First method
Install plugins via installing plugins message.
After installing and activating the theme you will see the message about installing required plugins at the top of the page.You should click Begin installing plugins link or go to Appearance > Install Plugins in order to install needed plugins for Cecile theme.

You will be redirected to Install Required Plugins page, here you will find all of the theme required plugins. In order to install these plugins, you just need to check all of them and select install then click apply. It will need a while for plugins to be installed successfully.
When the installation process is done, you can click Return to Required Plugins Installer and select active then check all plugins to active these plugins.

- Second method
Install plugins via WordPress Admin Panel.
Besides, you can install some plugins, which are available in wordpress.org by navigating Plugins > Add New in admin sidebar. You should enter plugin's name to search plugin and click "Install Now" to install the plugin you want. After that, click "Active" button to start using that plugin.


- Third method
Install plugins manually (Via FTP)
If you want to manually install plugins, you can follow some basic steps below.
- Download your WordPress Plugin to your desktop and extract plugin folder if it is a zip archive.
- With your FTP program, upload the Plugin folder to the wp-content/plugins folder in your WordPress directory.
- Go to Appearance > Plugins and find the newly uploaded Plugin in the list.
- Click Activate to activate it.
After finishing plugin installation, you need to configure the plugin.
2.3.2 Plugin Configuration
Some plugins will need to be configured before using.
*Note: repeat with 2.3.1 - second method
You can install some plugins such as Elementor, Kirki Toolkit which available in wordpress.org by navigating Plugins > Add New in admin sidebar. You should enter plugin name to search plugin and click "Install Now" to install the plugin you want. After that, click "Active" button to start using that plugin.
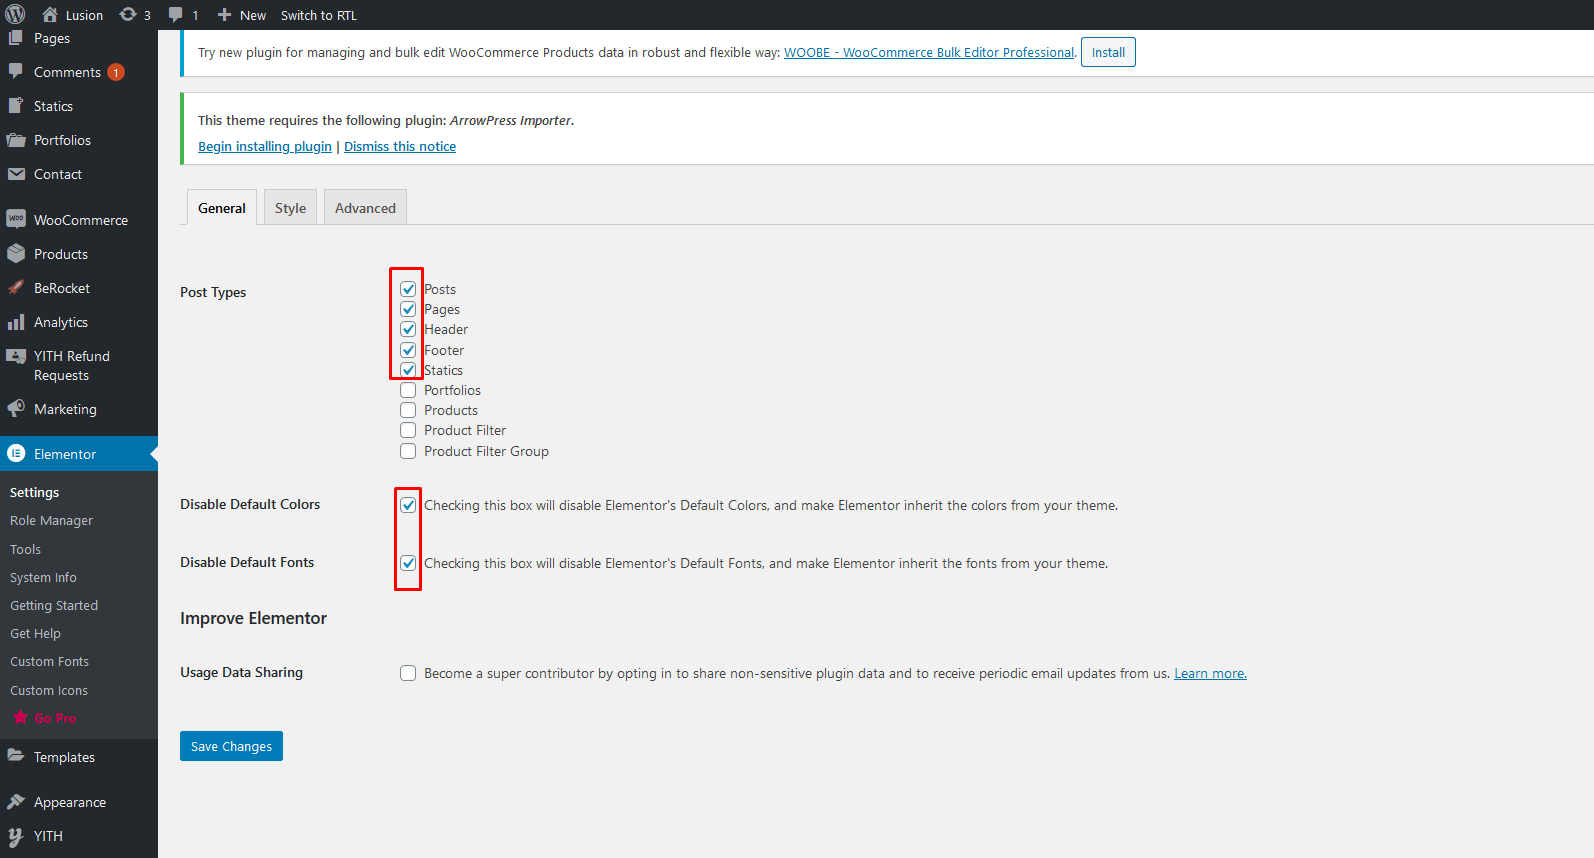
- Elementor
You can see here for more details.
- After installing the Elementor, please go to Elementor > Settings. In the post types field, you should check all post type as the screenshot below.
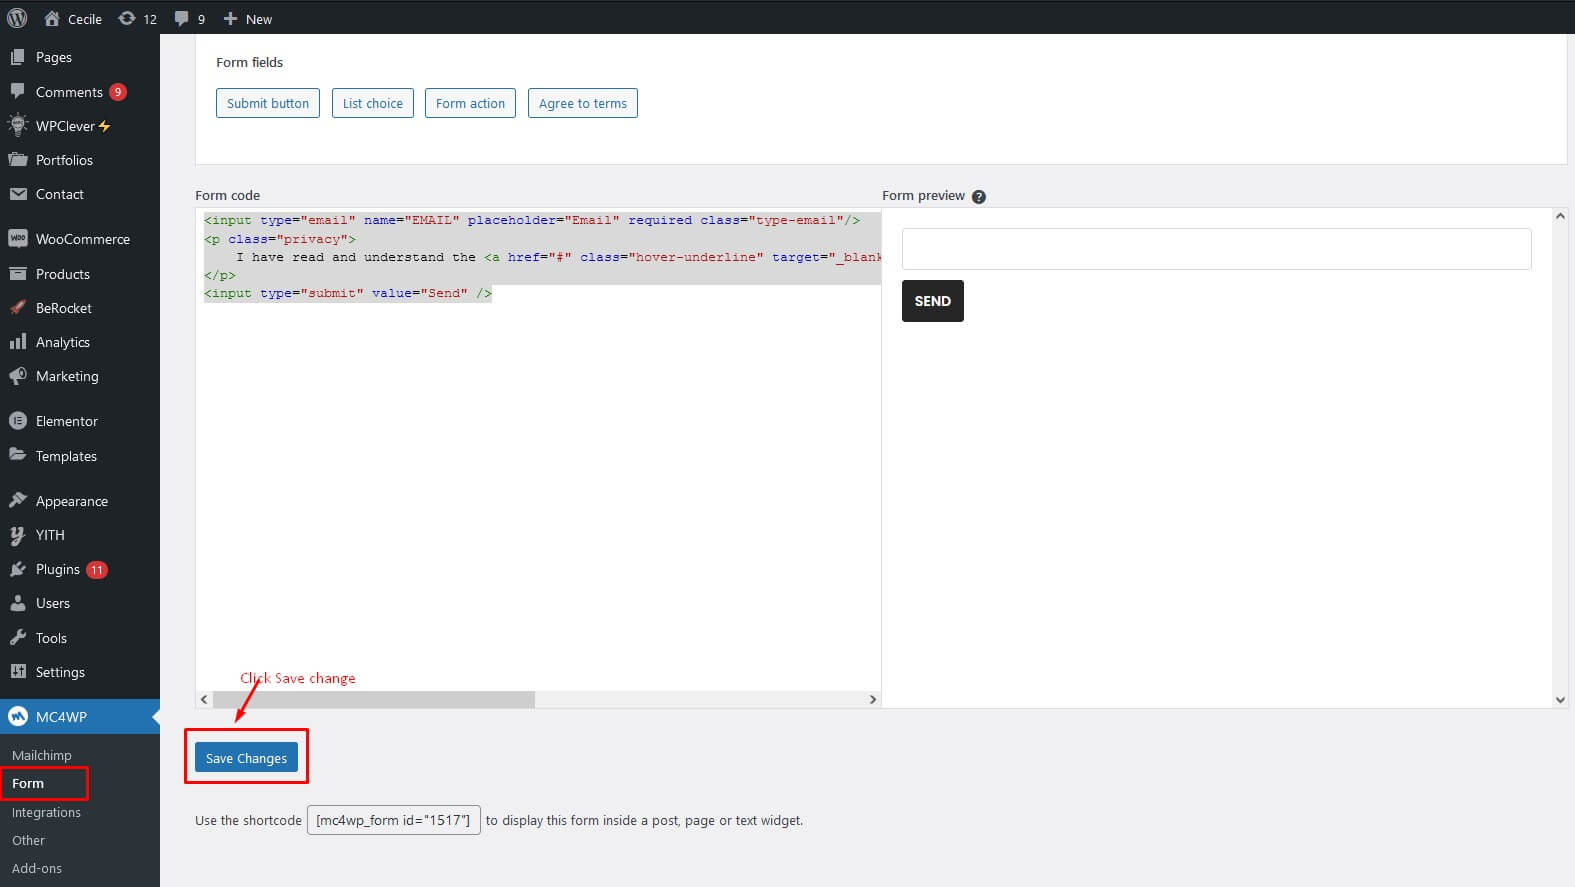
- MailChimp for WP
Go to MailChimp for WP > MailChimp to access general setting page of MailChimp. You should connect to your MailChimp account by entering API Key.

After that, navigate to MailChimp for WP > Forms and create a form with the content below
After installing the demo successfully. If a MailChimp form is already existed, you can do nothing or change the form content and click Save changes to display the form in the front end.
- Contact Form
Go to Contact > Form and create the form you want or edit existing form.
When you want to add a form which displays the same as in our demo site, you should change the content of the contact form in Contact > Form so the form can have a similar style. After changing form content, you can adjust the text or the field to what you want.
Below is the contact form content we used in our demo site. Each form can have a different style based on the content in the contact form. If you import demo content successfully, you can skip this step.
- Contact form in Contact Us
- Woocommerce
WooCommerce is the most popular WordPress eCommerce plugin. Packed full of features, perfectly integrated into your self-hosted WordPress website.
You can see here for more details and woocommerce documentation.
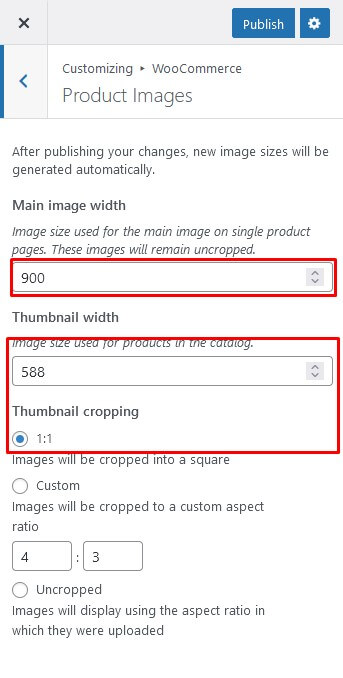
- Change Image Sizes
You can change the product image sizes in Appearance > Customizer > Woocommerce > Product Image on admin sidebar.
- Product image in Shop page: You could change Thumbnail width
- Product image in single product page: You could change Main Image width
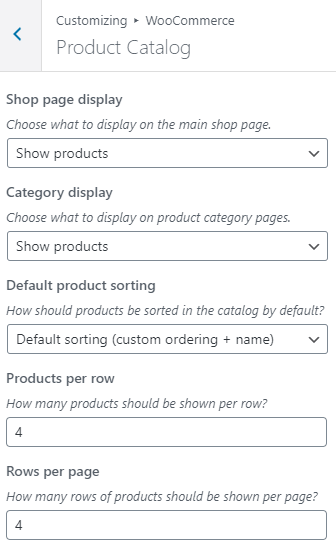
- Change Product Catalog
You can change the product catalog in Appearance > Customizer > Woocommerce > Product Catalog on admin sidebar.
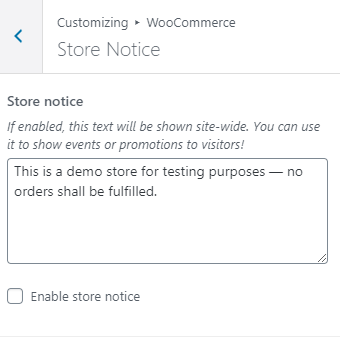
- Enable store notice
Navigate to Appearance > Customizer > Woocommerce > Store Notice, check the box Enable store notice
You can change text in this field
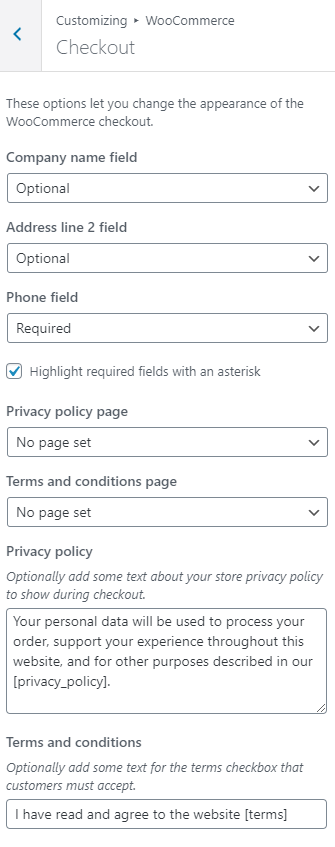
- Change Checkout
You can change the product catalog in Appearance > Customizer > Woocommerce > Checkout on admin sidebar.
2.3 Activate theme
Note: In order to fully use the features of the theme, you need to have the theme activated.
After installation, please log in admin panel through your admin account, the go to Setting -> Activate theme -> Enter purchase code -> Save Activate Theme and insert the “Purchase Code”.
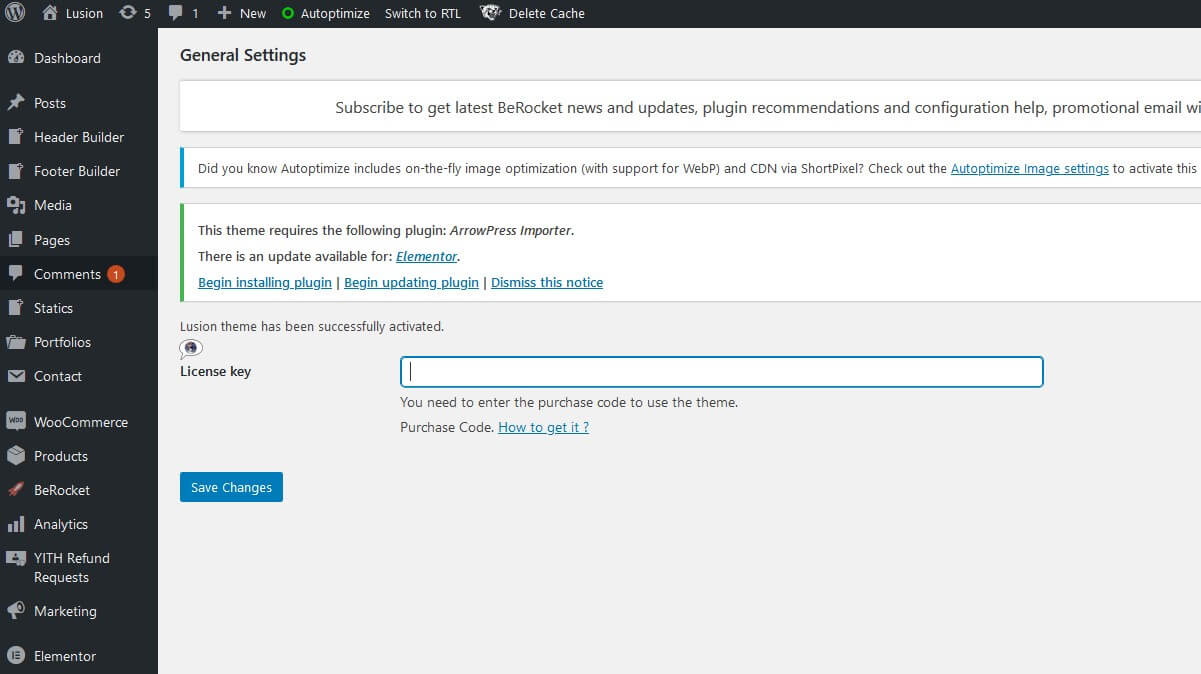
Click here to know how to get Purchase Code. Note that, with “Regular License”, one Purchase Code is used for only 1 domain.
- Option 1: Work on your localhost.
-
Option 2: Use subdomain. We allow using unlimited subdomain for dev site purpose. However, you have to insert the purchase code for the principal domain before using this purchase code for other subdomains.
For example, with your main domain “ mydomain.com”, you are able to create several subdomains such as dev.mydomain.com, staging.mydomain.com, abc.mydomain.com…
In order to use theme on developer site, there are 2 options
Note: If you want to change the domain? You can follow the instructions here and you can only change the domain once.
Note: Once Required Plugins are configured, you may be interested in installing sample content as our demo sites. In the next section, we will guide you about demo installation.
2.4 Demo Installation
Note: For successful demo importing, you should make sure to set up Php configuration limit and max_execution_time as theme requirement before importing demo. Please read Install Theme > Installation for all requirements.
Make sure to install and activate all required plugins in Appearance > Install Plugins before installing demo especially ArrowTheme Importer plugin
2.4.1 First Method: One click import
- Go to Appearance > Import Demo Content
-
Import Base Content
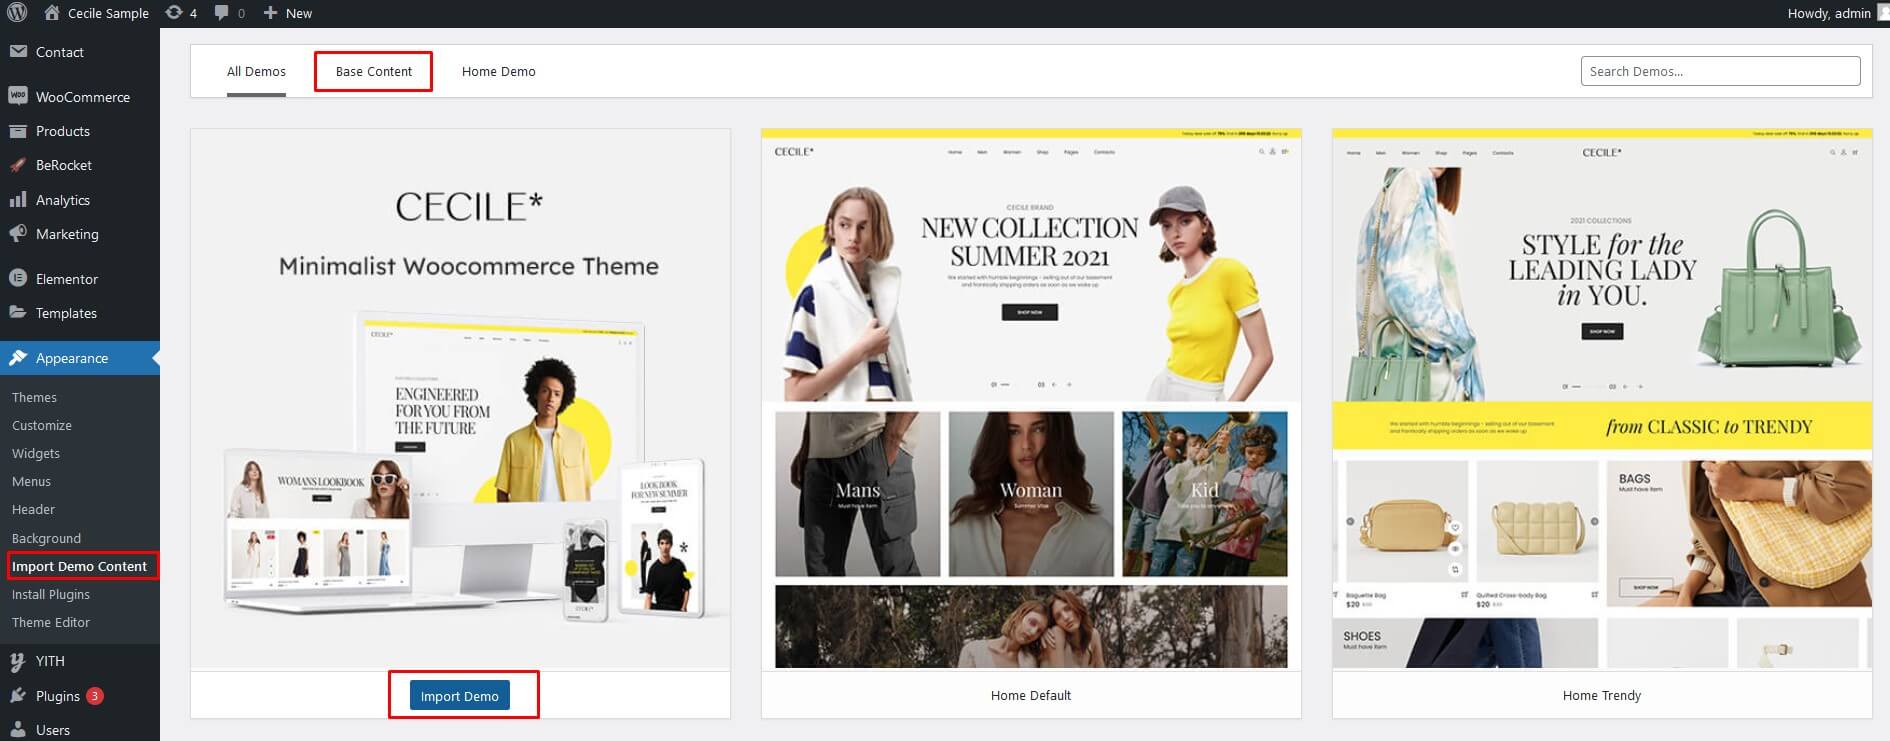
-
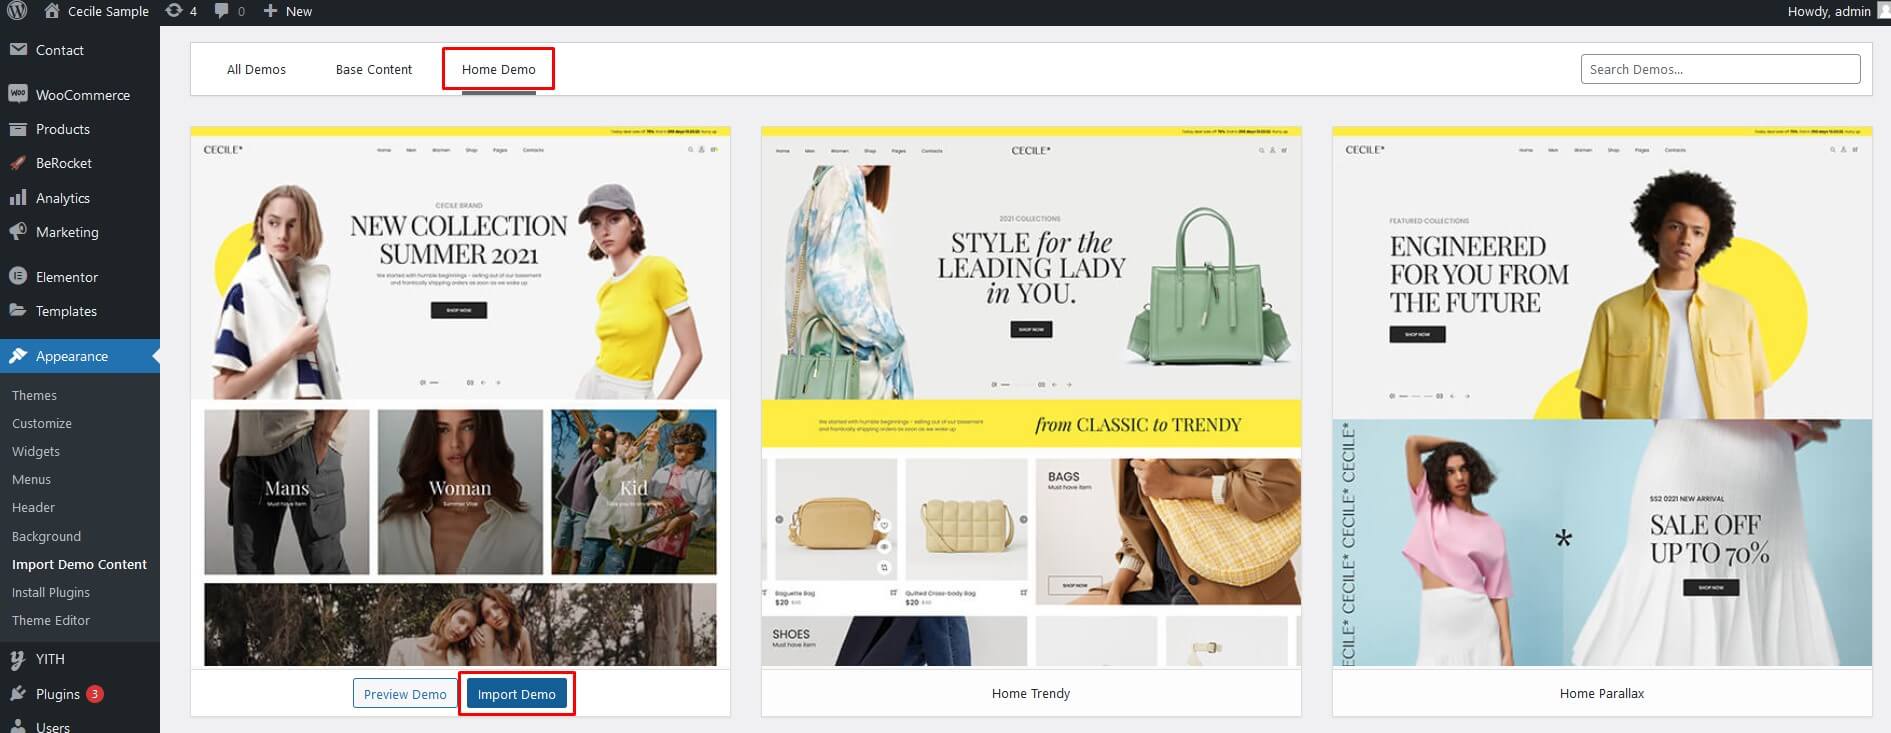
After successful importing Base Content, you can go to Appearance > Import demo content
and
import Home Demos you want
Note: After the Installation is successful, go to Elementor -> Tools -> Replate URL with your site. Ex: Your website is http://hcaresol.pt/teste/ then you enter new domain http://hcaresol.pt/teste/ and old domain http://hn.arrowpress.net/cecile-sample/ and click button Replate URL
Note: If this method doesn't work with your server, you can try import all demos by the second method.
2.4.2 Second Method: One click demo import plugin
Install demo with One click demo import plugin.
-
Install and activate One Click Demo Import plugin.
Select file in theme_import/content.xml folder and click "Open".
-
Go to Appearance > Import demo data and choose XML file placed in theme_import/content.xml
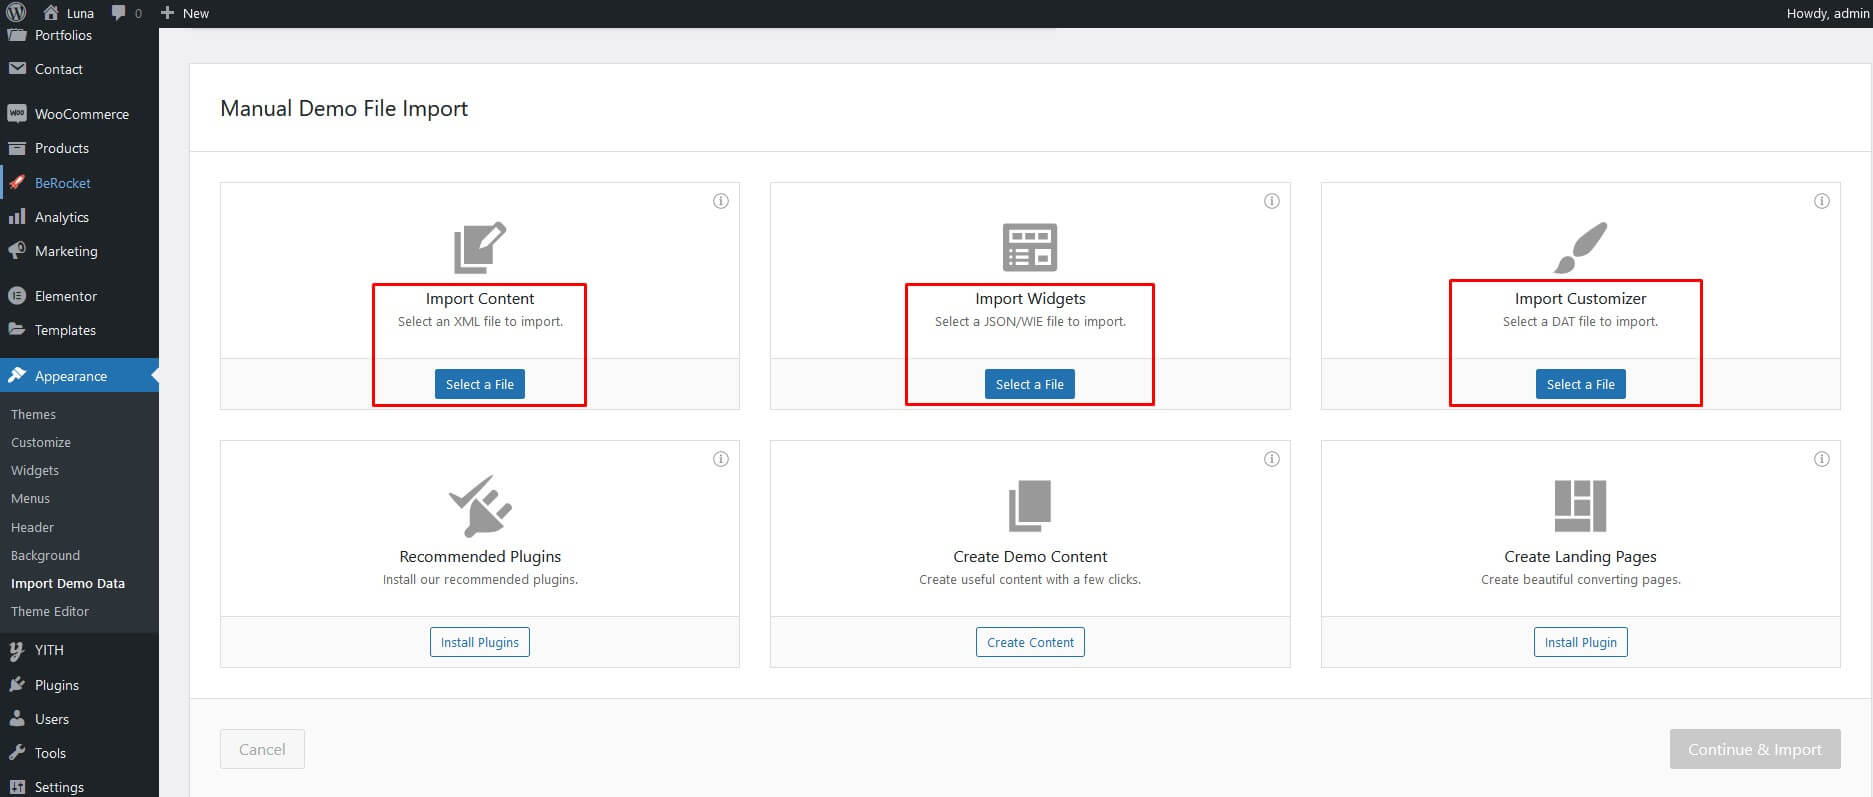
-
In Widget import section, you should select import file for widget in theme_import/widget.wie
-
In Customize import section, you should select import file for Customize in theme_import/customize.dat
-
Click Import button.
-
After successfully finish above process, you should go to Setting > General and select homepage. Go to Appearance > Menu and assign menu to menu location such as Primary Menu. If you don't know how to set menu, please see Build your site > Menu setup.
2.4.3 Third Method (All-in-One WP Migration)
Install demo via All-in-One WP Migration plugins.
Remember that your site database will reset entirely after using this method.
Please follow steps listed below to import demo.
- Step 1: Install and activate All-in-One WP Migration plugin to use this method.
- Step 2: Download Demo backup file.
- Step 3: Navigate to All-in-One WP Migration > Import on admin sidebar
.- Step 4: Click Import From > File button, select the demo file downloaded in step 2. After that, you should wait for few minutes and click Continue.
- Step 5: Login to the site with the account: Username: admin, Password: admin .After login with this account, you can change username and password with your new credentials.
2.4.4 Fourth Method (WordPress importer)
Import demo data manually.
Note: Please remember to install all needed plugins before import demo data. If you have not install plugins, please see Plugins Installation to finish that step.
-
Import widget
- Step 1: Install and activate Widget Importer & Exporter
- Step 2: Navigate to Tools > Widget Settings Import and click Select a file button.
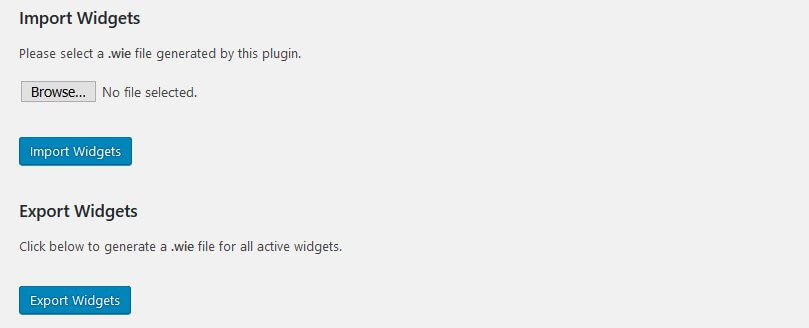
- Step 3: Select widget file in theme_import/widget.wie folder and click "Open".
- Step 4: Click Show Widget Settings.
- Step 5: Click Select All Active Widgets.
- Step 6: Click Import Widget Settings.
-
Import Data
- Step 1: Navigate Tools > Import and click on WordPress link. This will bring up a popup box that allows you to install the plugin directly from your website.
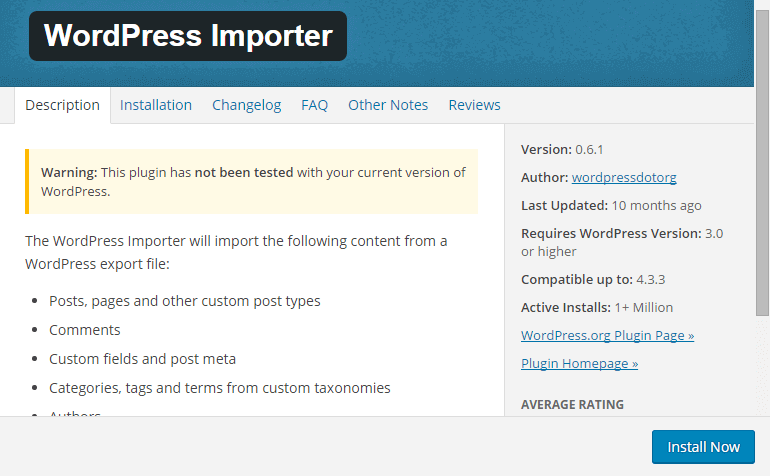
- Step 2: After clicking Install Now button, you should activate plugin by clicking Activate Plugin & Run Importer.

- Step 3: After that, you will be navigated to the import page. This is where you upload the XML file which will be found in theme_import/content.xml to import data.

- Step 4: You will then be given an option to assign imported authors to existing authors on your website or create a new account for each author’s post. Also, there is an option for you to download attachments. If you select this, WordPress will attempt to import all of the images that are attached to the posts and pages you are importing.
-
Install plugin Customize
Note: This will overwrite all existing option values, please proceed with caution!
After extract zip package of Cecile theme. You can install and active Customizer plugin
3. Theme Configuration
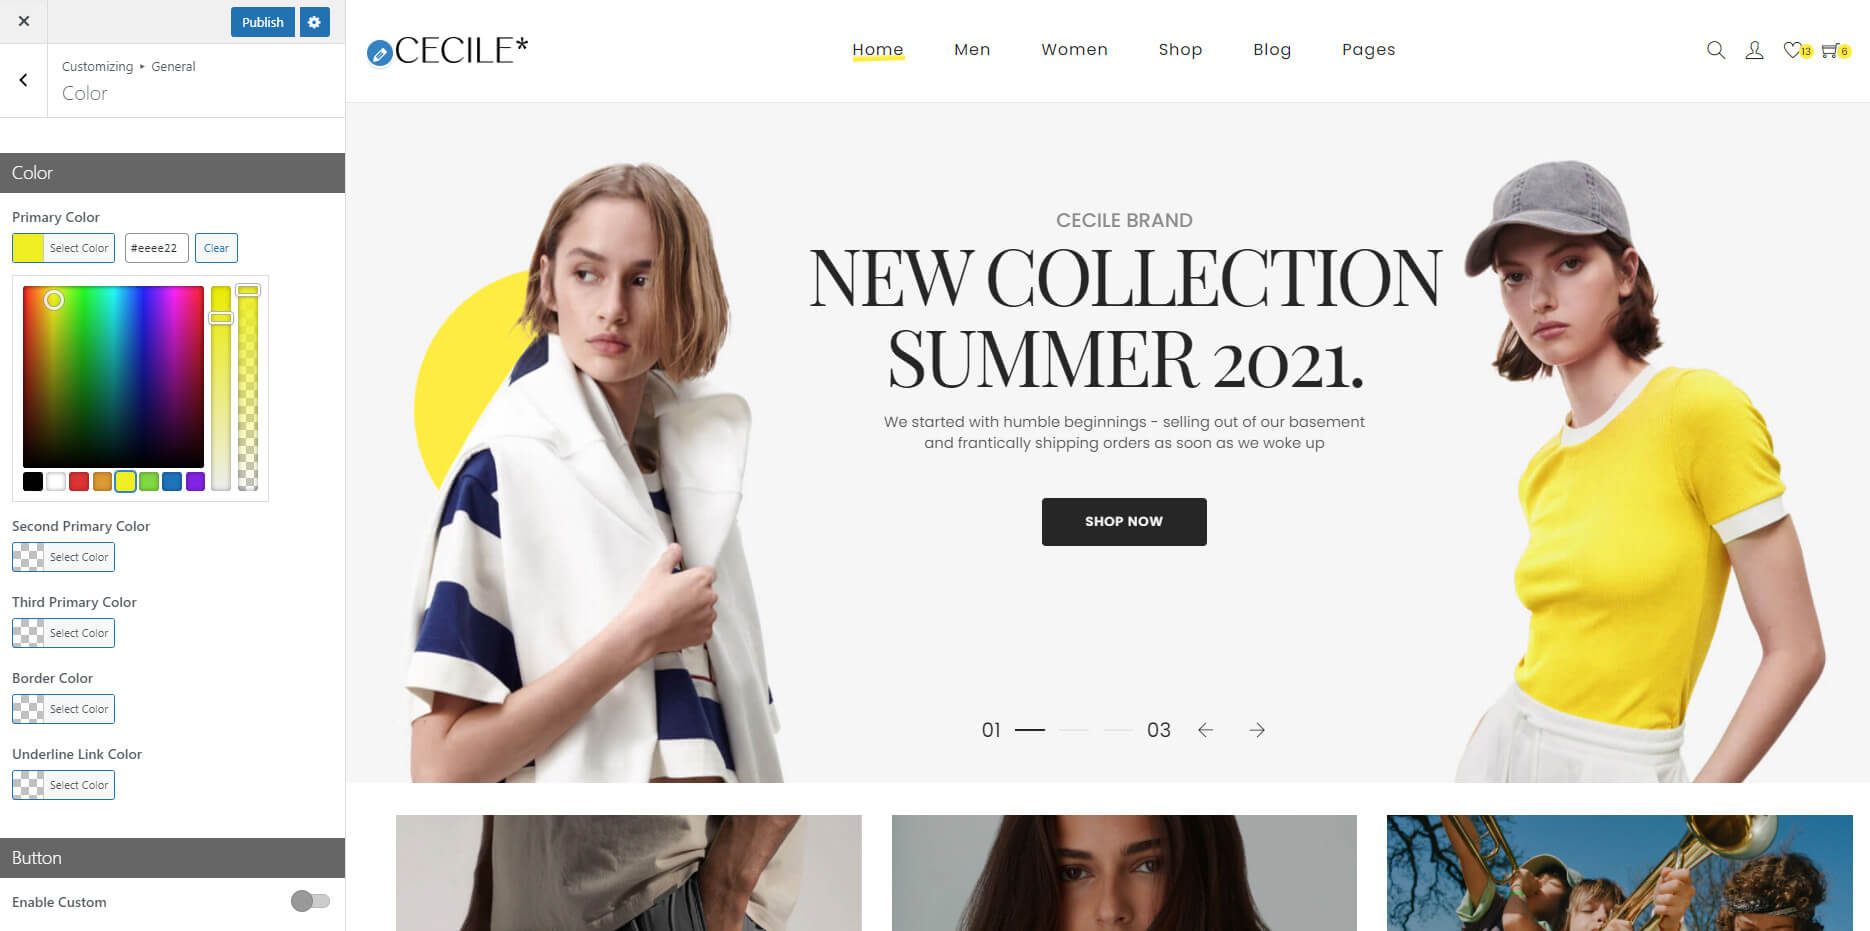
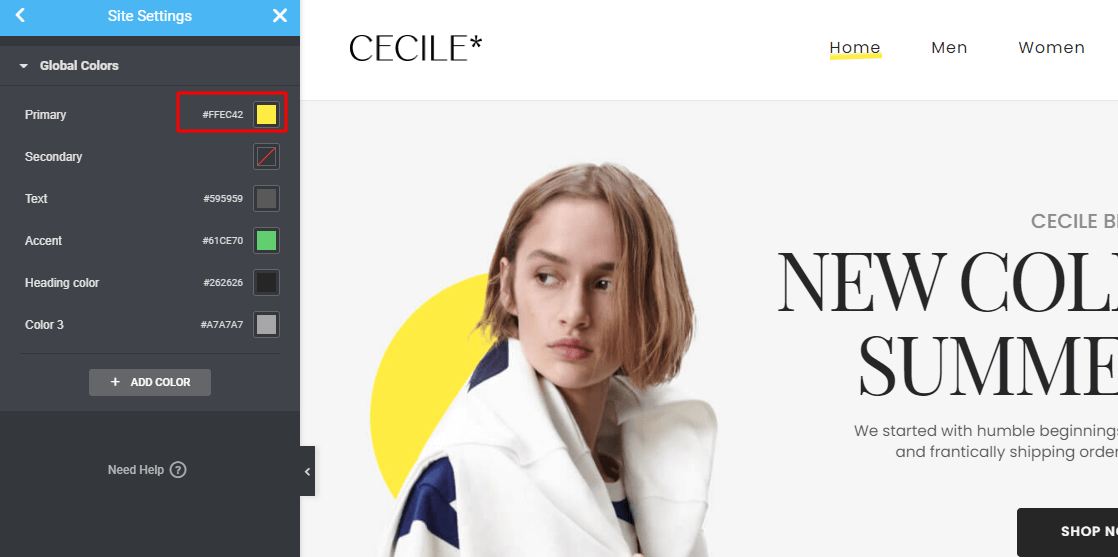
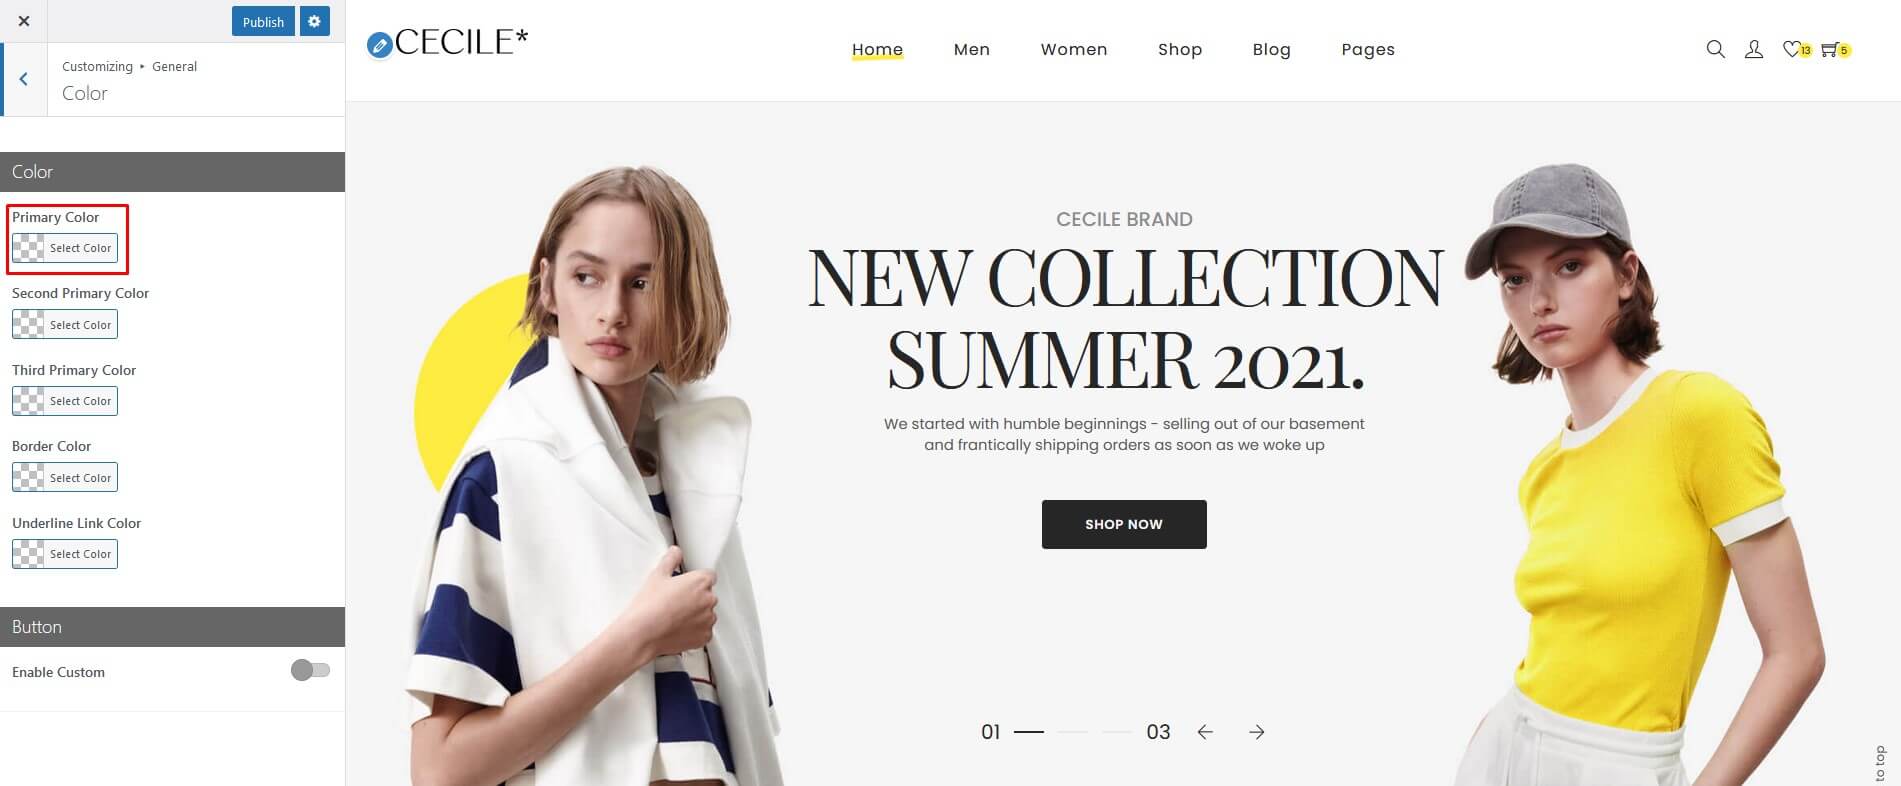
3.0 Set Up Primary Color
Firstly, you need go to Appearance -> Cusomize -> General -> Color -> Choose primary color -> Publish
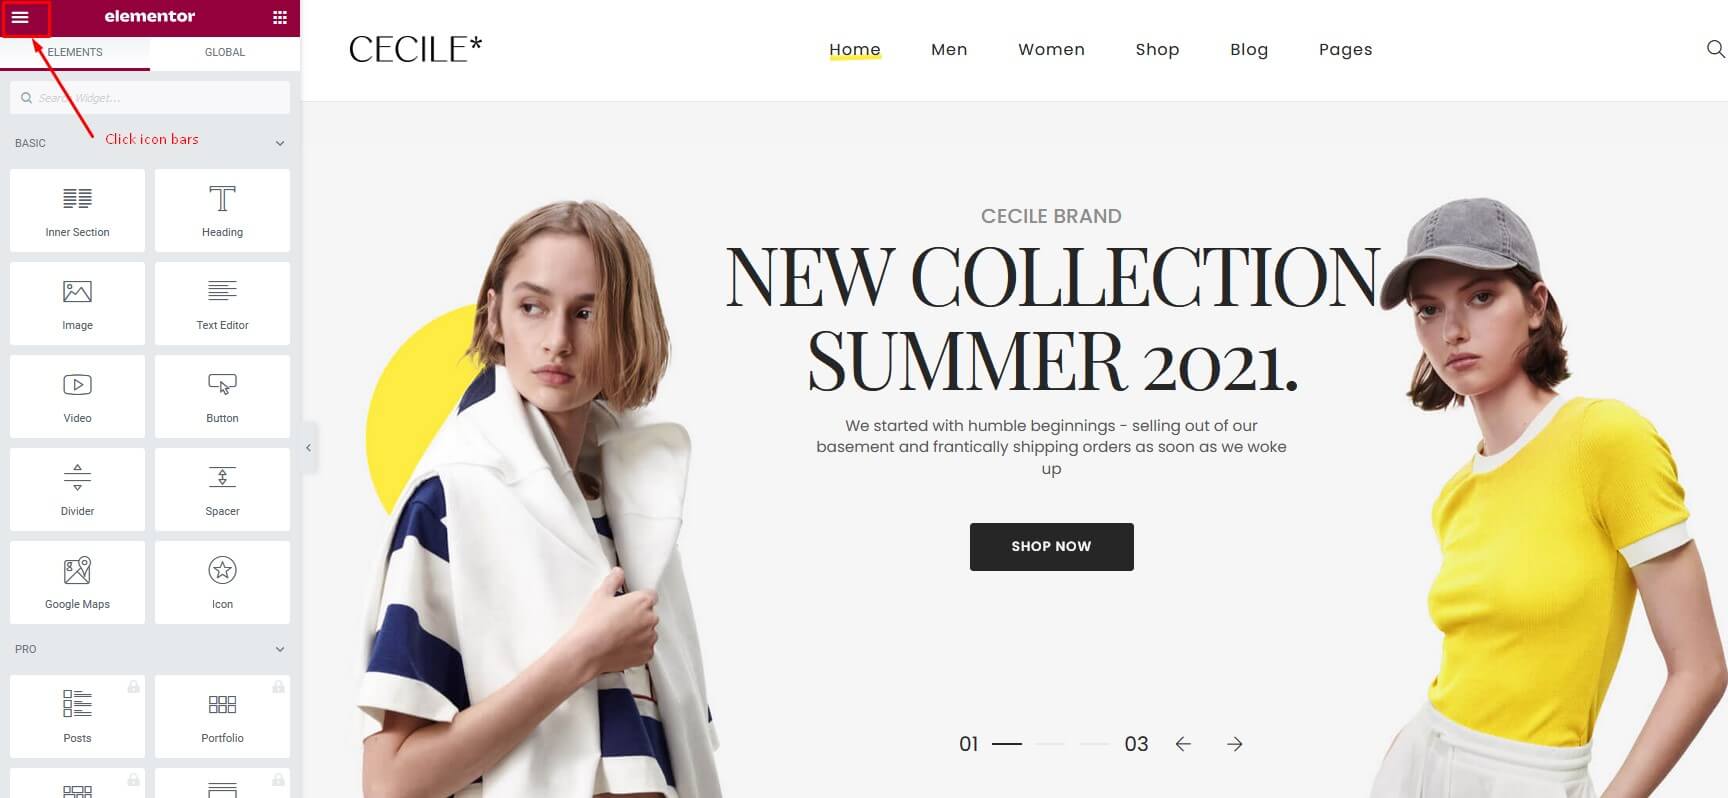
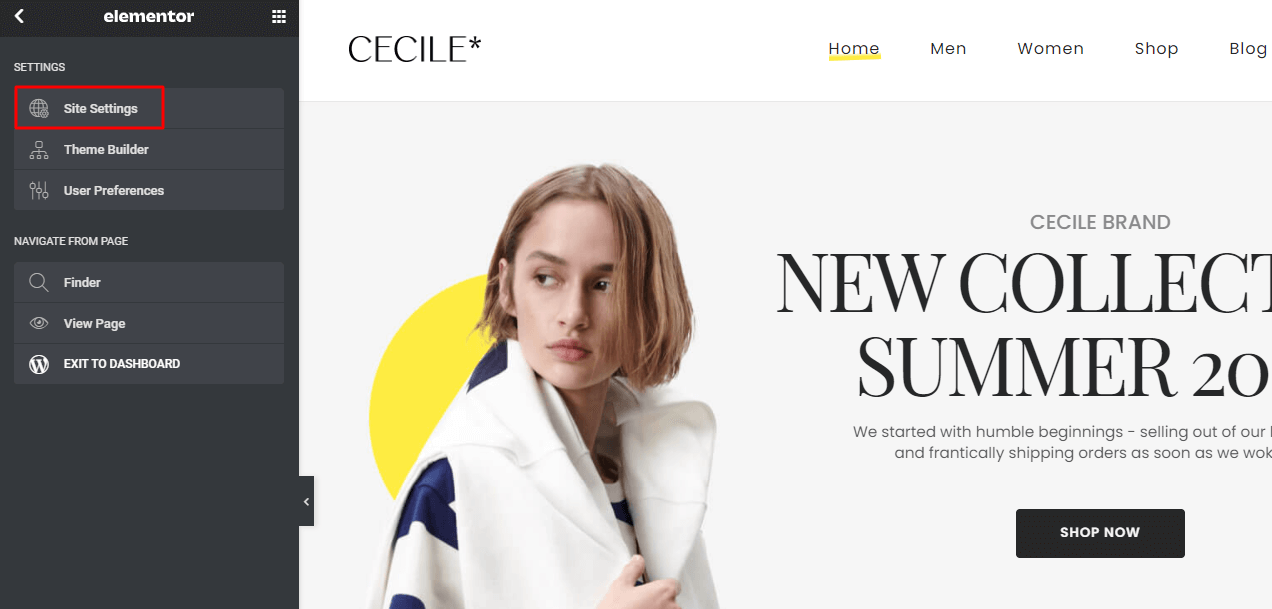
Later, you need go to Edit With Elementor -> Click Icon Bar -> Site Settings -> Global Colors -> Change the primary color similar to the one you configured earlier and if you choose a different homepage than defaut home you need to reselect your default homepage color that is the same as the primary one.
3.1 Set Up Menu
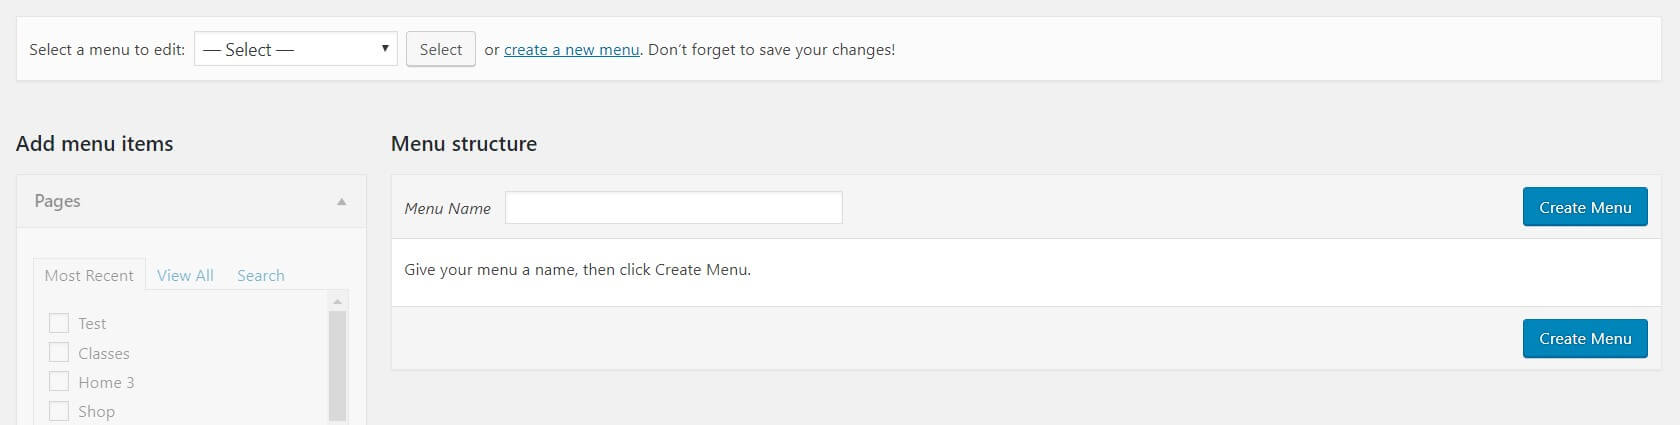
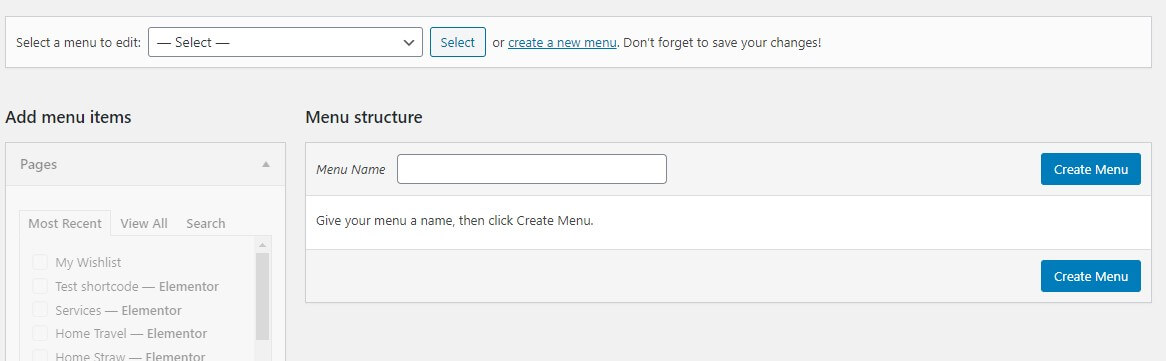
1. Creating your Menu
Step 1- Login to the WordPress Dashboard.
Step 2- From the 'Appearance' menu on the left-hand side of the Dashboard, select the 'Menus' option to bring up the Menu Editor.
Step 3 - Select Create a new menu at the top of the page.
Step 4 - Enter a name for your new menu in the Menu Name box.
Step 5 - Click the Create Menu button. Your menu is now defined, and you can now add pages to it (steps below).
Step 6 - Select the Pages that you want to add by clicking the checkbox next to each Page's title.
Step 7 - Click the Add to Menu button located at the bottom of this pane to add your selection(s) to the menu that you created in the previous step.
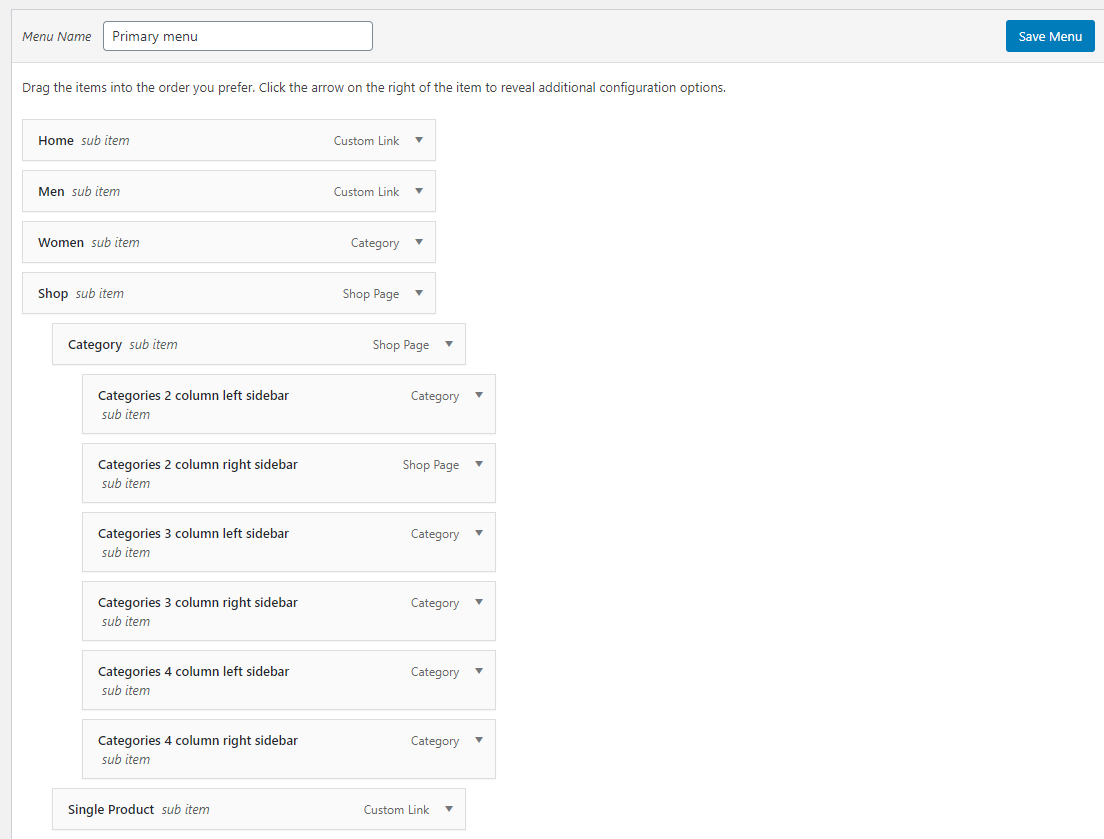
Step 8 Fill information of menu that you want to display.
Step 9 - Assign each Theme Location with a menu. You can assign menus to multiple Theme Locations.
Step 10 - Click the Save Menu button once you've added all the menu items you want. Your custom menu has now been saved.
Menu Home will be displayed.

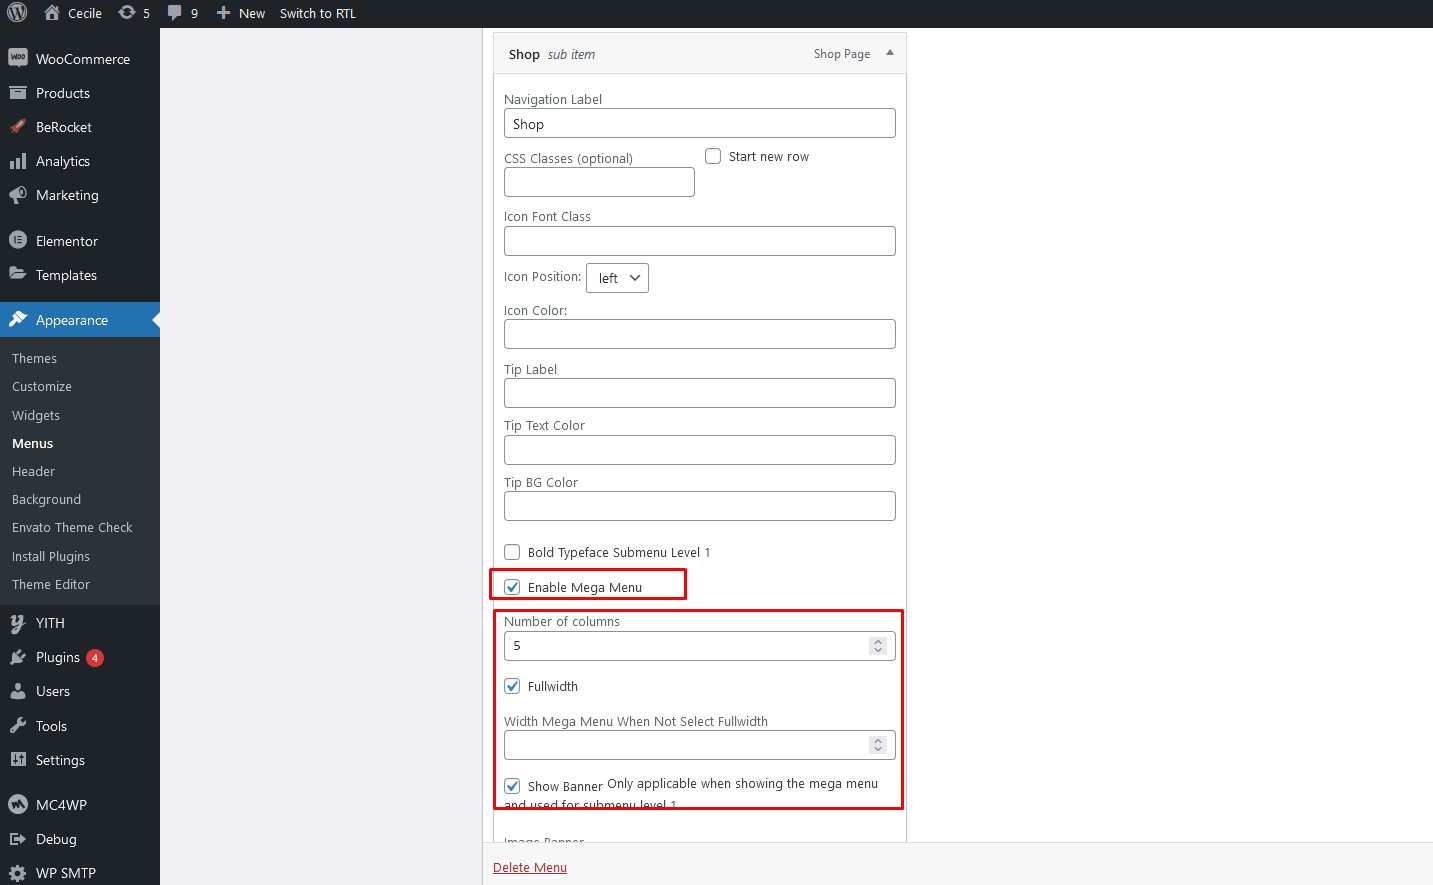
2. Mega Menu
Mega Menus allow you to add multi-column drop down menus to your navigation with rich media such as images. In this article, we will show you how to easily add a mega menu to your WordPress site.
If you want to use mega menu, you should check the box Enable Mega Menu & Choose Mega Menu
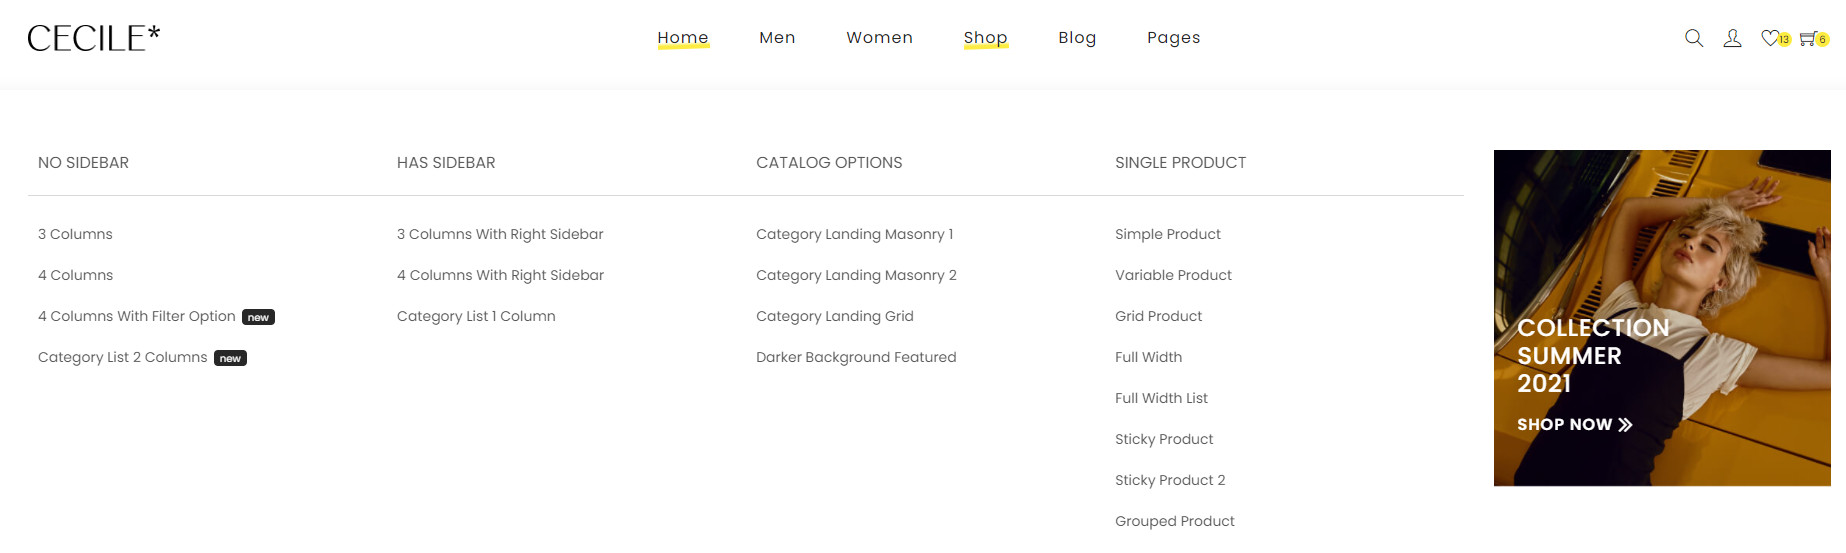
Display on Frontend
3.2 Set Up Header
Step 1 - From admin Dashboard, navigate to Header Builder > Add New Header
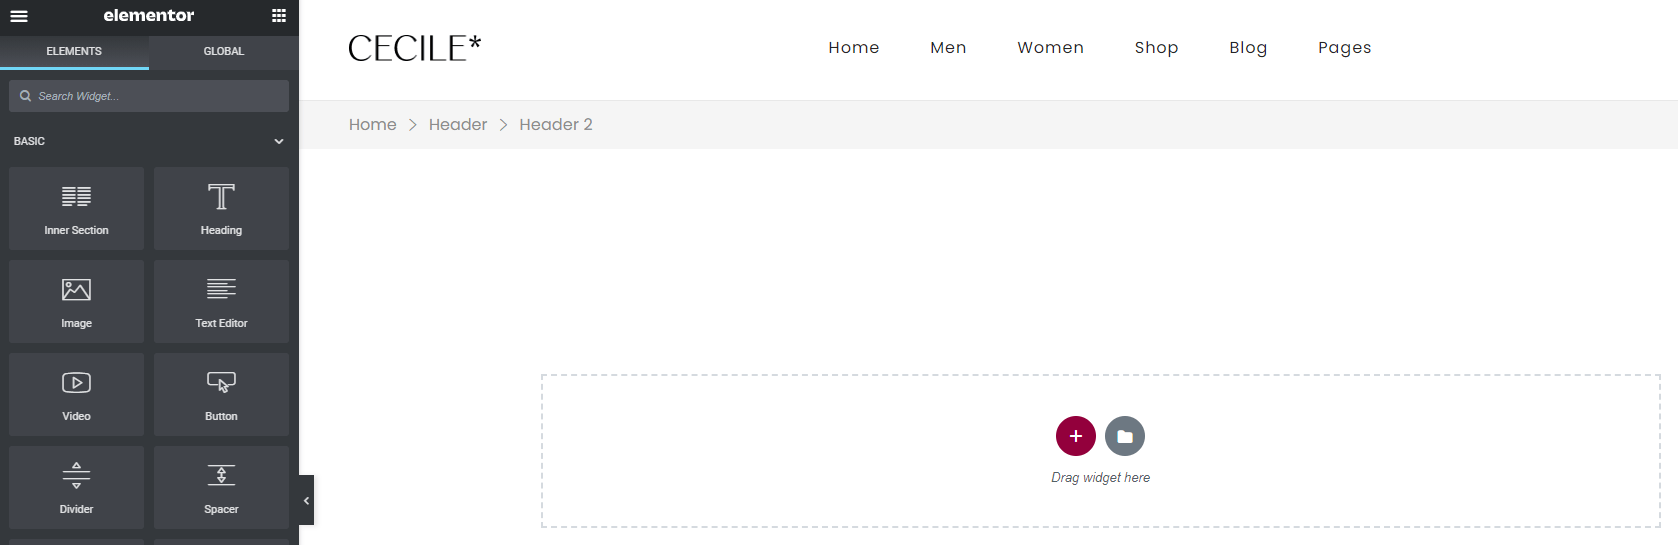
Step 2 - Using Elementor backend editor Cecile then add element to your Header
Step 3 - Build your header style with unlimited layout
Step 4 - Use Elementor to drag or drop element to create header.
Elementor Layout setting
Front end looks like :

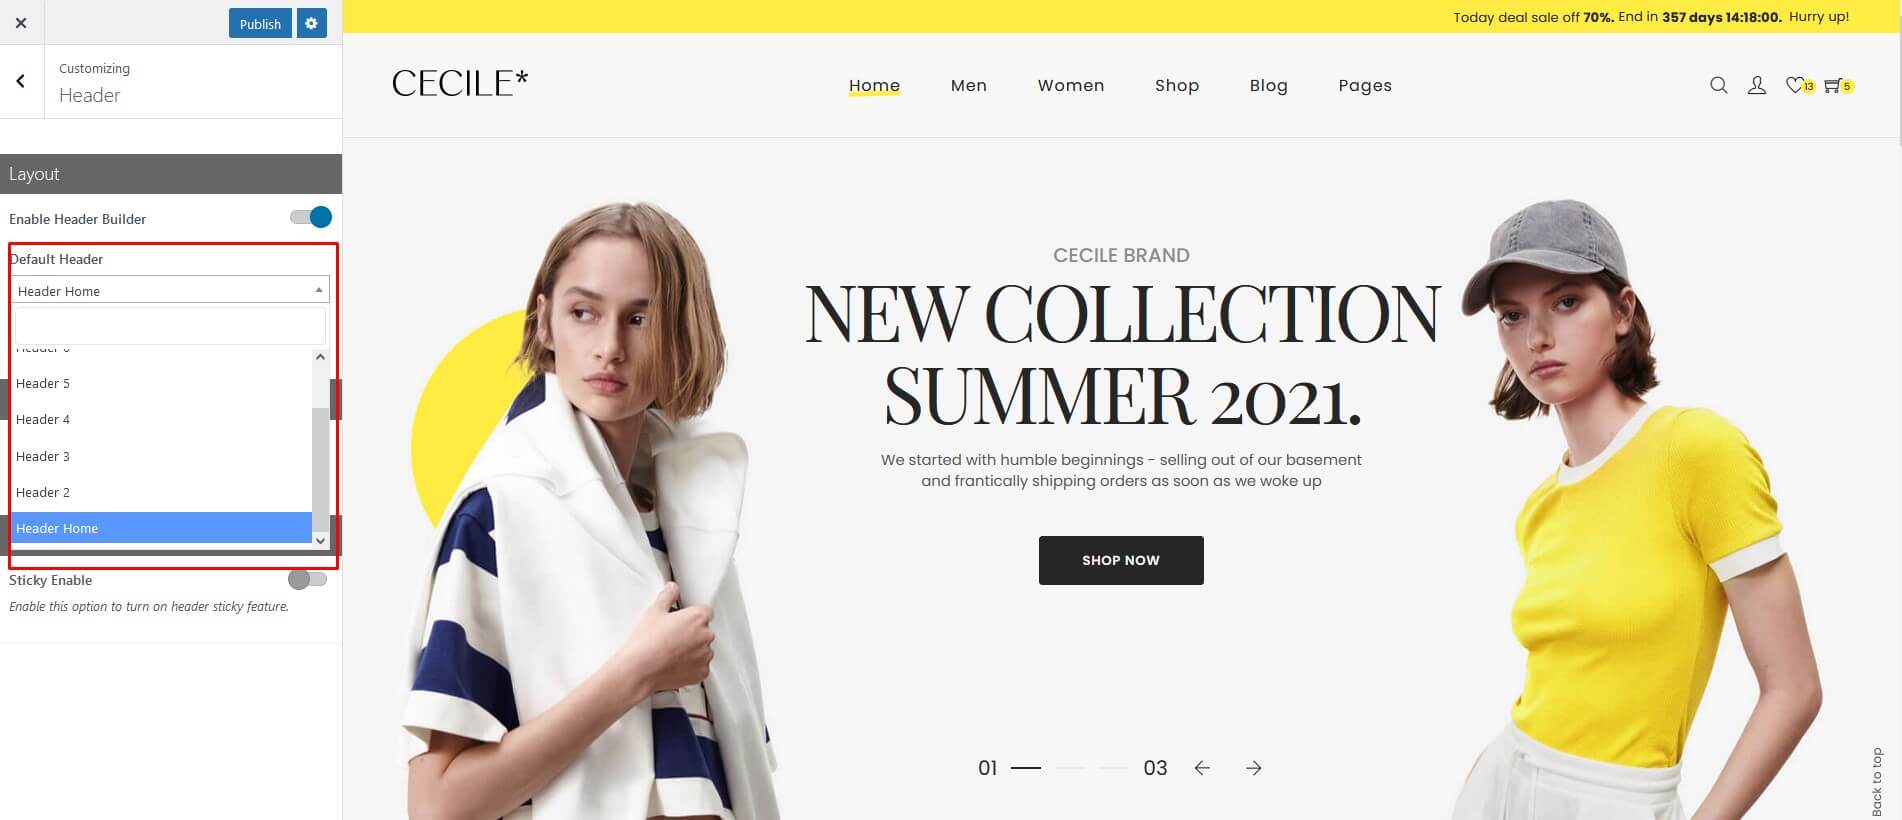
Step 4 - Navigate to : Apperance > Customize > Header.
Choose your header for page.
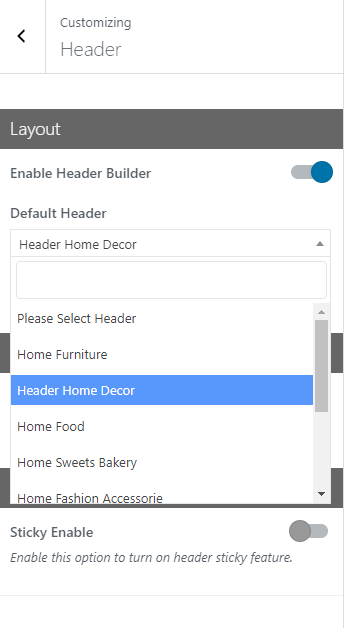
Cecile has 7 header styles.
Header 1


3.3 Set Up Home Page
You can quickly build a home page using Elementor for WordPress which are 'drag and drop' frontend and backend page builder plugin, that will save you tons of time working on the site content. You will be able to take full control over your WordPress site, build any layout you can imagine – no programming knowledge required
From your Dashboard admin, navigate to Pages
- Select All Pages to see all pages then click edit one page you want
- Select Add New to create new page
3.3.1 How to use Elementor
Have you ever used Elementor ? Please follow this guide first : Elementor guide
Official Plugin Documentation For More information about the Elementor check the official documentation.
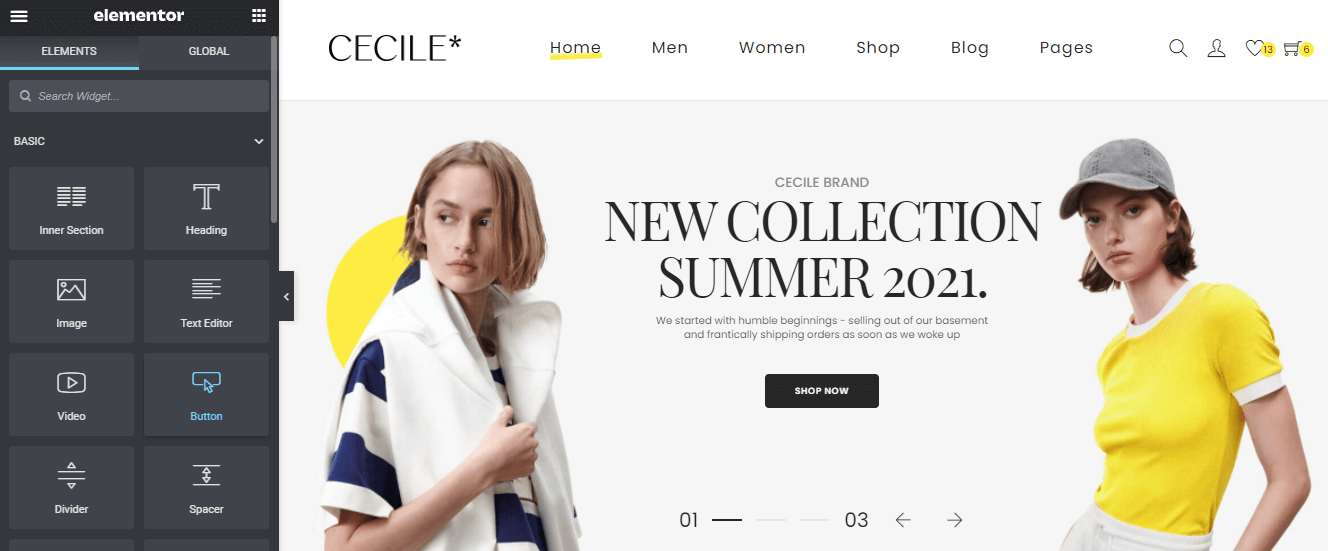
Backend Editor Cecile
How to use Back End Cecile
a. Add and modify Row Layout
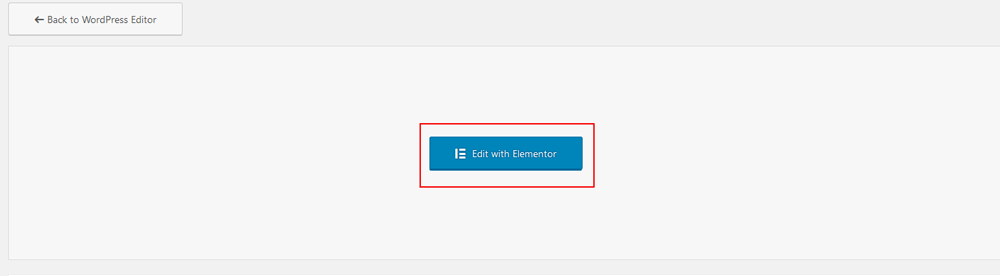
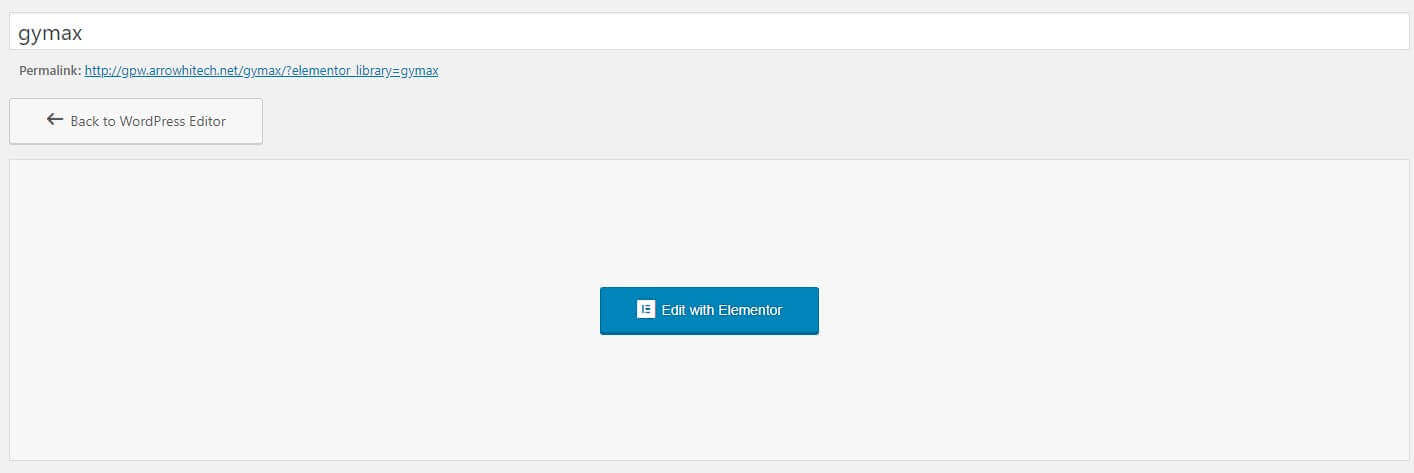
Step 1 - Go to your page / post, first activate the backend editor and click Edit with Elementor
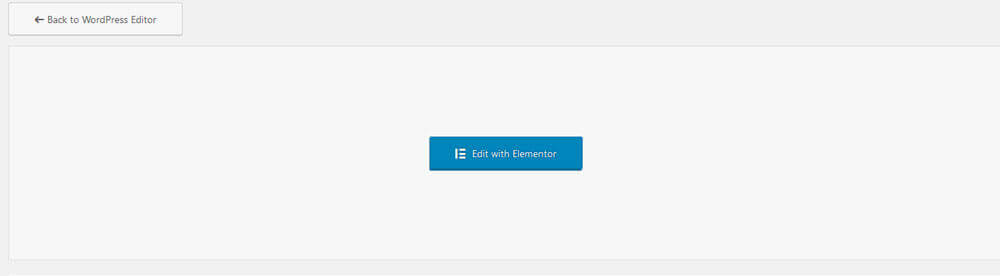
Step 2 - You will see all elements in left sidebar, please choose element that you want to use.
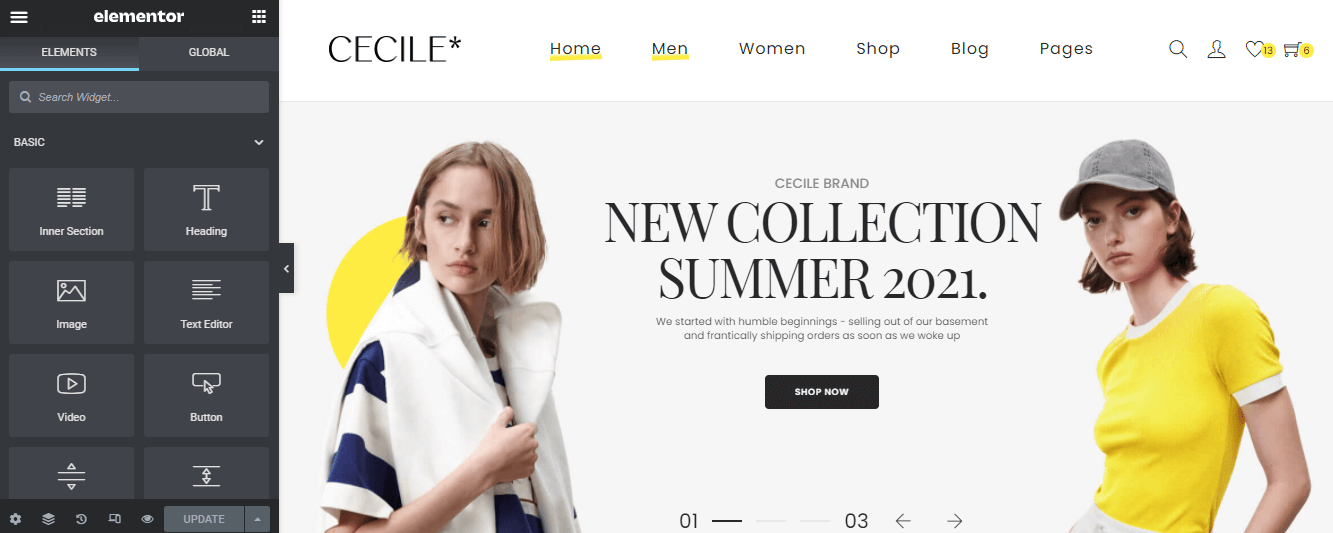
or you will see button "Add New Section" ,"Add Template" , please click to one of those button to add element.

Step 3 - To change the Row layout ( number of columns ) you need to click button marked below, content will in left sidebar.

b. Edit Element
Click on the Edit This Element (pencil icon) to Edit the Row element.
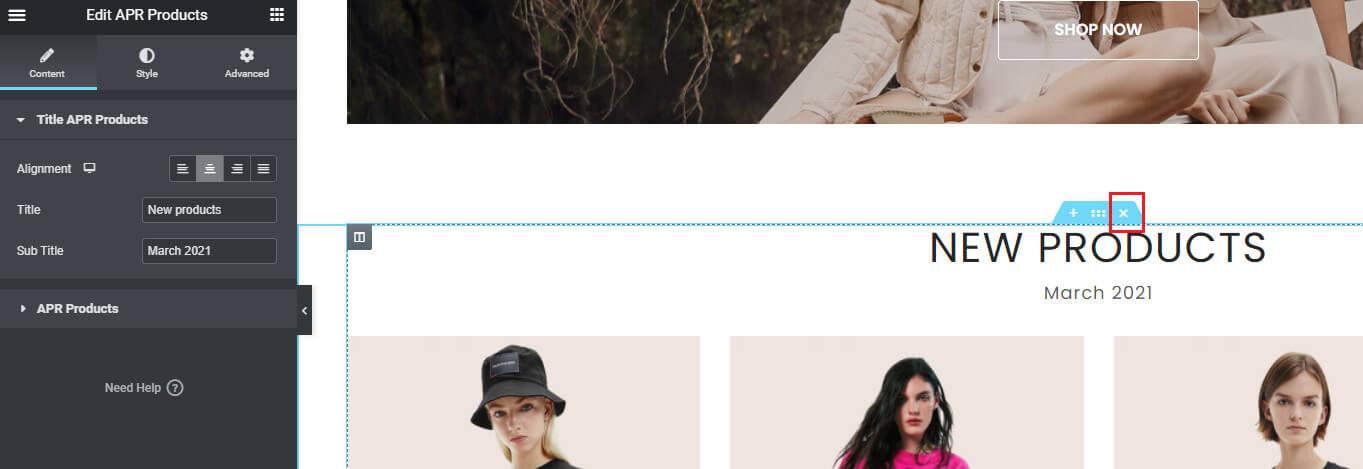
c. Remove Element
Trash Box Icon - To Remove Row, Column or Module you need to click the Trash Box icon.
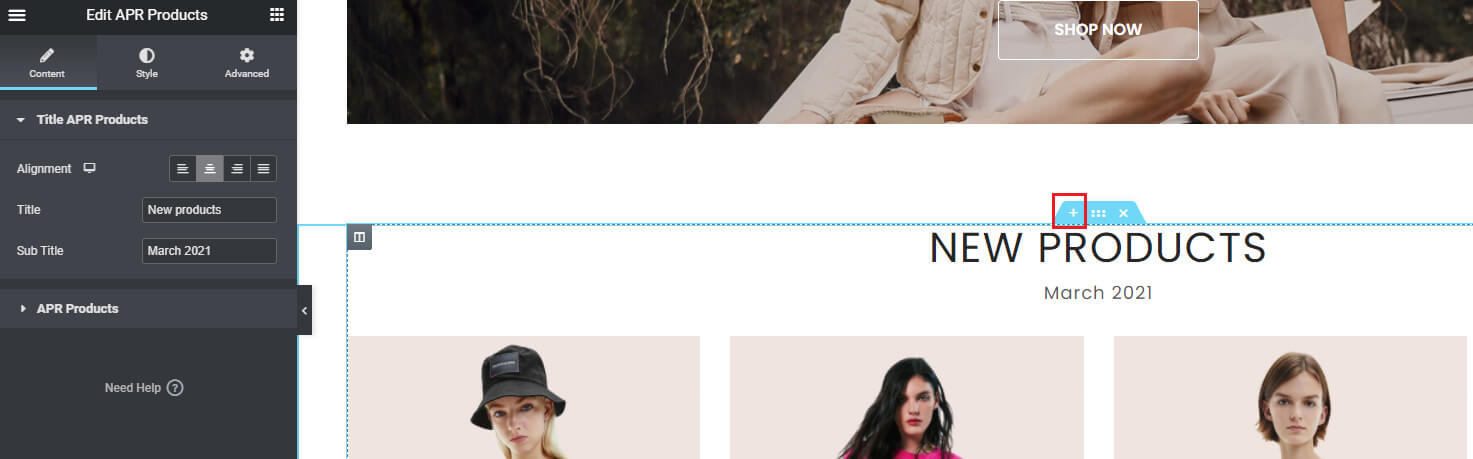
d. Add Element
Trash Box Icon - To Add Row, Column , please click to add icon.
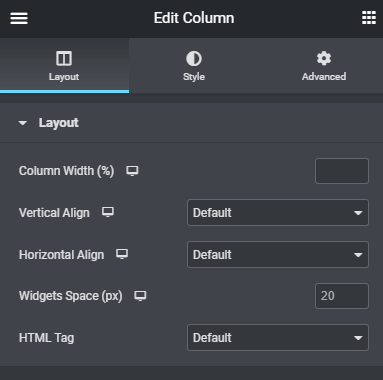
3.3.2 Page Options
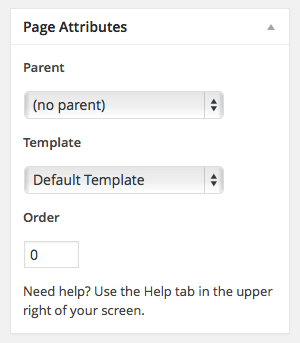
a. Page Attributes
You can select page attributes on right sidebar of admin page layout. Each Page template have each style .
b. Page configure default template
For each page you can change the page layout style, custom header , custom footer and much more! Check the screenshot below and read the documentation to see how it works .
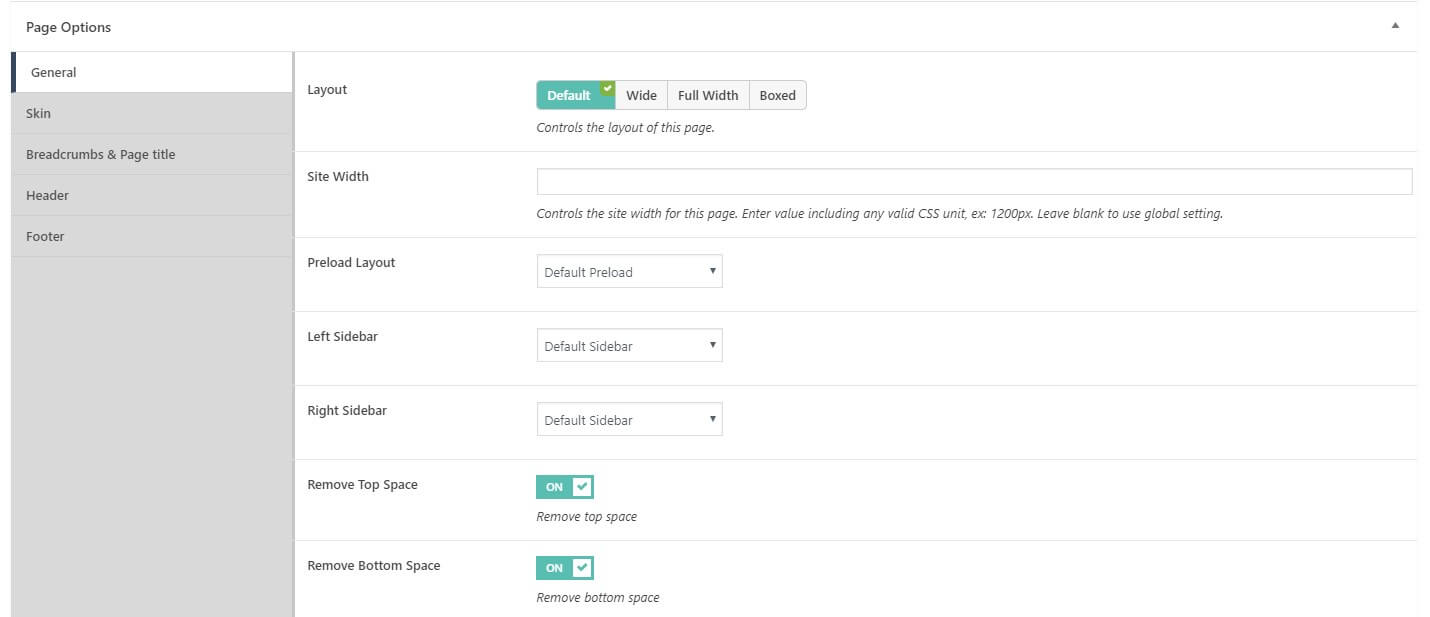
- General - Select if you want the page to have a Fullwidth layout and config sidebar, ...
- Skin - Select if you want to custom color in customize.
- Breadcrumbs - Select if you want to custom breadcrumb in customize.
- Header Layout - Select if you want to custom header in customize.
- Footer Layout - Select if you want to custom footer in customize.
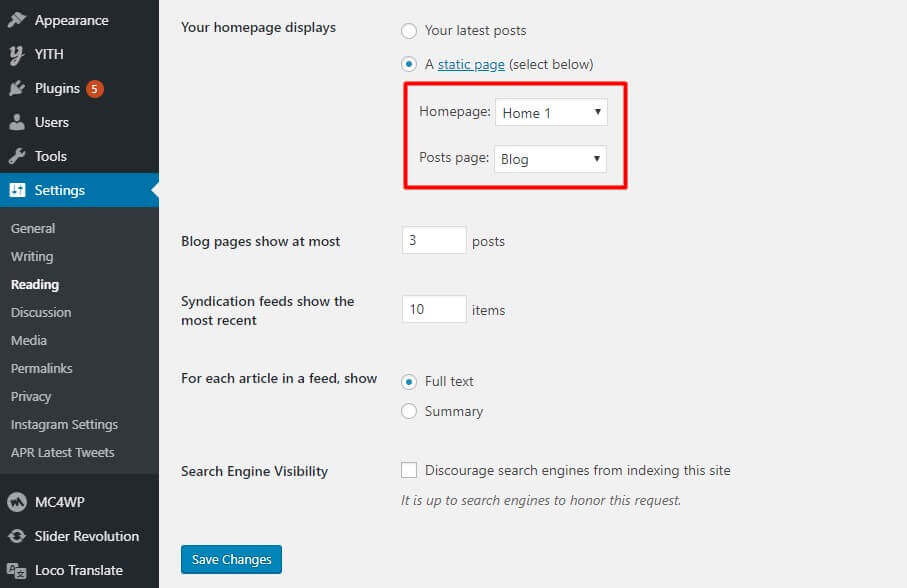
3.3.3 Set a page as Home Page
Step 1 - Go to Settings > Reading in your WordPress Dashboard panel.
Step 2 - Set "Front page displays" to a "Static Page".
Step 3 - In the drop down menu for "Front Page" choose a page which will be your home page.
Step 4 - In the drop down menu for "Posts Page" choose a page which will be your posts page.
Step 5 - Save changes.
Cecile uses woocommerce to set up product, if you want to know how to use, please click the link:
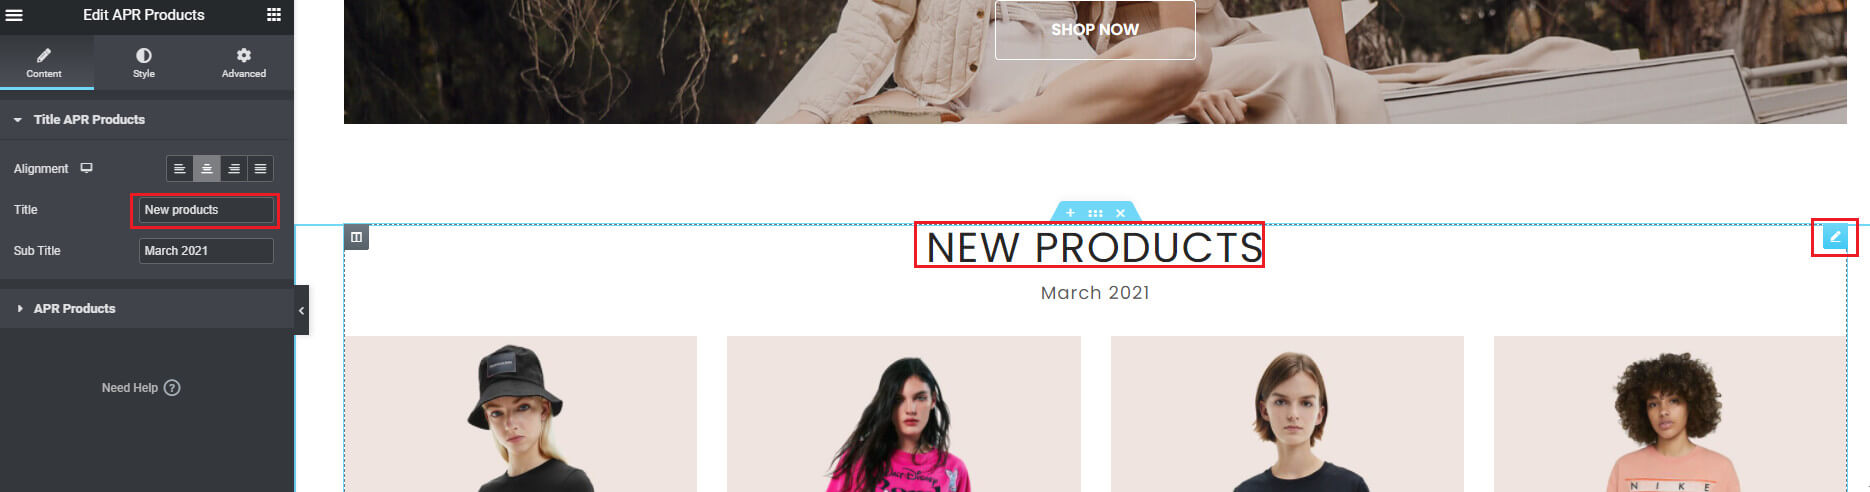
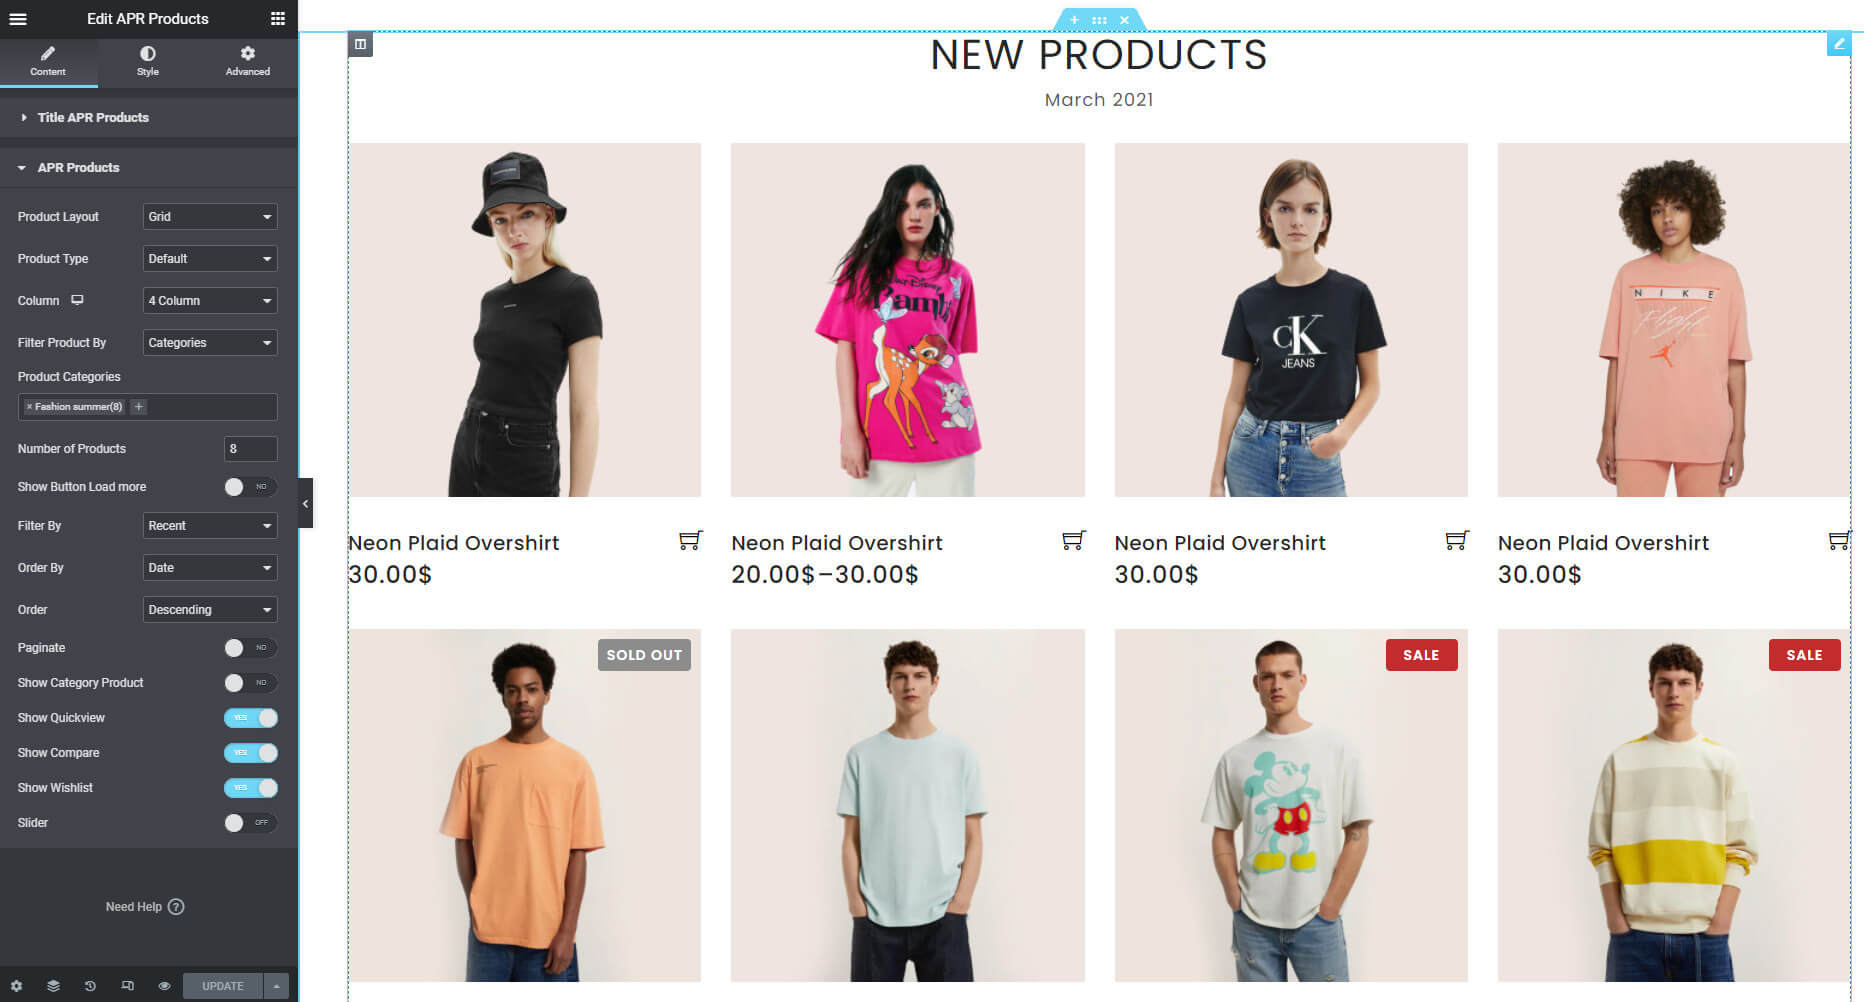
In our theme, we have an element called " APR Products " for setting product displayed in homepage, please click to add element --> then choose "APR Products".
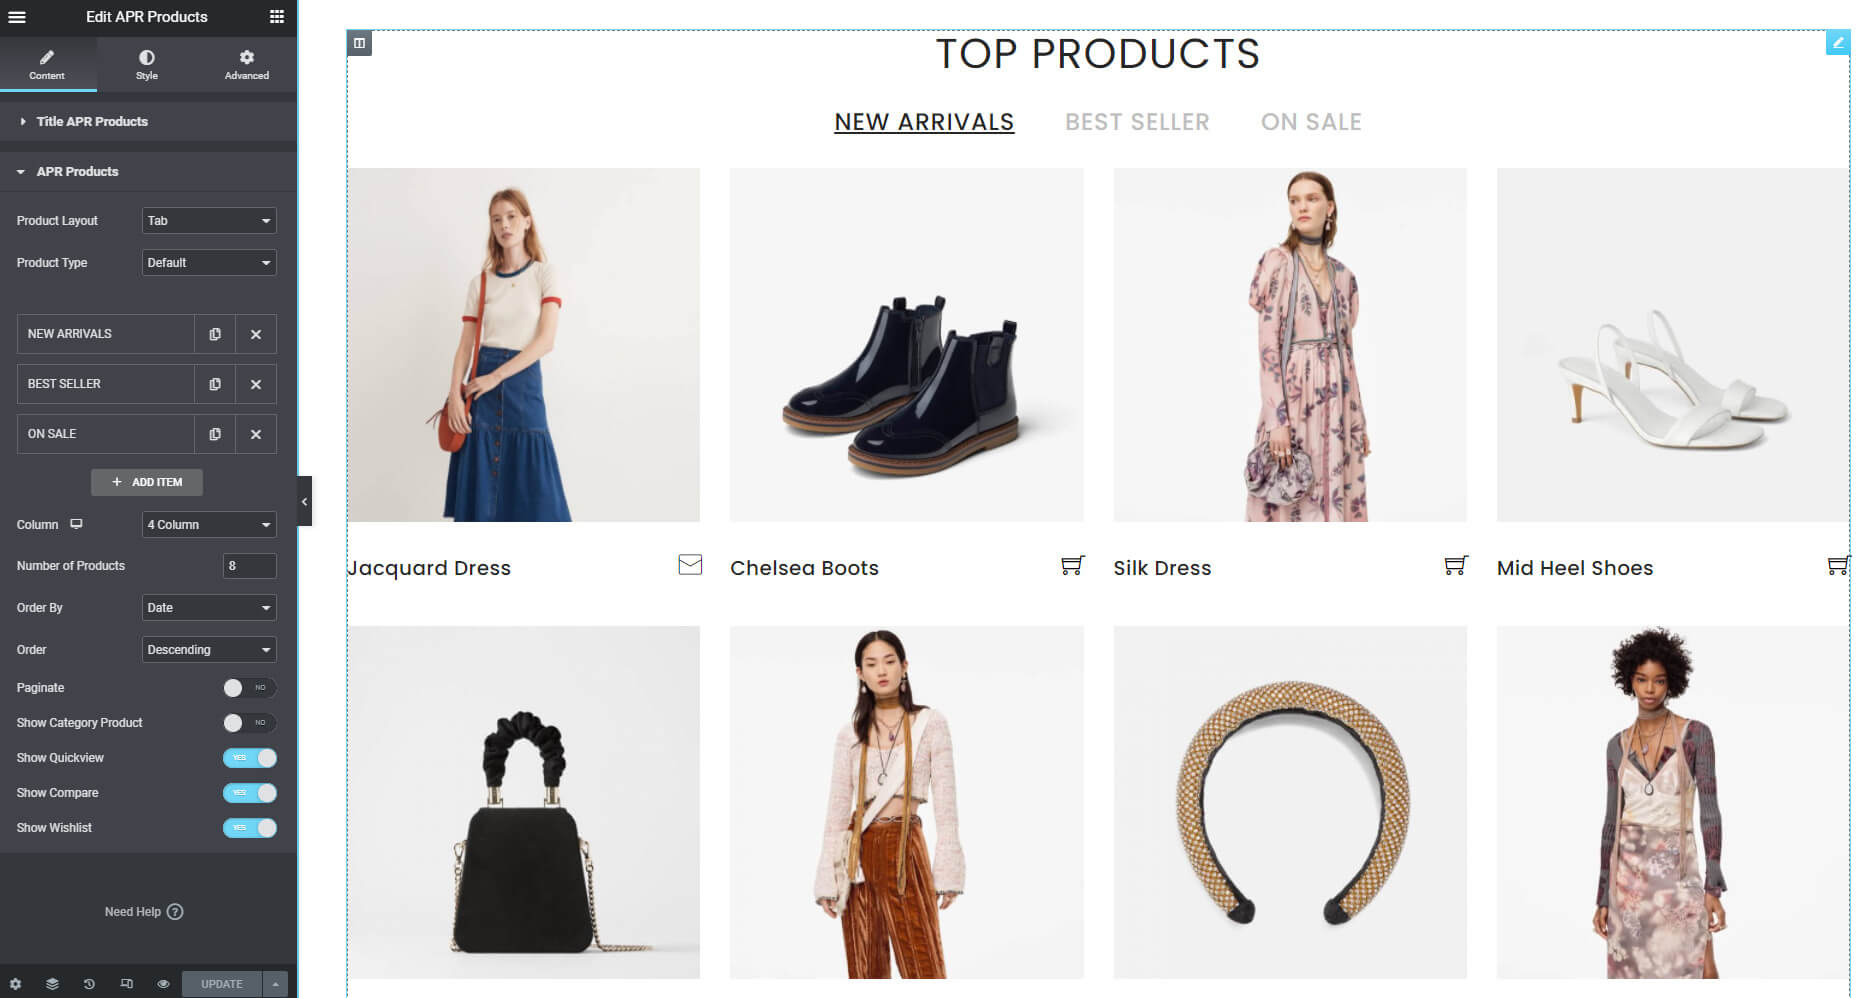
In our theme, we have an element called "APR Tab " for setting product displayed in homepage, please click to add element --> then choose "APR Tabs".
3.4 Set Up Template
Step 1 - From admin Dashboard, navigate to Elementor > My templates
Step 2 - Click to Add New popup to require add new template to display, please name your template and click Create Template
Step 3 - Using Elementor backend editor Cecile then add element to your Template
Step 4 - Drag or drop element that you want to build your template style with unlimited layout
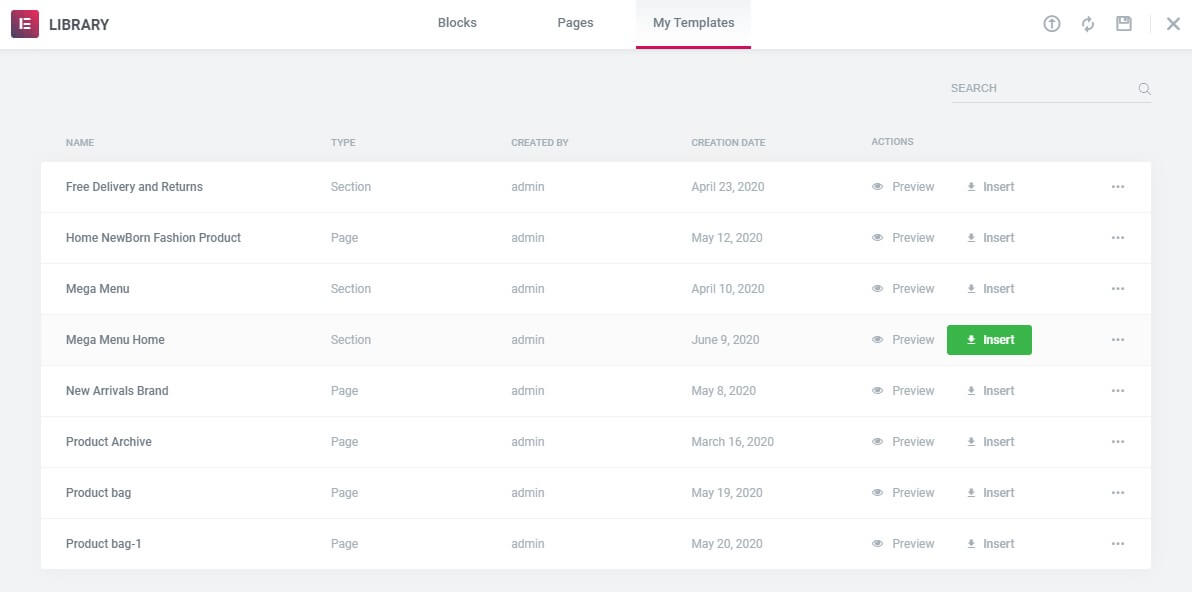
Step 5 - You can insert the template available by clicking icon Add Template

Step 6 - Choose tab My Template and you can add template that has created to page.
3.5 Set Up Blog Page
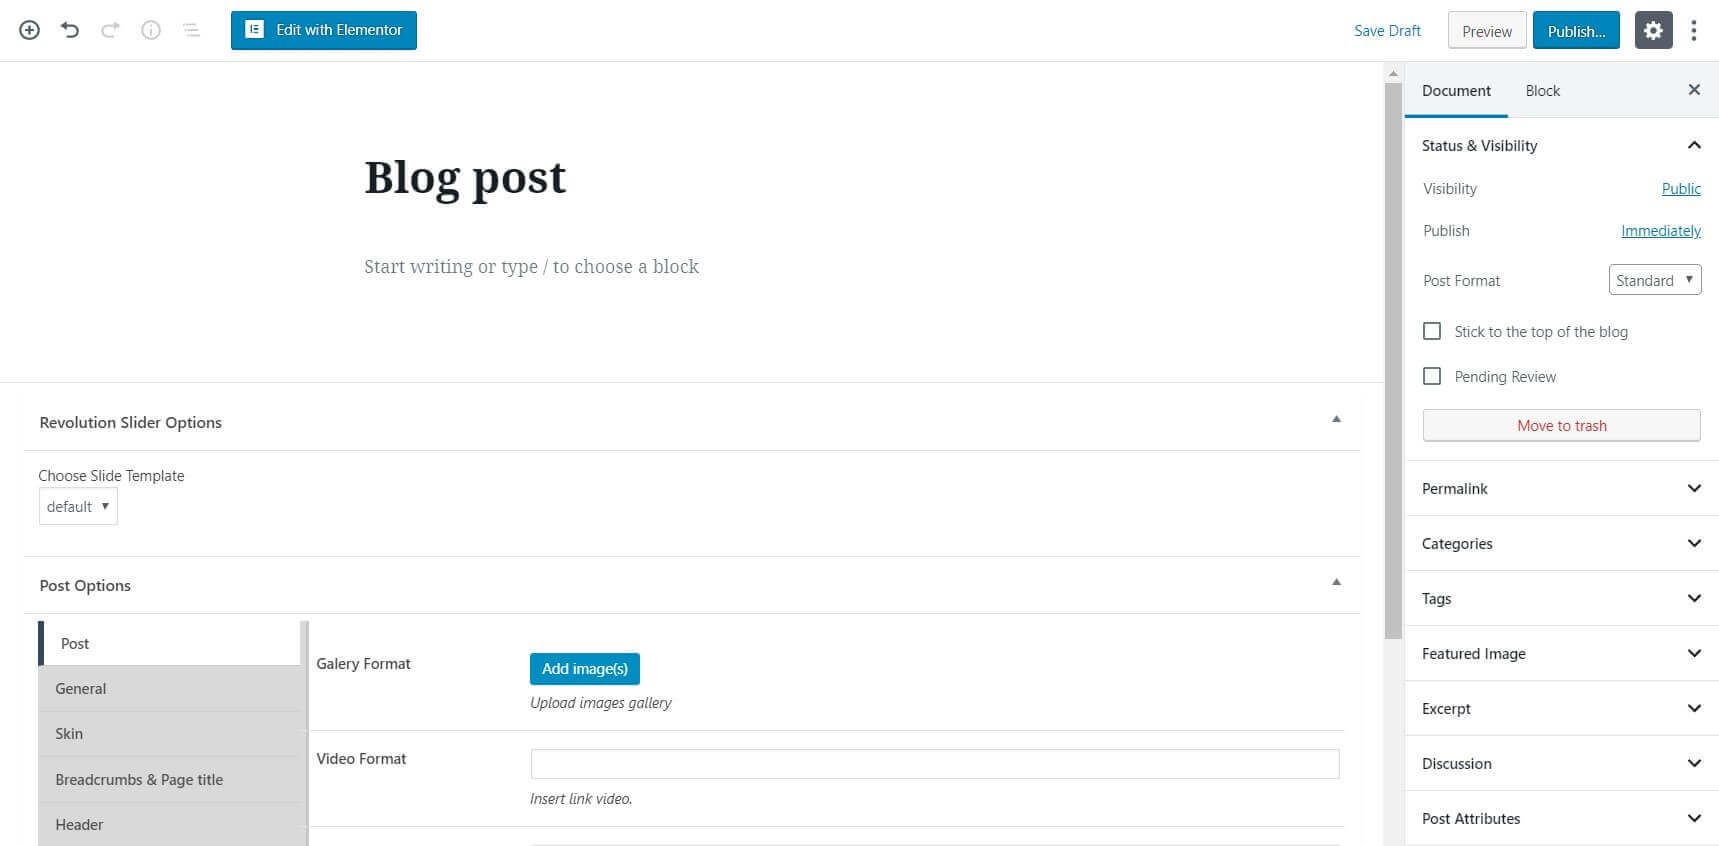
3.5.1 Create the blog post
Step 1 - Log in to your WordPress Administration Panel (Dashboard).
Step 2 - Click the 'Posts' tab.
Step 3 - Click the 'Add New' sub-tab.
Step 4 - Start filling in the blanks: enter your post title in the upper field , you can add content of post by using elementor to create.
Step 5 - As needed, select a category, add tags, fill in the meta setings below the editor.
Step 6 - Upload a featured image for your Post.
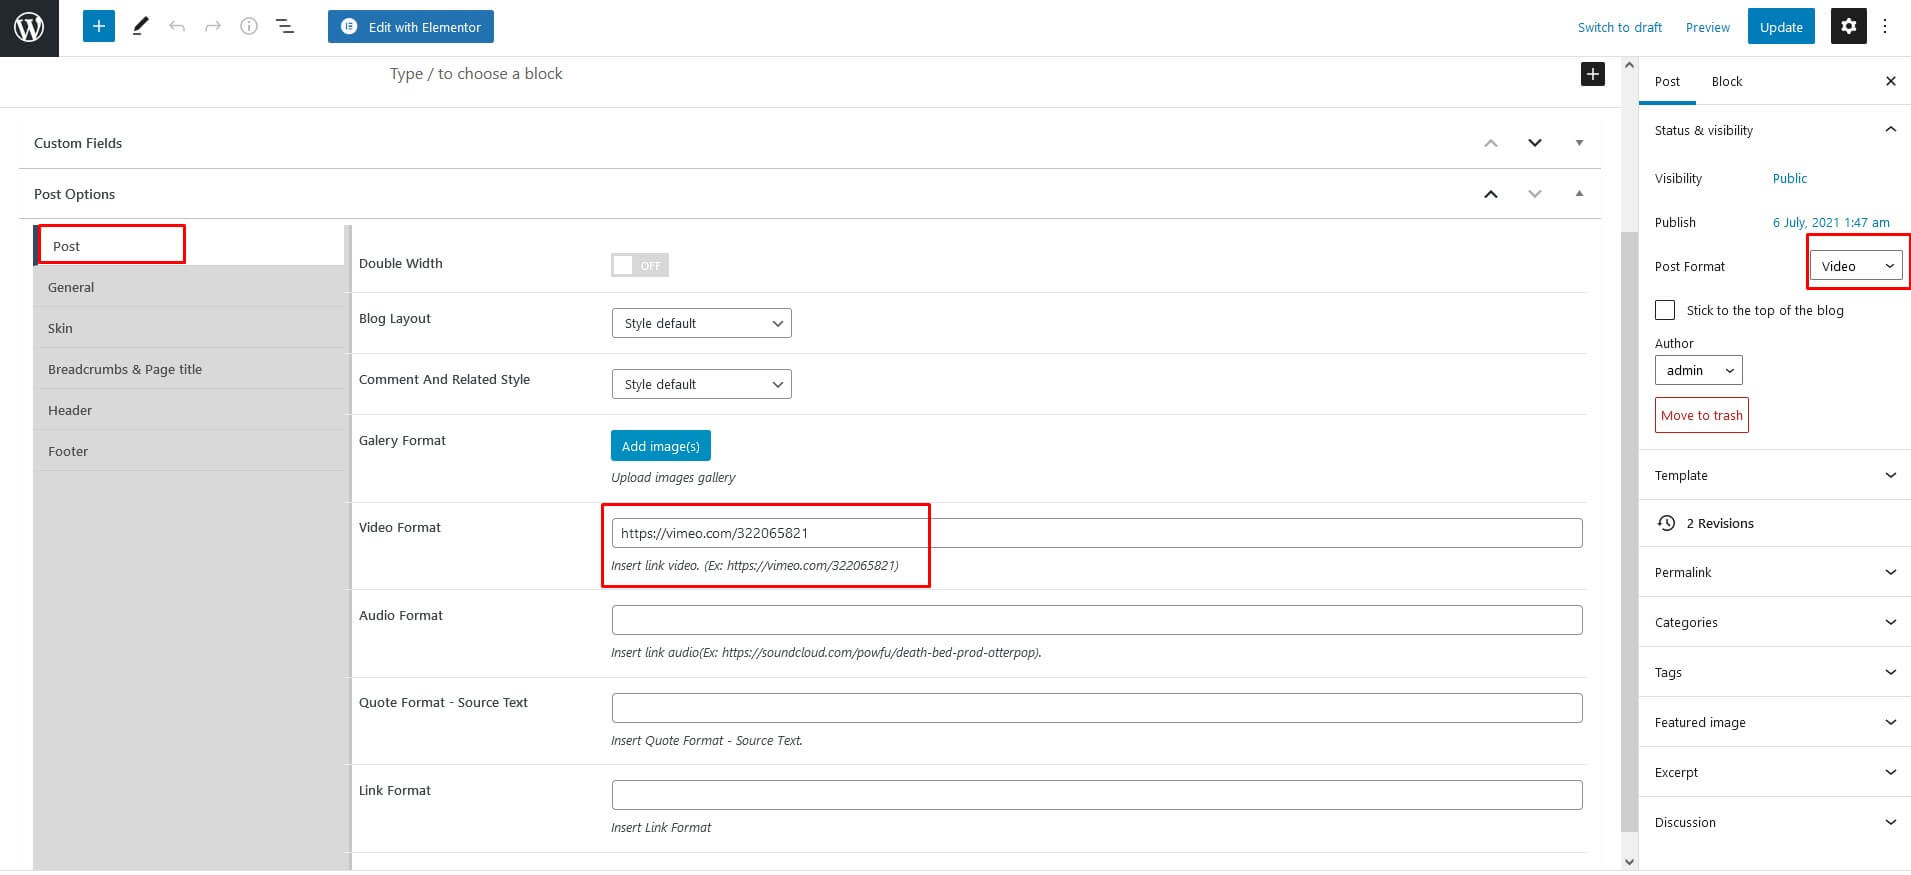
Step 7 - Select Post Format and enter suitable content for post format in Post Format box. You can create blog post with a lot of Formats like link, gallery, image ..... Select format on Format box from in right sidebar .
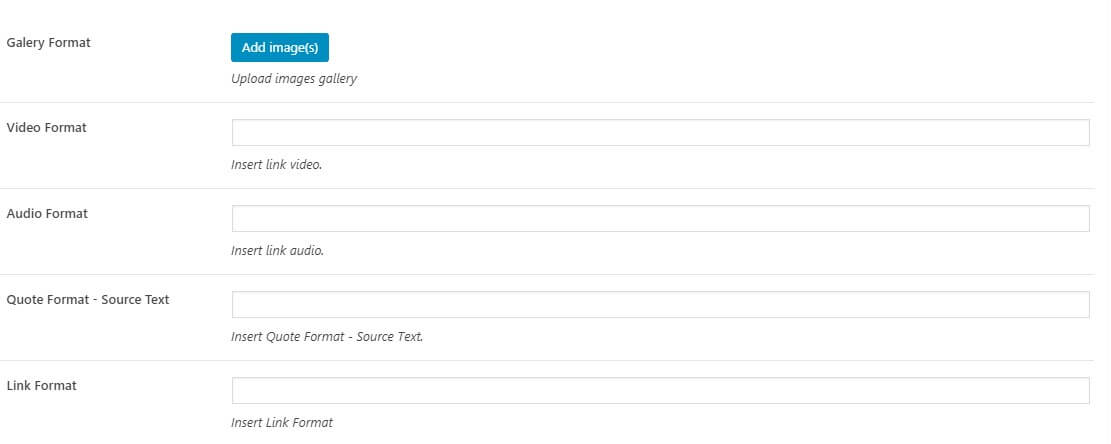
- Video and audio format: you will need to enter embed link of youtube, vimeo or soundcloud or paste the iFrame embed from either Youtube or Vimeo into the Video Embed Code field in Video & Audio Embed Code.
- Project format: If you choose Project format, you will see Image Project box displayss in the right of page. Image in project will be shown as slider.
- Blockquote format: If you choose Blockquote format, you will need enter quote text
- Link format: For Link format, you will need enter title and link
Step 9 - When your post is ready, click Publish.
3.5.2 Manager current all blogs
Navigate to Posts → All Posts
You can see all informations of you blog post, add new, edit or delete them.
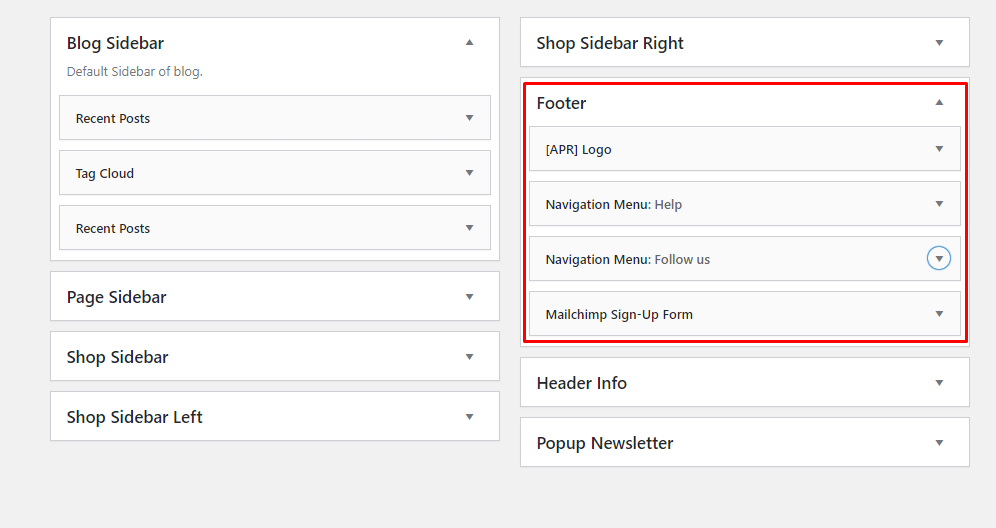
3.6 Set Up Widgets
Step 1 - From admin Dashboard, navigate to Footer > Add New Footer
Step 2 - Using Elementor backend editor Cecile then add element to your Footer
Step 3 - Build your footer style with unlimited layout
Step 4 - Drag or drop element to create footer.
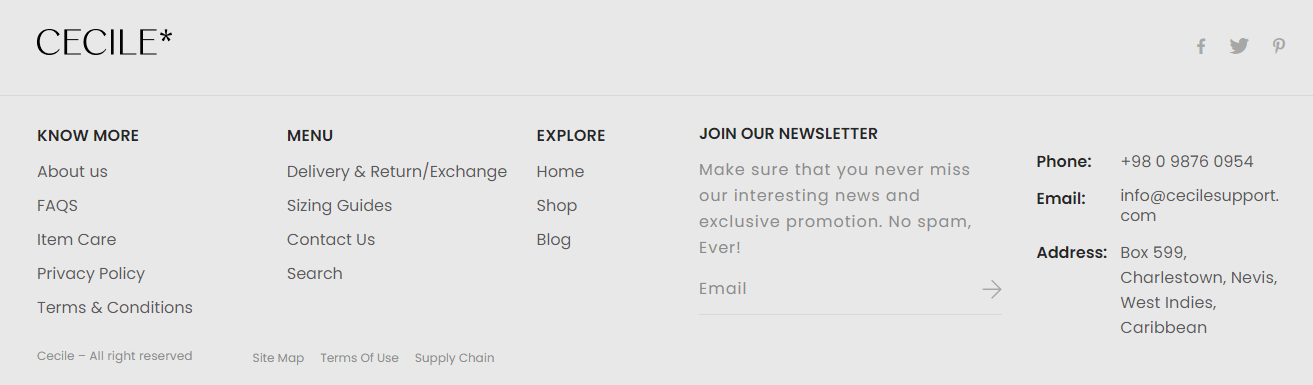
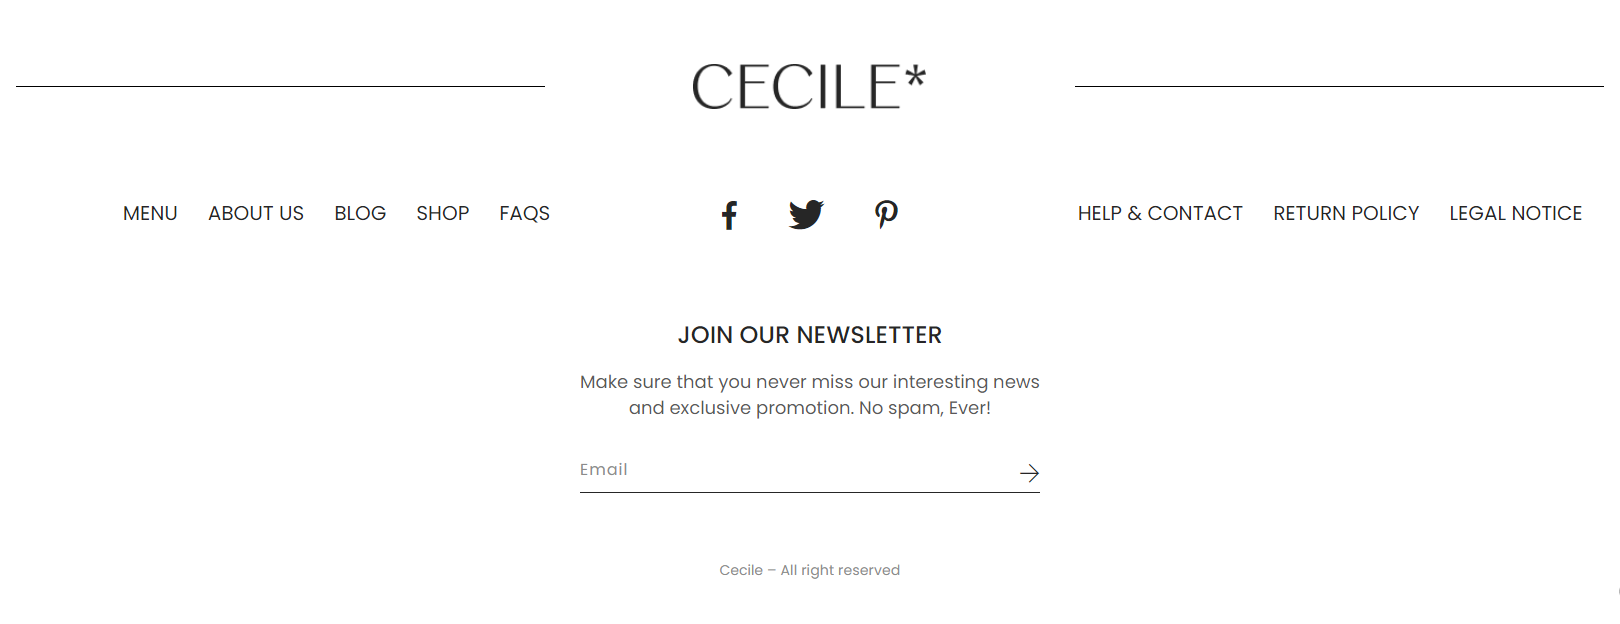
Footer default.
Change Content footer default
Go to Appeareance > Widget, you can find footer sidebar for each footer.
Front end look like :
After you create your footer elements. Navigate to Dashboard ->> Homepage and scrolldown until you see Page setting ->> choose Footer and choose footer that you want to use.
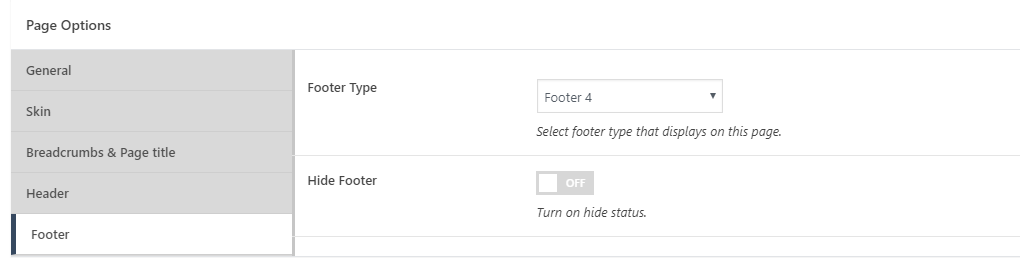
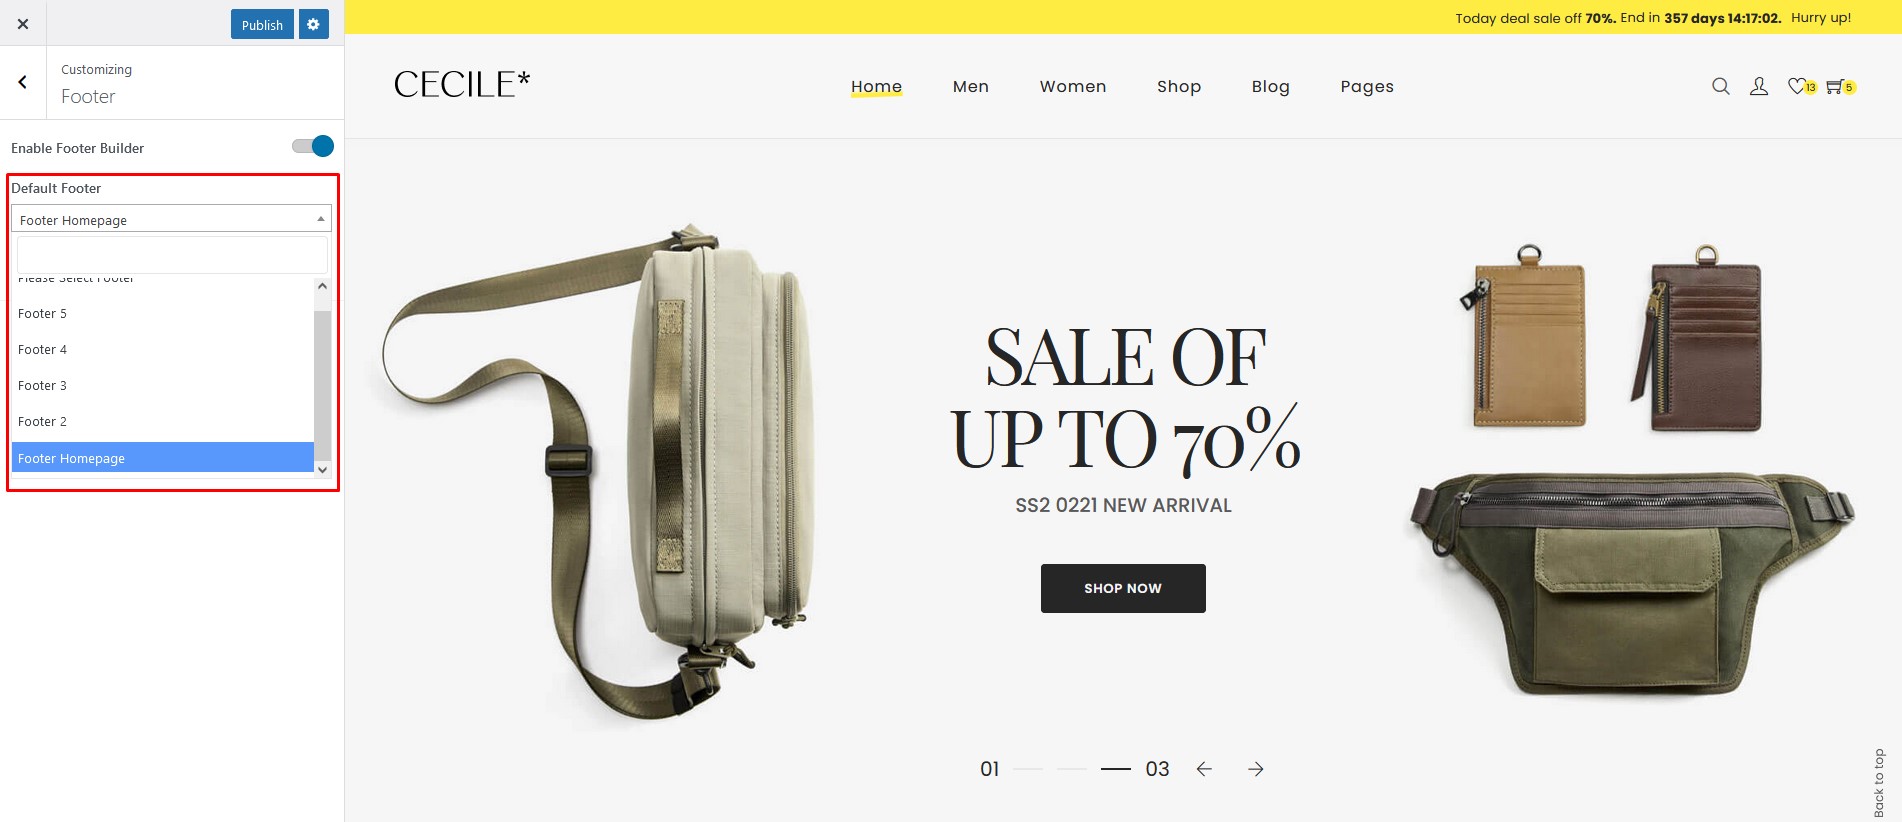
Or you can choose footer in Customizer. Navigate to : Apperance > Customize > Footer.
Choose your footer for page.
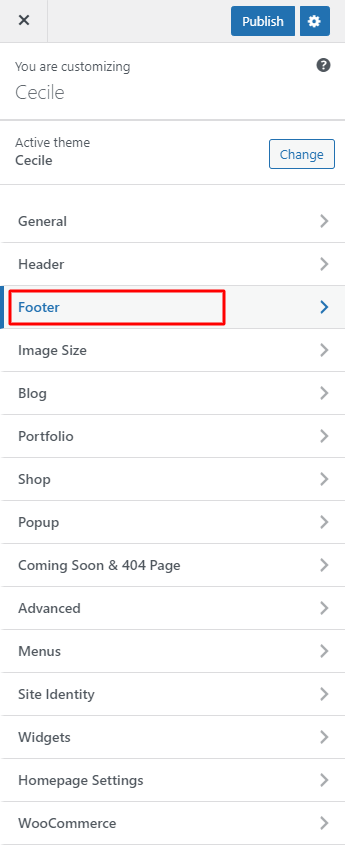
Cecile has 6 footer styles.
Footer 1
3.7 Woocommerce Set Up
3.7.1 Plugin Advanced AJAX Product Filters
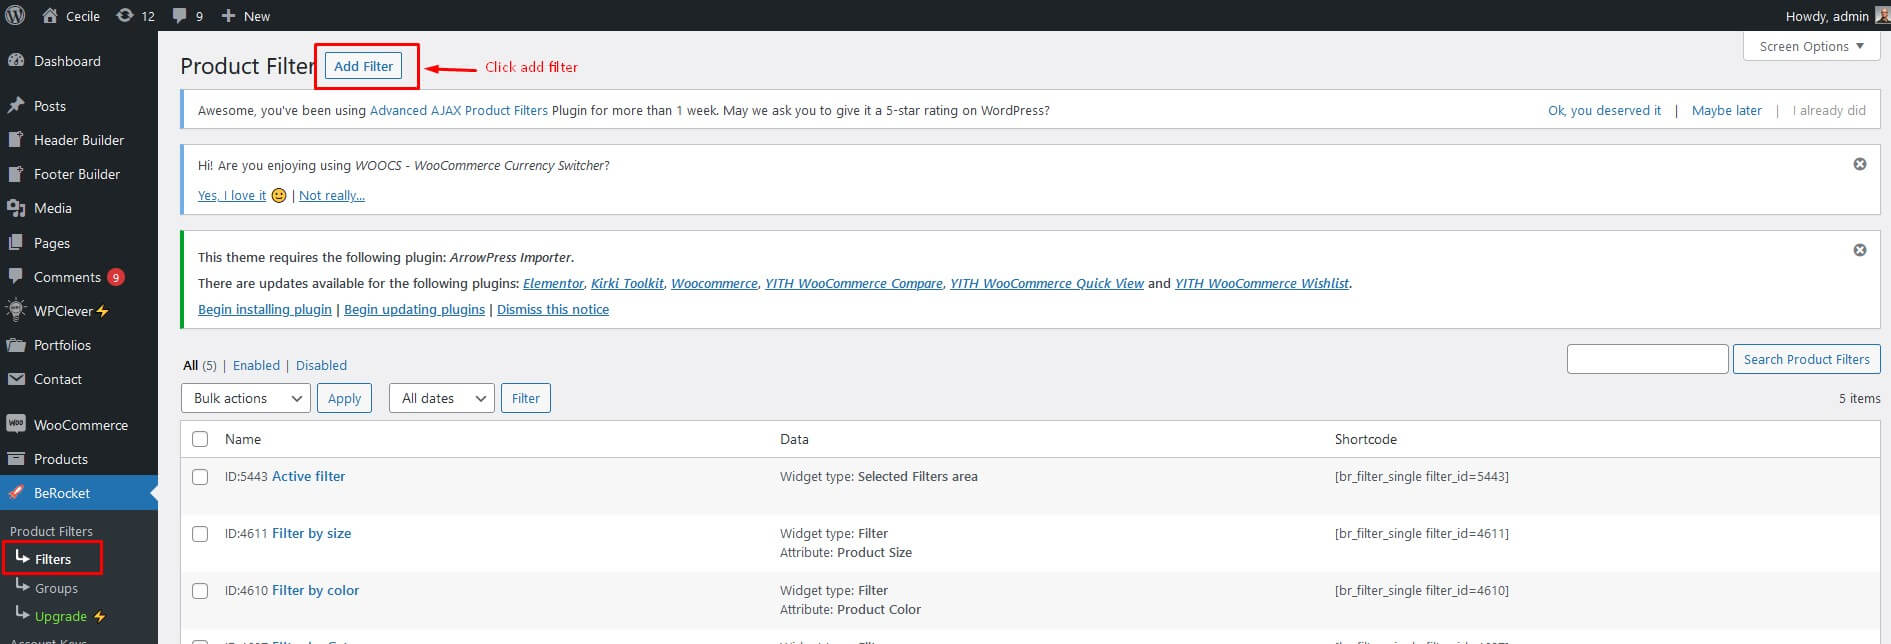
Go to BeRocket > Product Filters to access general setting of BeRocket
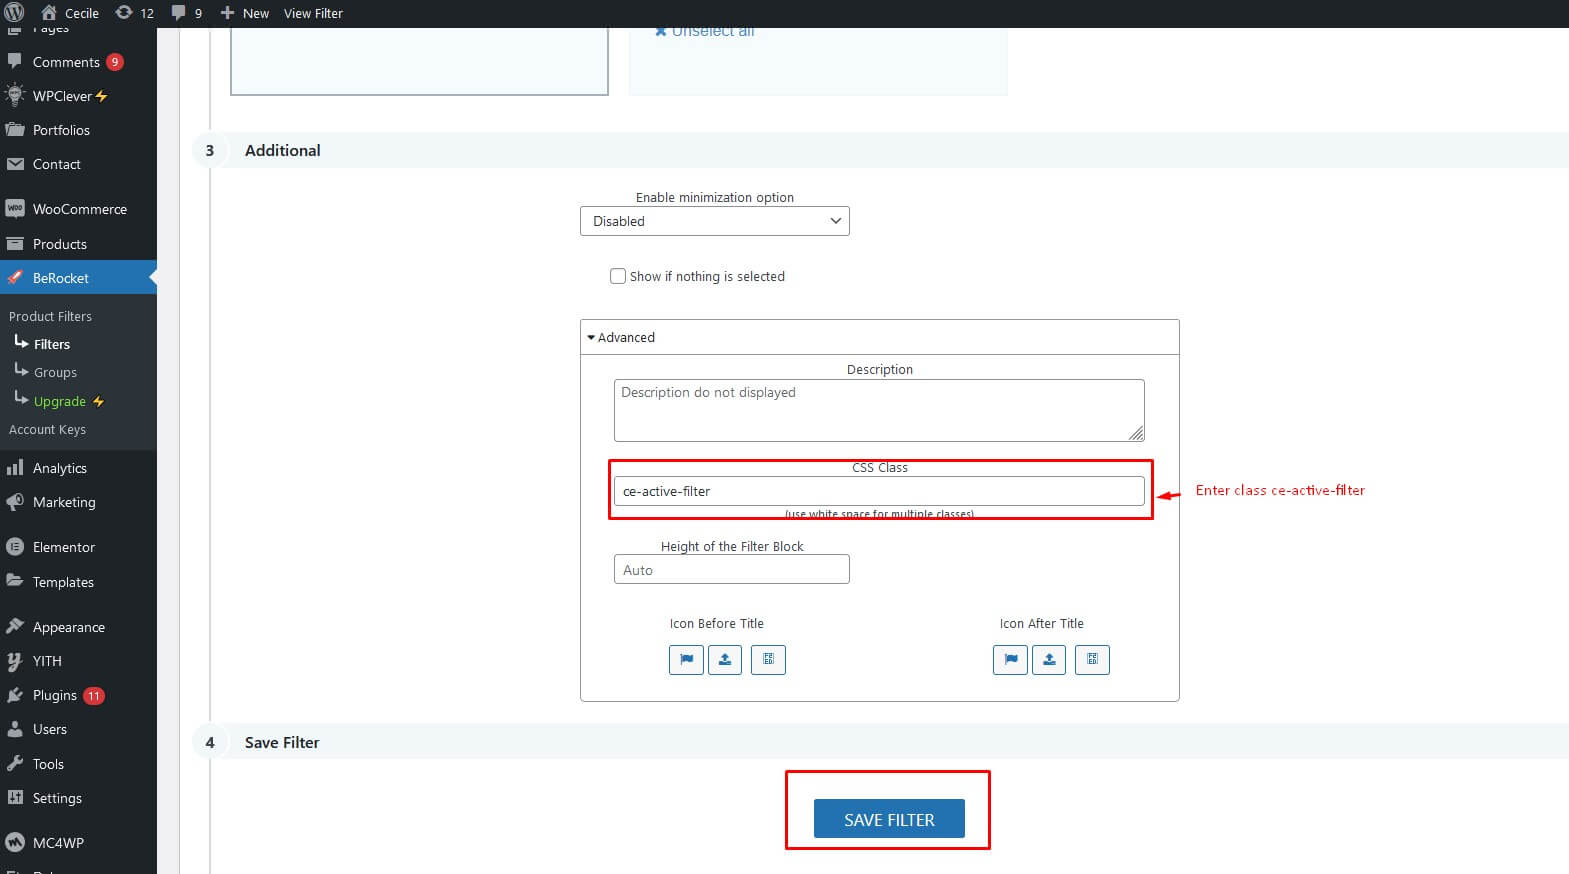
- Create Active filter
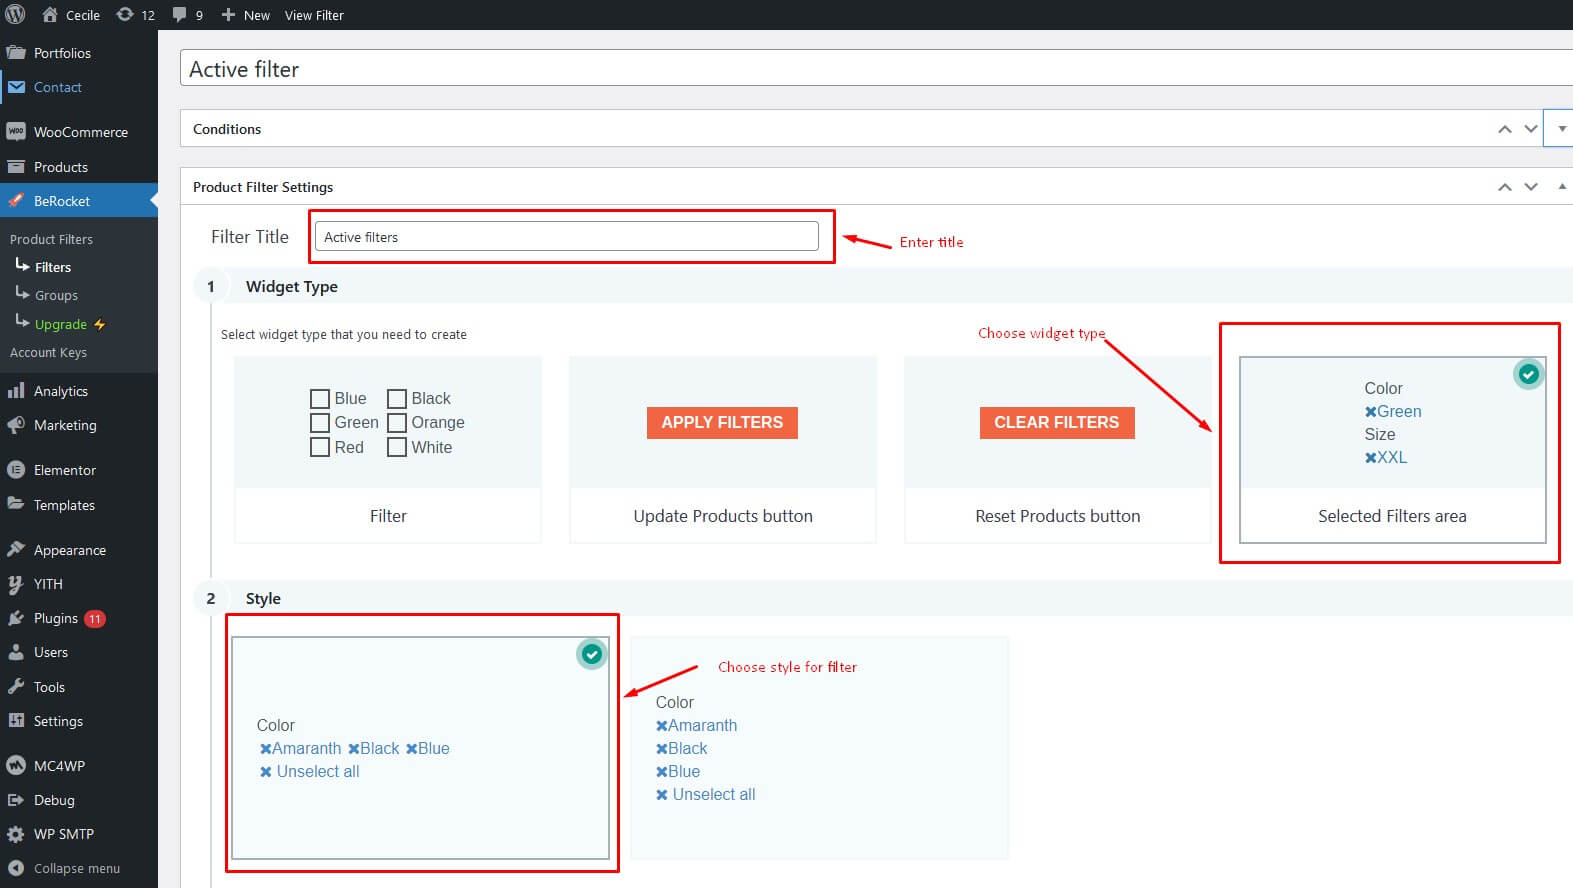
You need click Add Filter -> Enter title for filter
Then you need choose widget type, choose style for filter and advanced add class ce-active-filter -> Save change
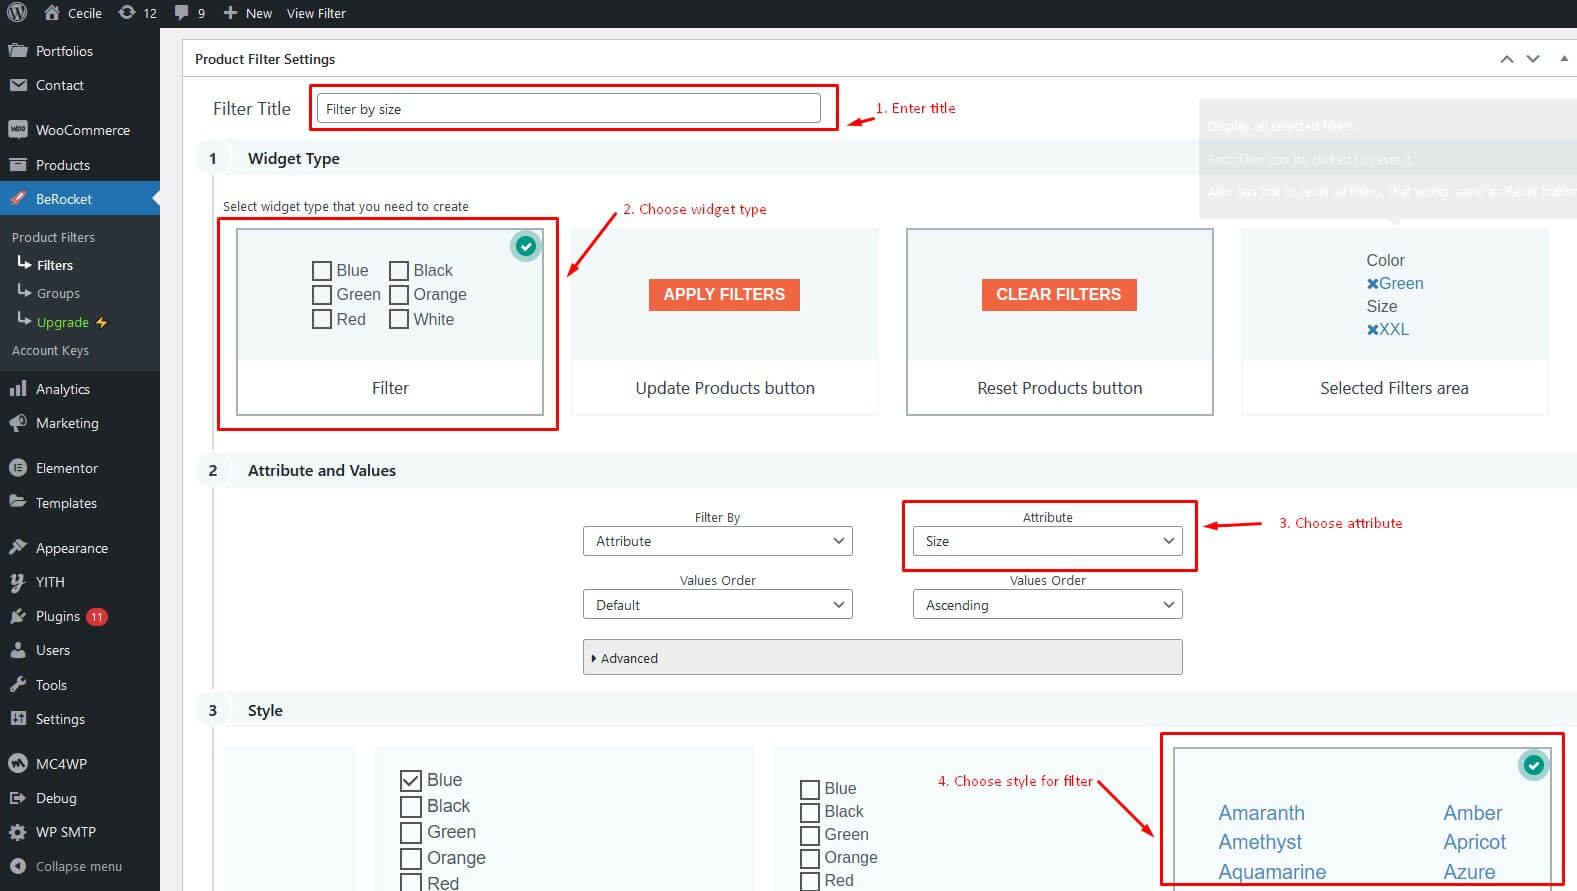
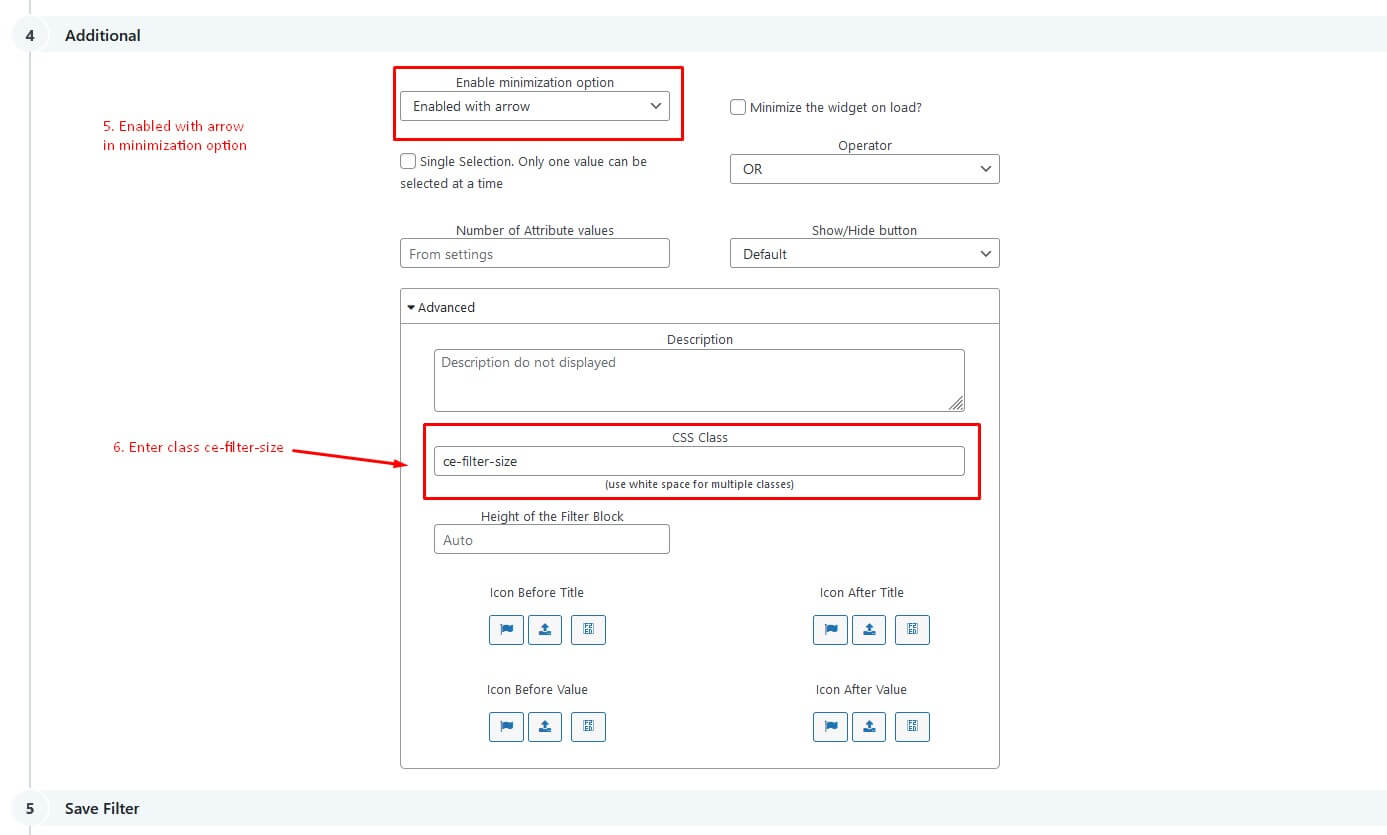
- Create Filter by size
You need click Add Filter -> Enter title for filter
Then you need choose widget type, choose style for filter and advanced add class ce-filter-size -> Save change
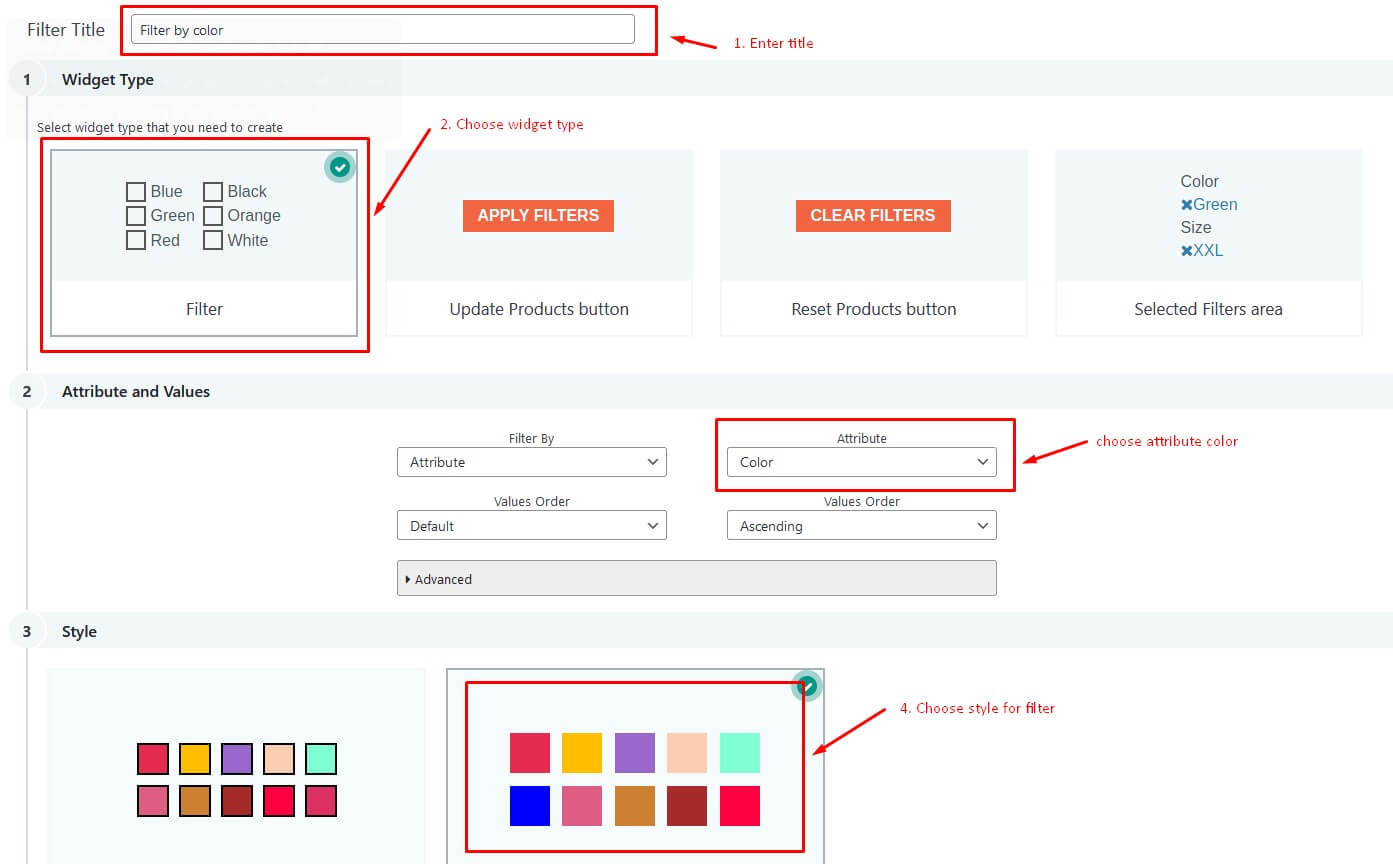
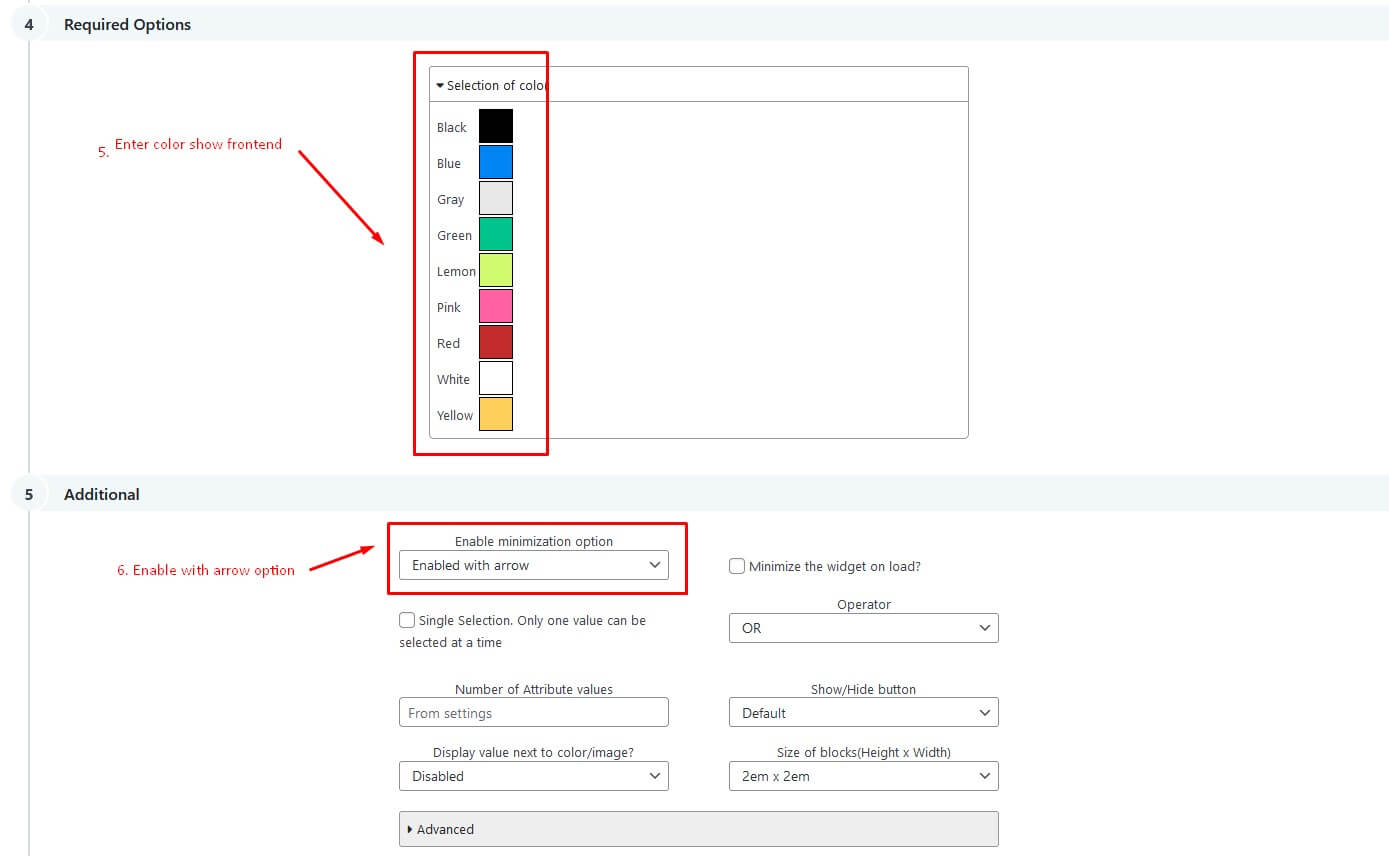
- Create Filter by color
You need click Add Filter -> Enter title for filter
Then you need choose widget type, choose style for filter and advanced -> Save change
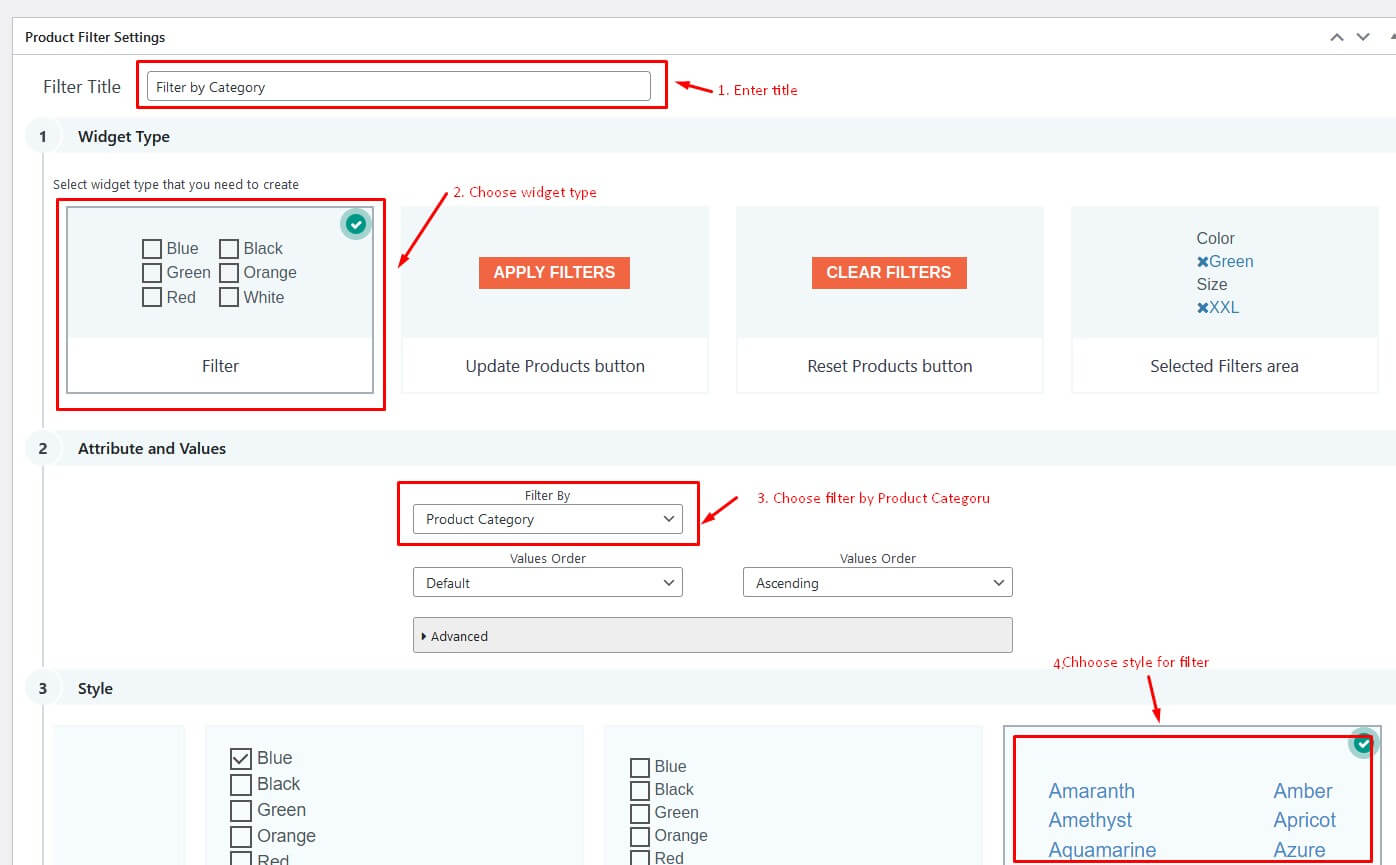
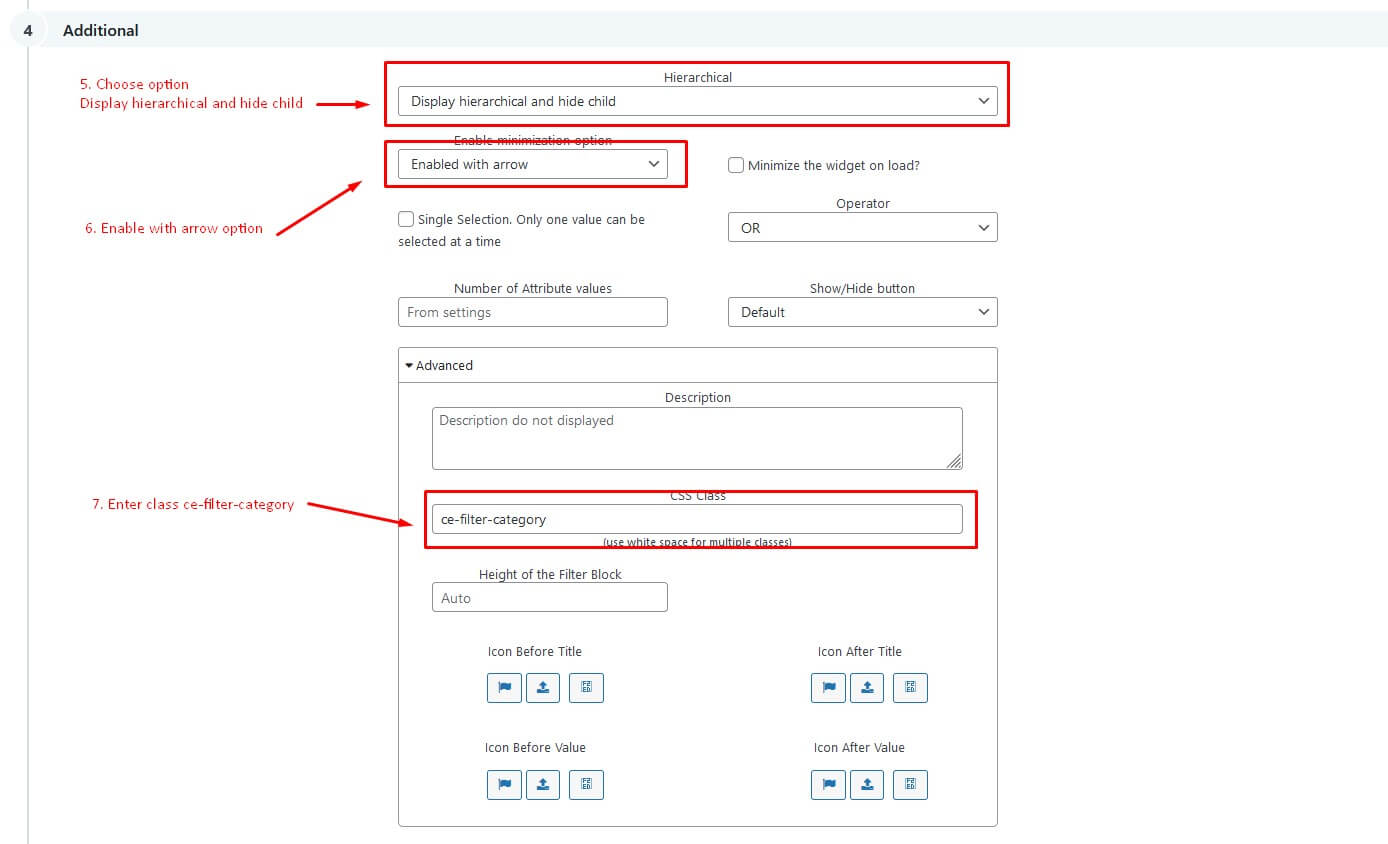
- Create Filter by category
You need click Add Filter -> Enter title for filter
Then you need choose widget type, choose style for filter and advanced add class ce-filter-category -> Save change
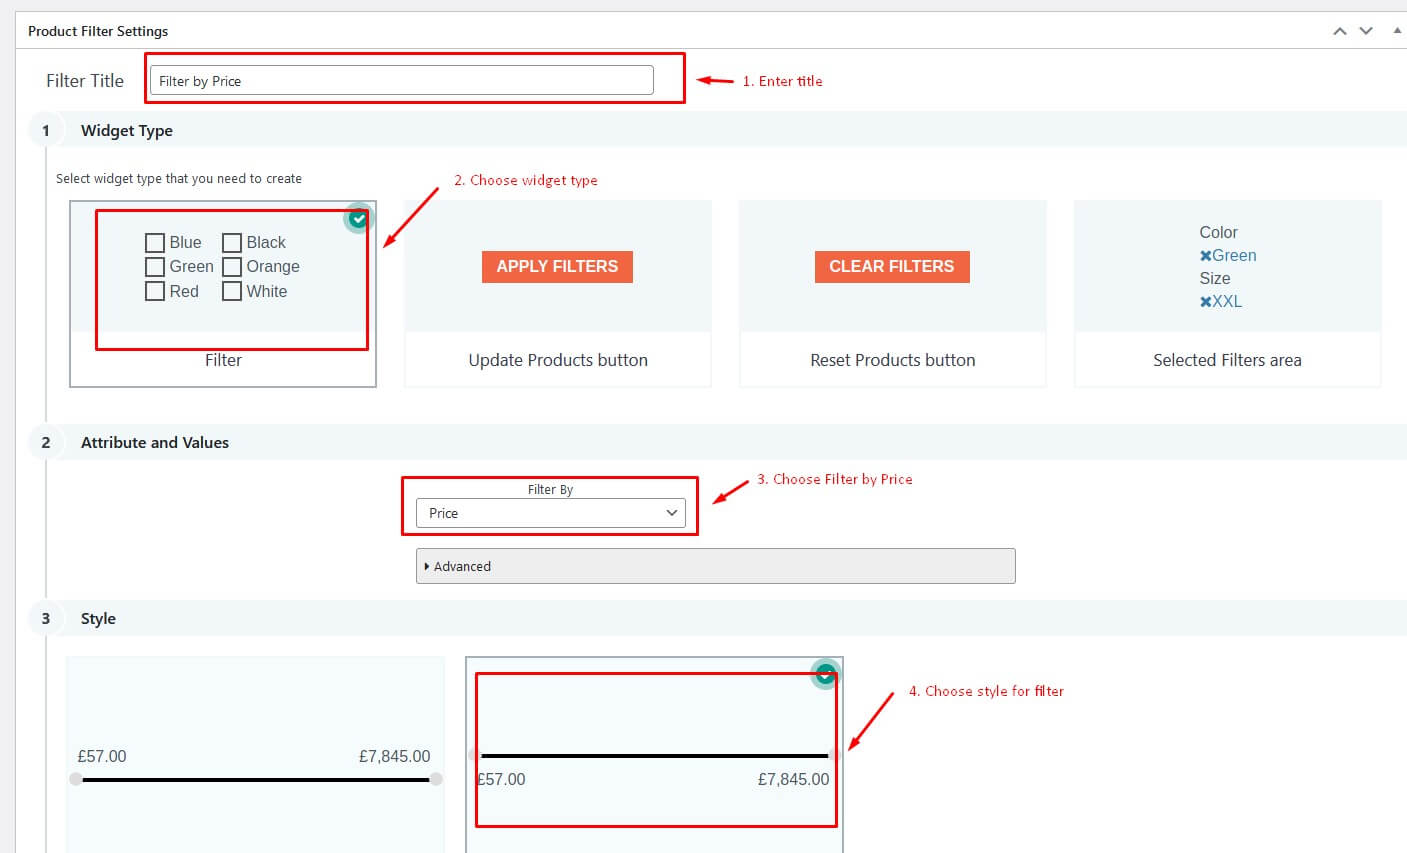
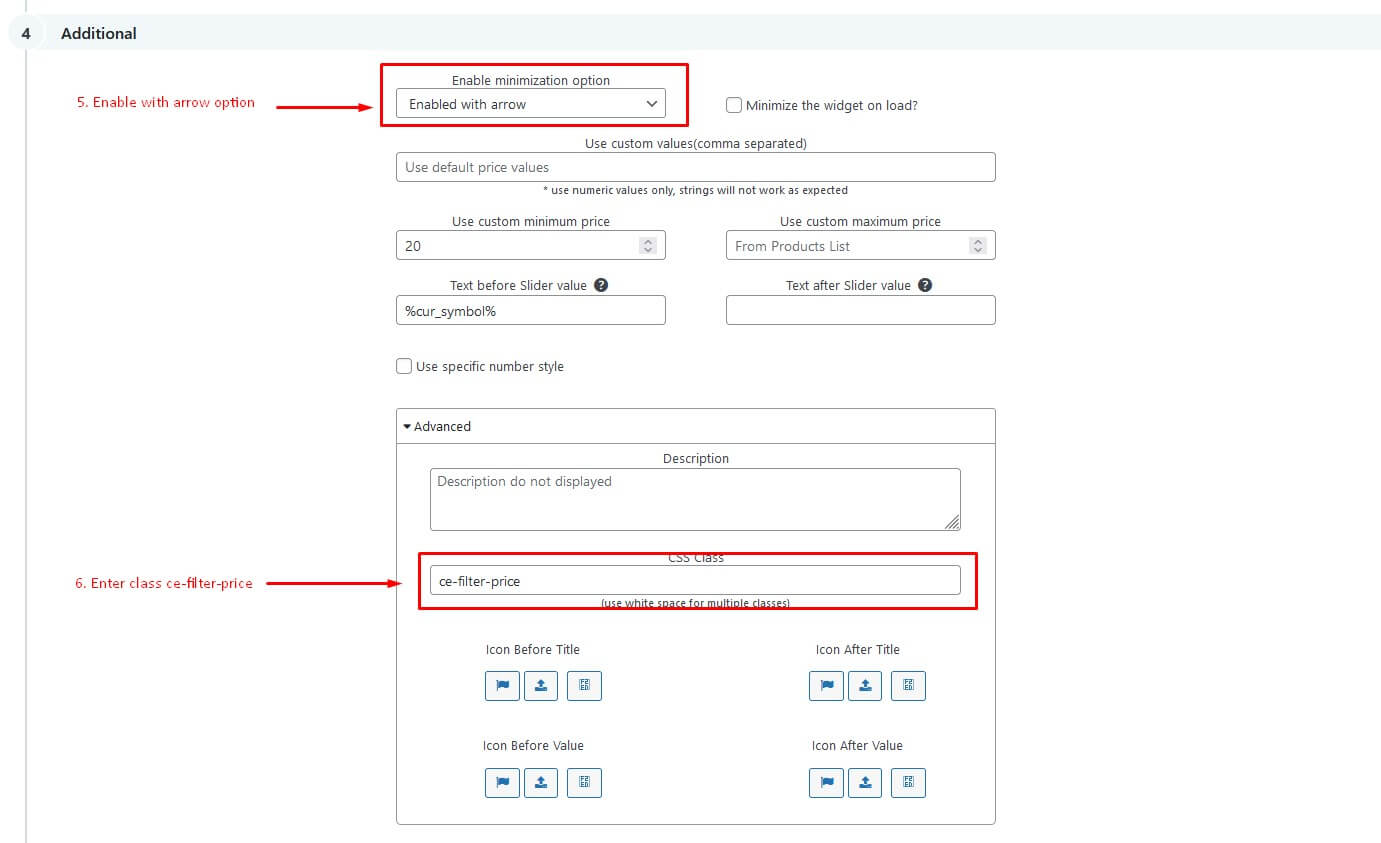
- Create Filter by price
You need click Add Filter -> Enter title for filter
Then you need choose widget type, choose style for filter and advanced add class ce-filter-price -> Save change
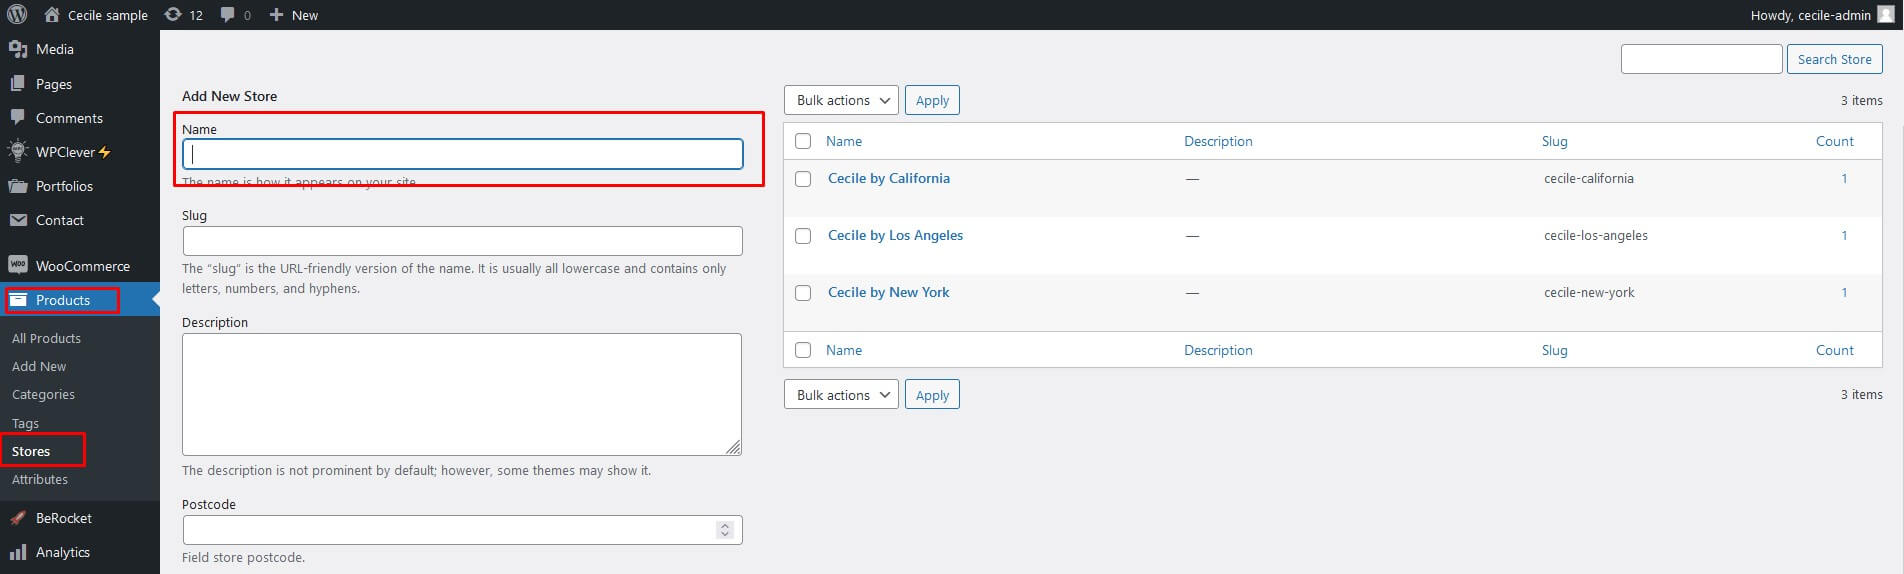
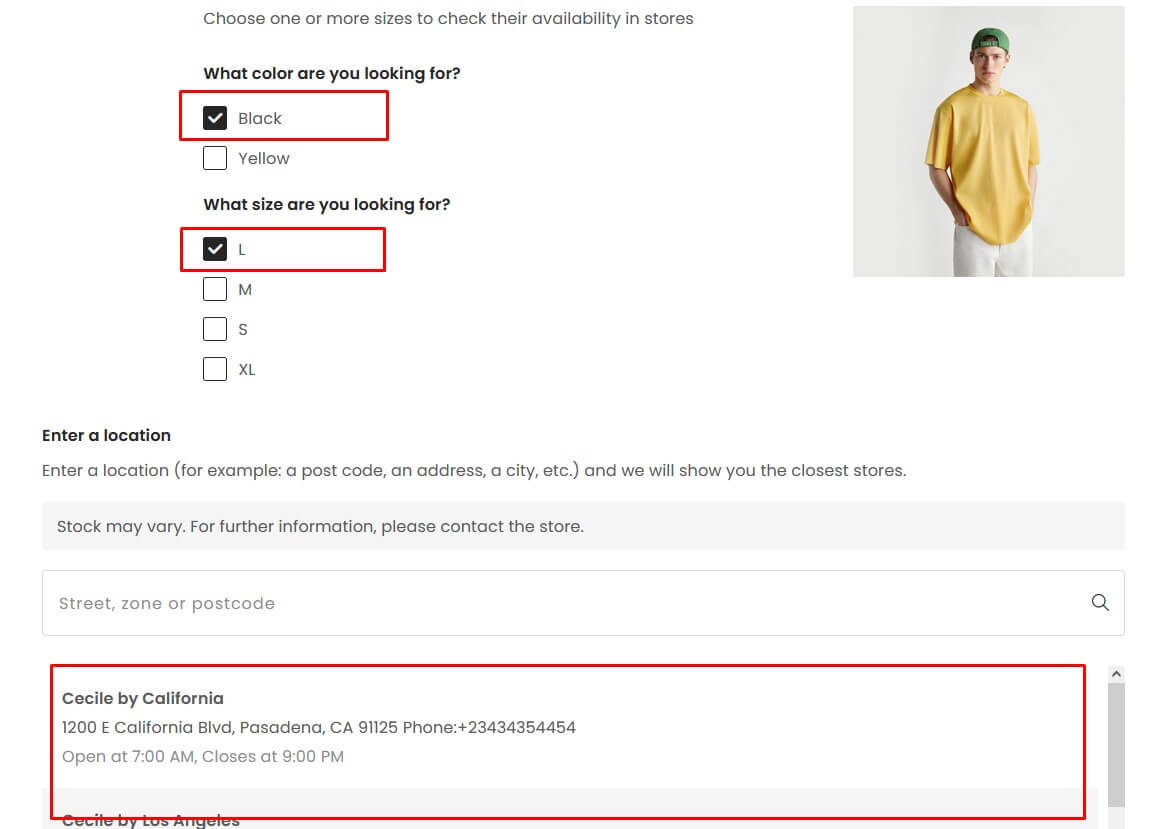
3.7.2 Check in-store availability
If your store has more than one store. You need go to Products -> Stores -> Create store for shop
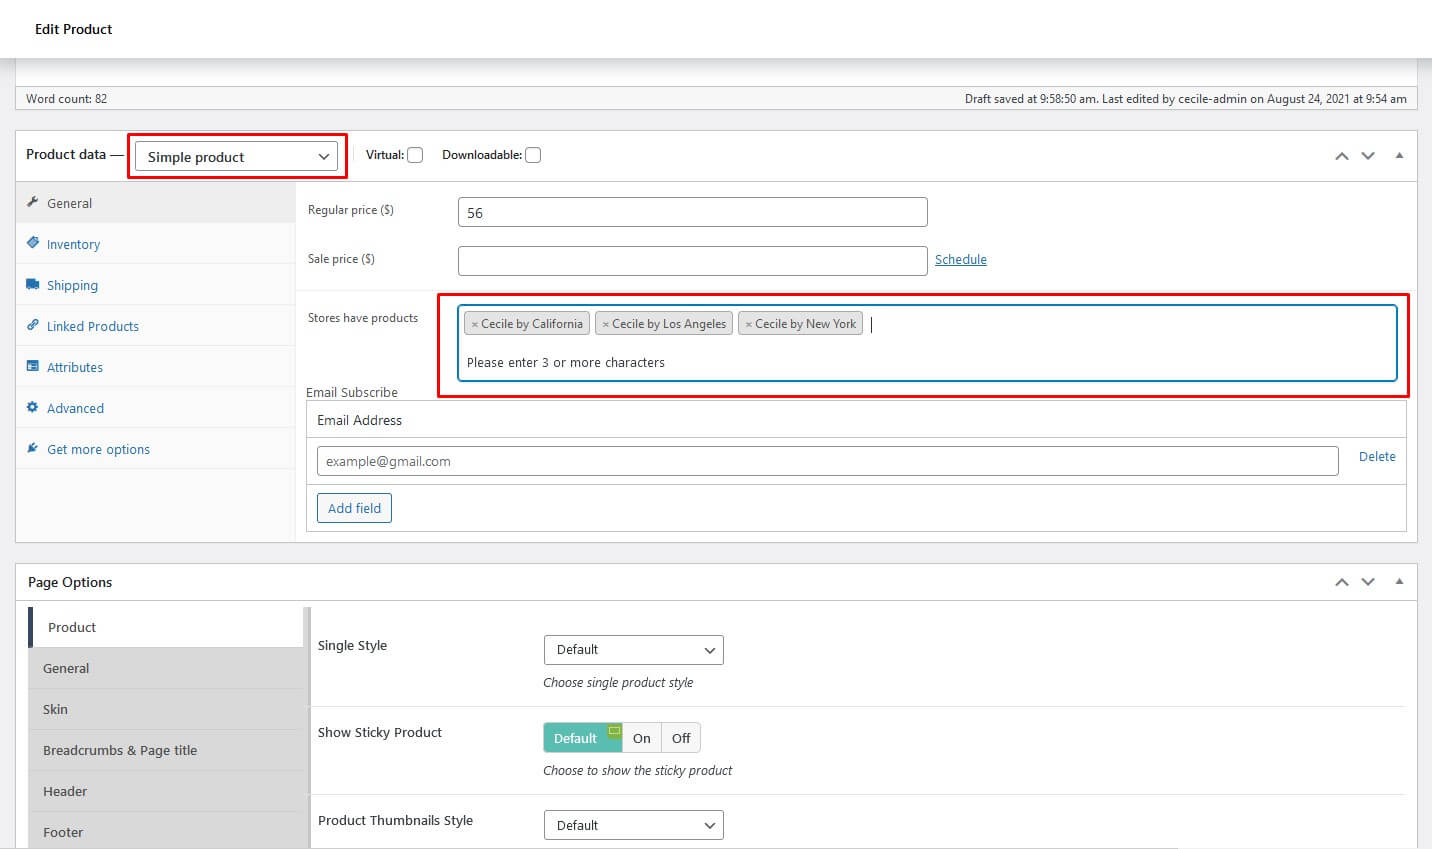
With a Simple product, you can go to Edit Product -> In tab General -> Enter store for your product if stocks are available -> Save.
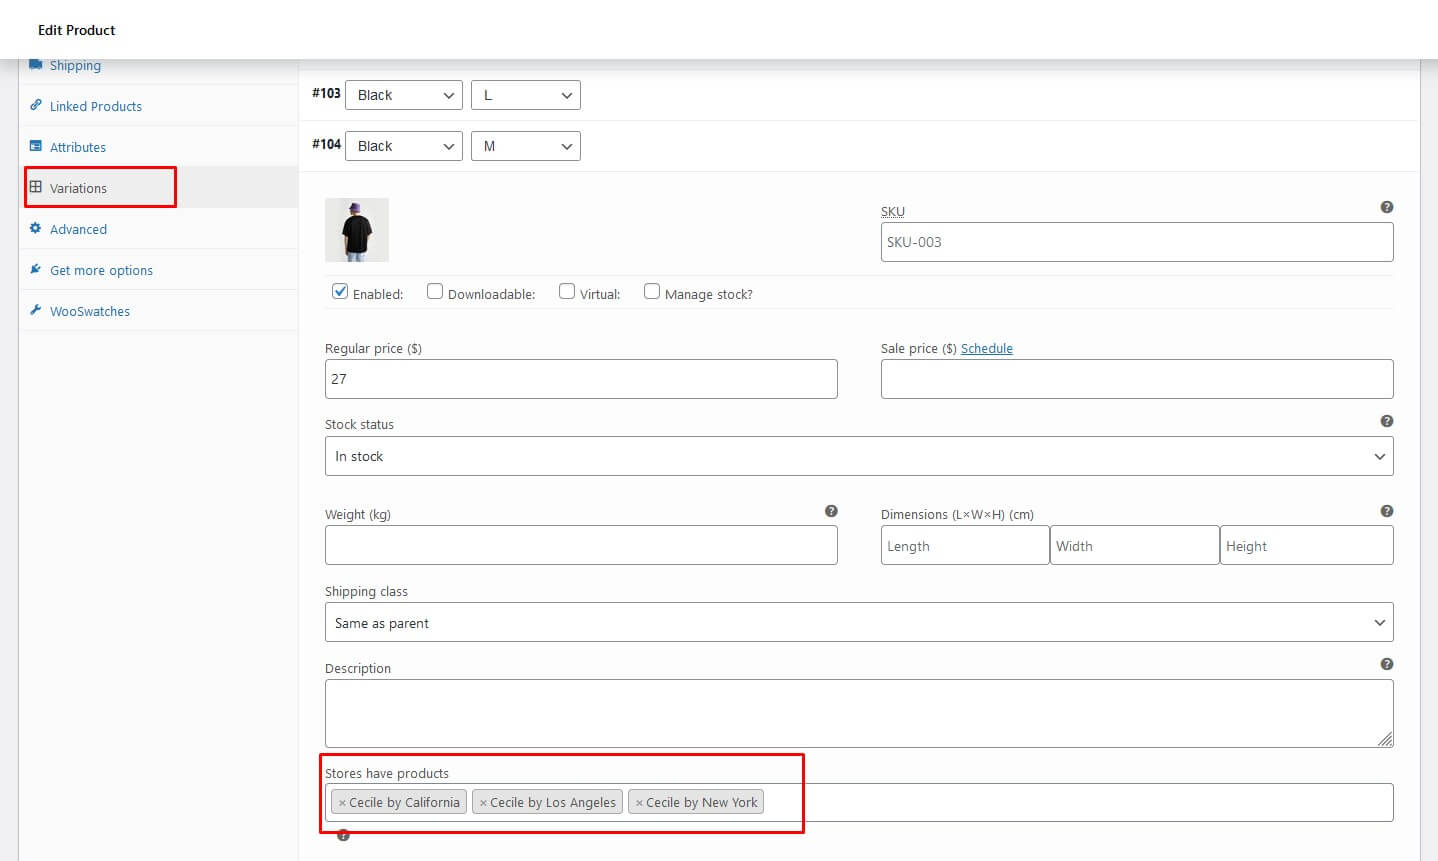
With a Variable product, you can go to Edit Product -> In tab Variations -> Click a variation -> Enter store for your product if stocks are available -> Save.
Frontend display results.
4. Theme Customization
Cecile Theme use Customizer provides an ultra effective and intuitive way to customize theme layout & setting with real-time preview. Bring all of settings to customizer, you do not need to using another theme option anymore
There are 2 ways to access theme options.
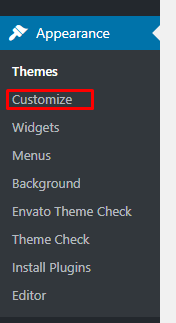
1) Click Cusomize link at the top of the page.

2) To access Customizer go to your admin Dashboard Navigate to Appearance >> Customize
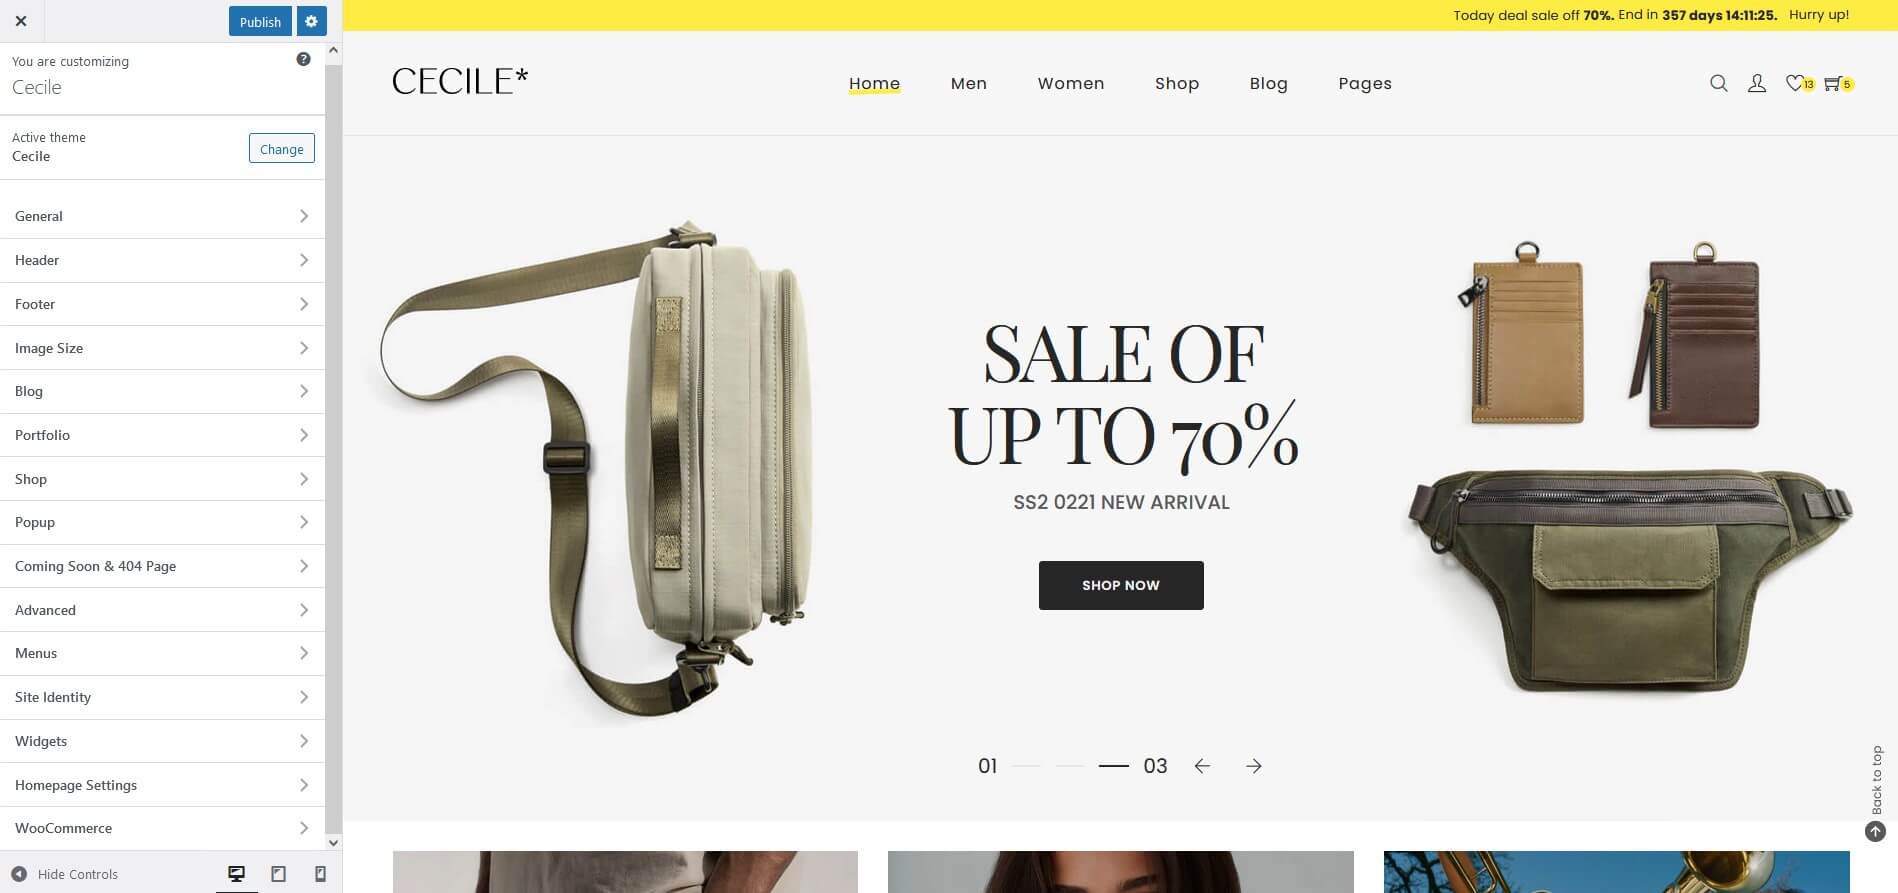
After that, you will see a logical tabbed section including a lot of tabs for you to discover. Below sections will go through each tab in detail for you
4.1 General
Customize General parts like layout, color, etc.
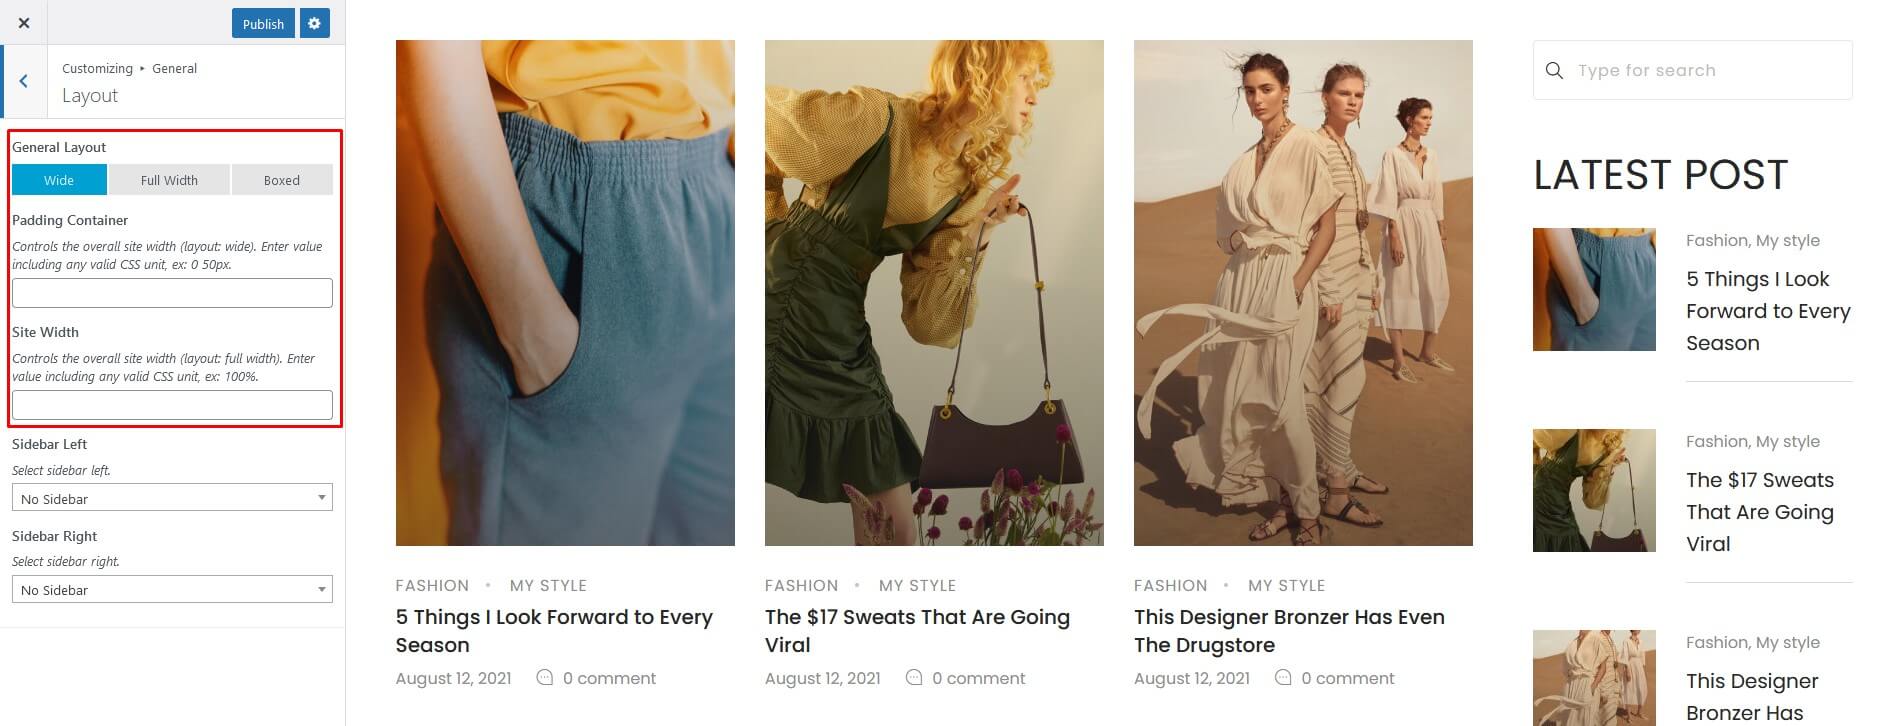
4.1.1 Layout
Settings General Layout / Site Width / Sidebar Left / Sidebar Right for Site.
4.1.2 Color
Change main color, background color and custom button color for Site.
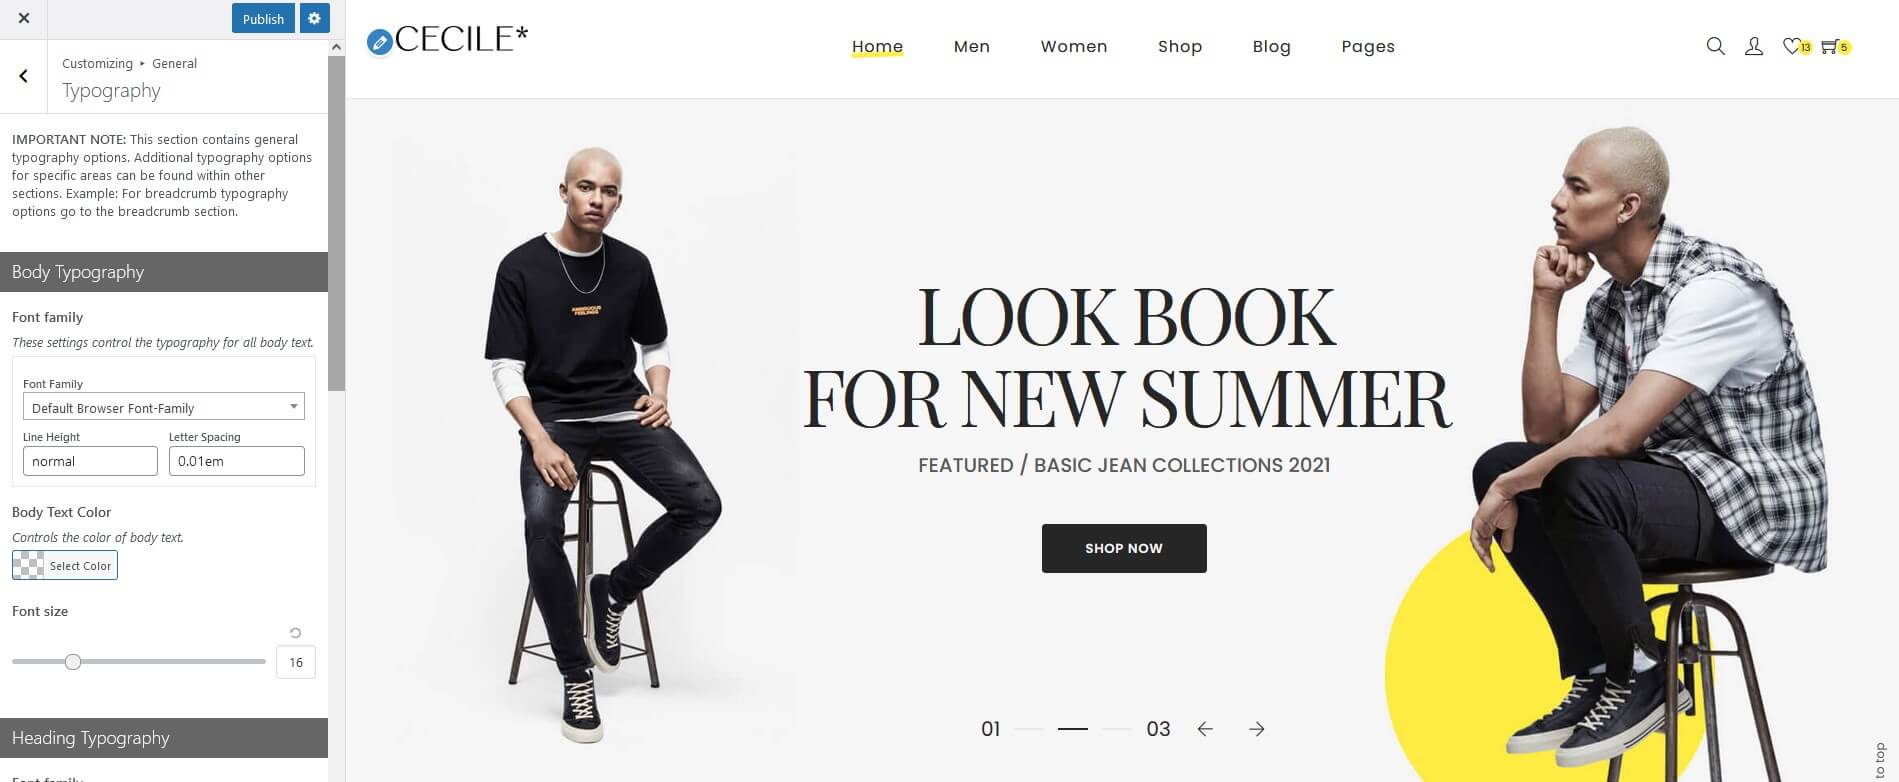
4.1.3 Typography
Change color, font-size, font family for the heading and text body for Site.
4.1.4 Preloader
Show / Hide Preloader

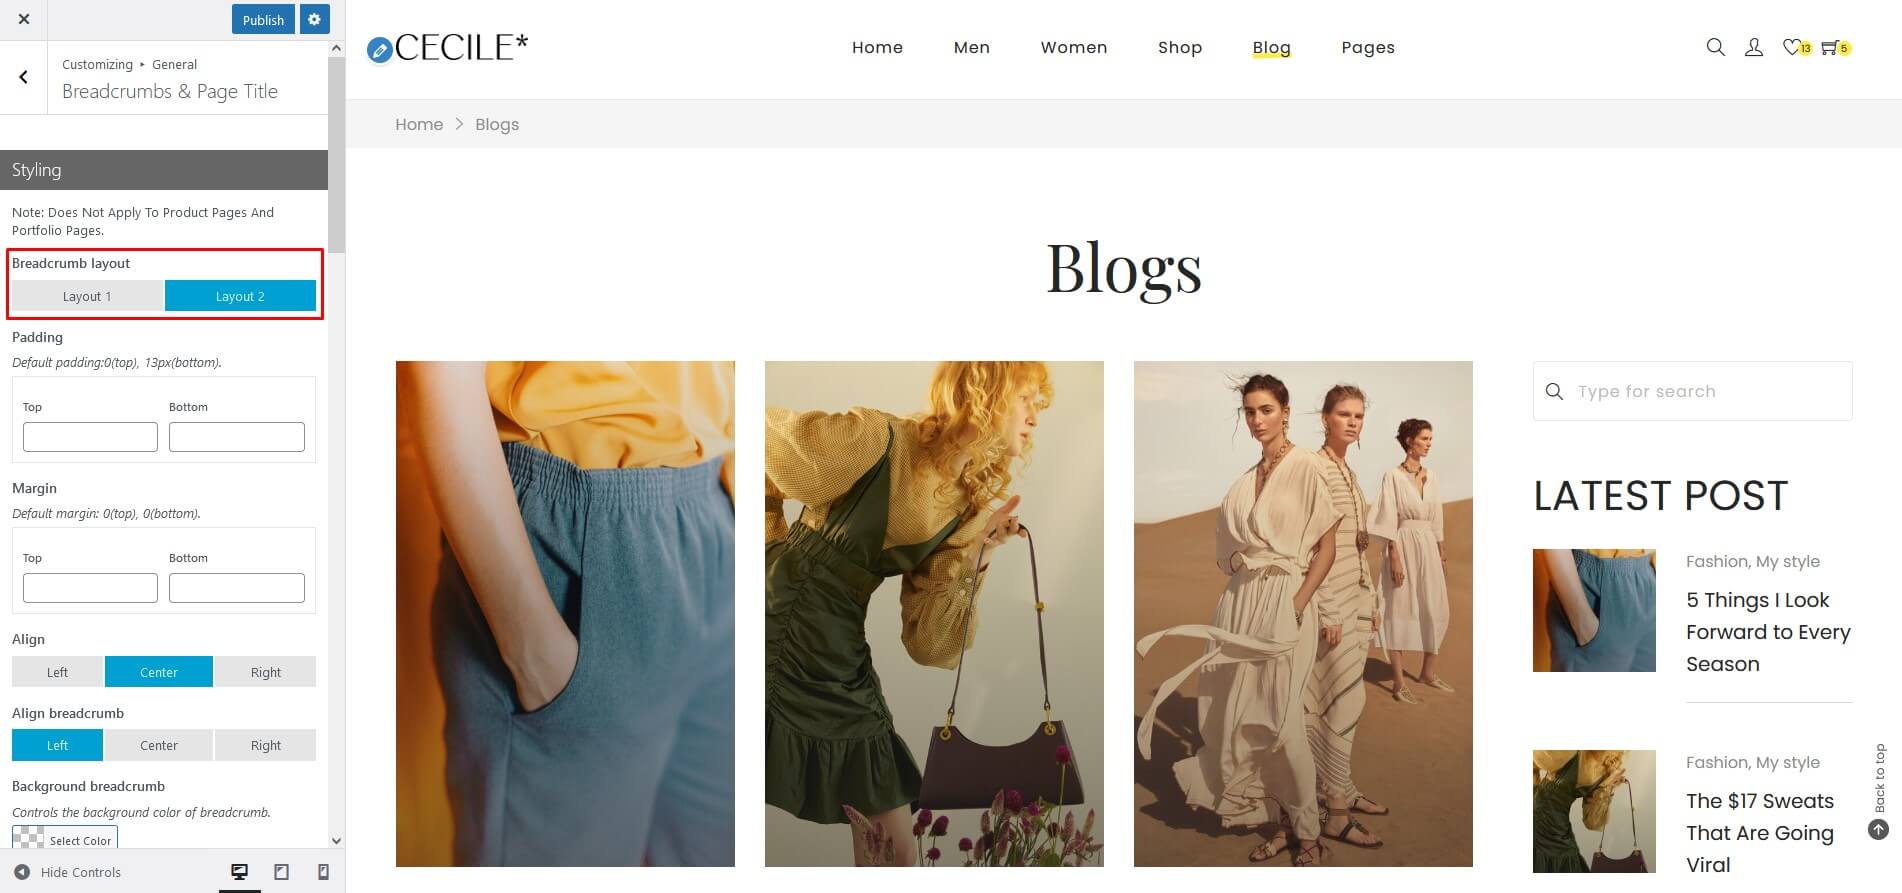
4.1.5 Breadcrumbs & Page Title
Show / hide and create style for breadcrumb, page title for Site.
4.2 Header
You can choose header for your website
4.3 Footer
You can choose footer for your website
4.4 Blog
Customization for Blog pages.
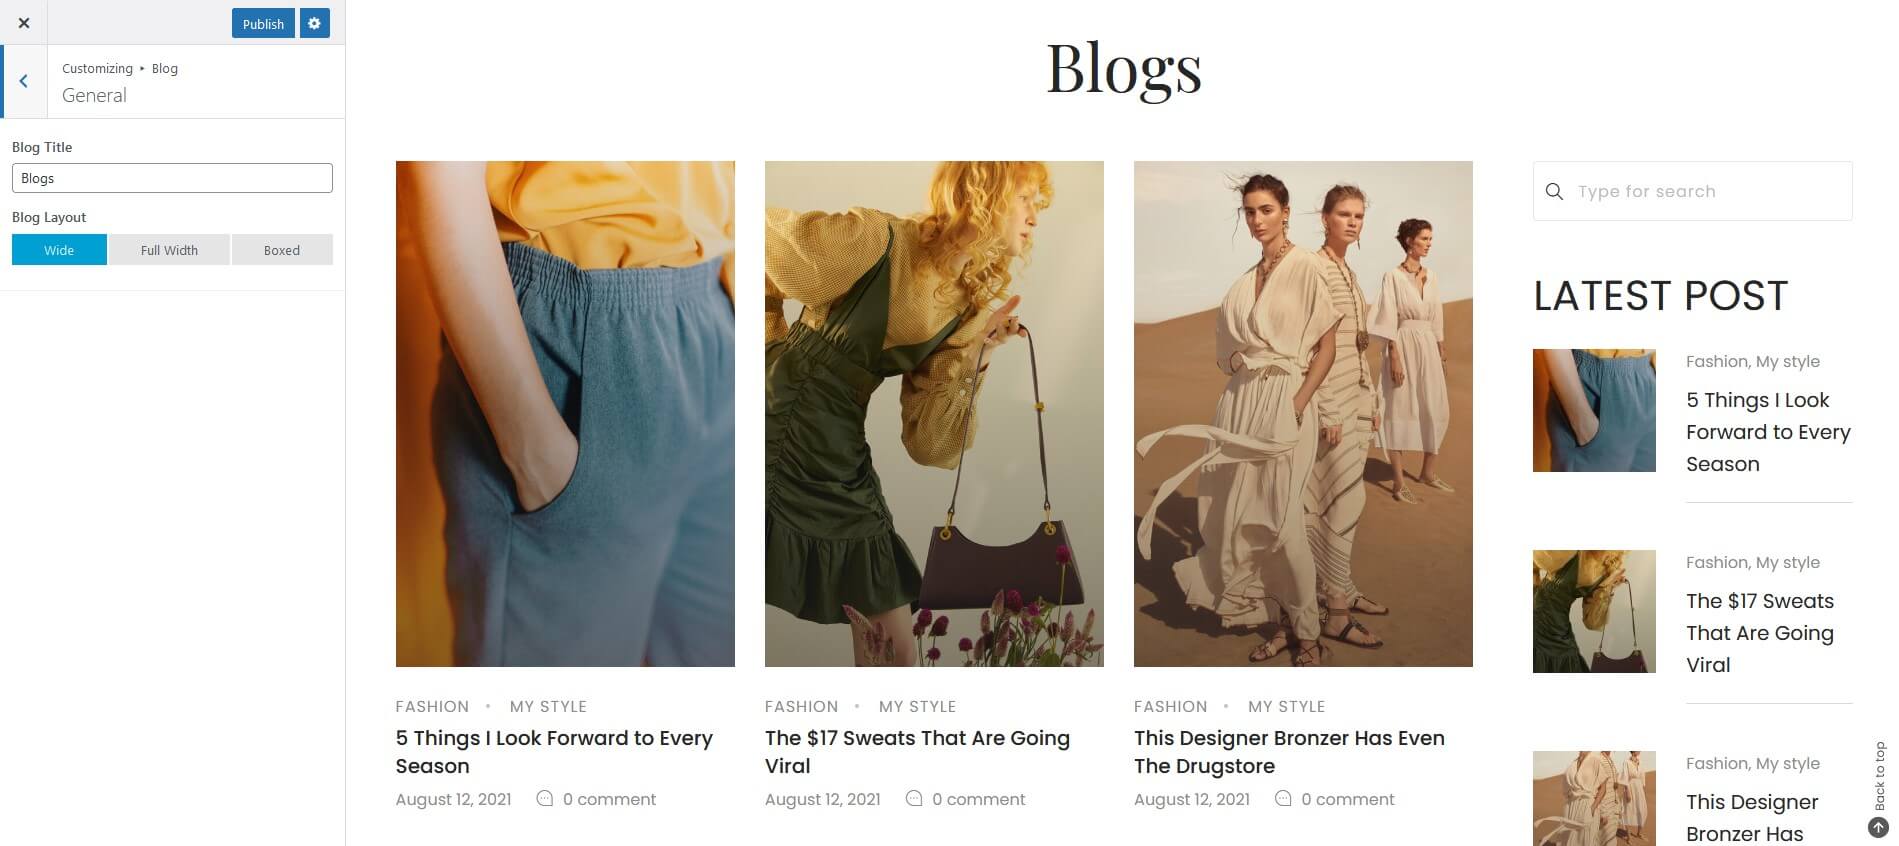
4.4.1 General
You can choose layout, change title for Blog page.
4.4.2 Blog Archive
You can easily setting option like choose layout, choose sidebar, post meta,... for Blog page.
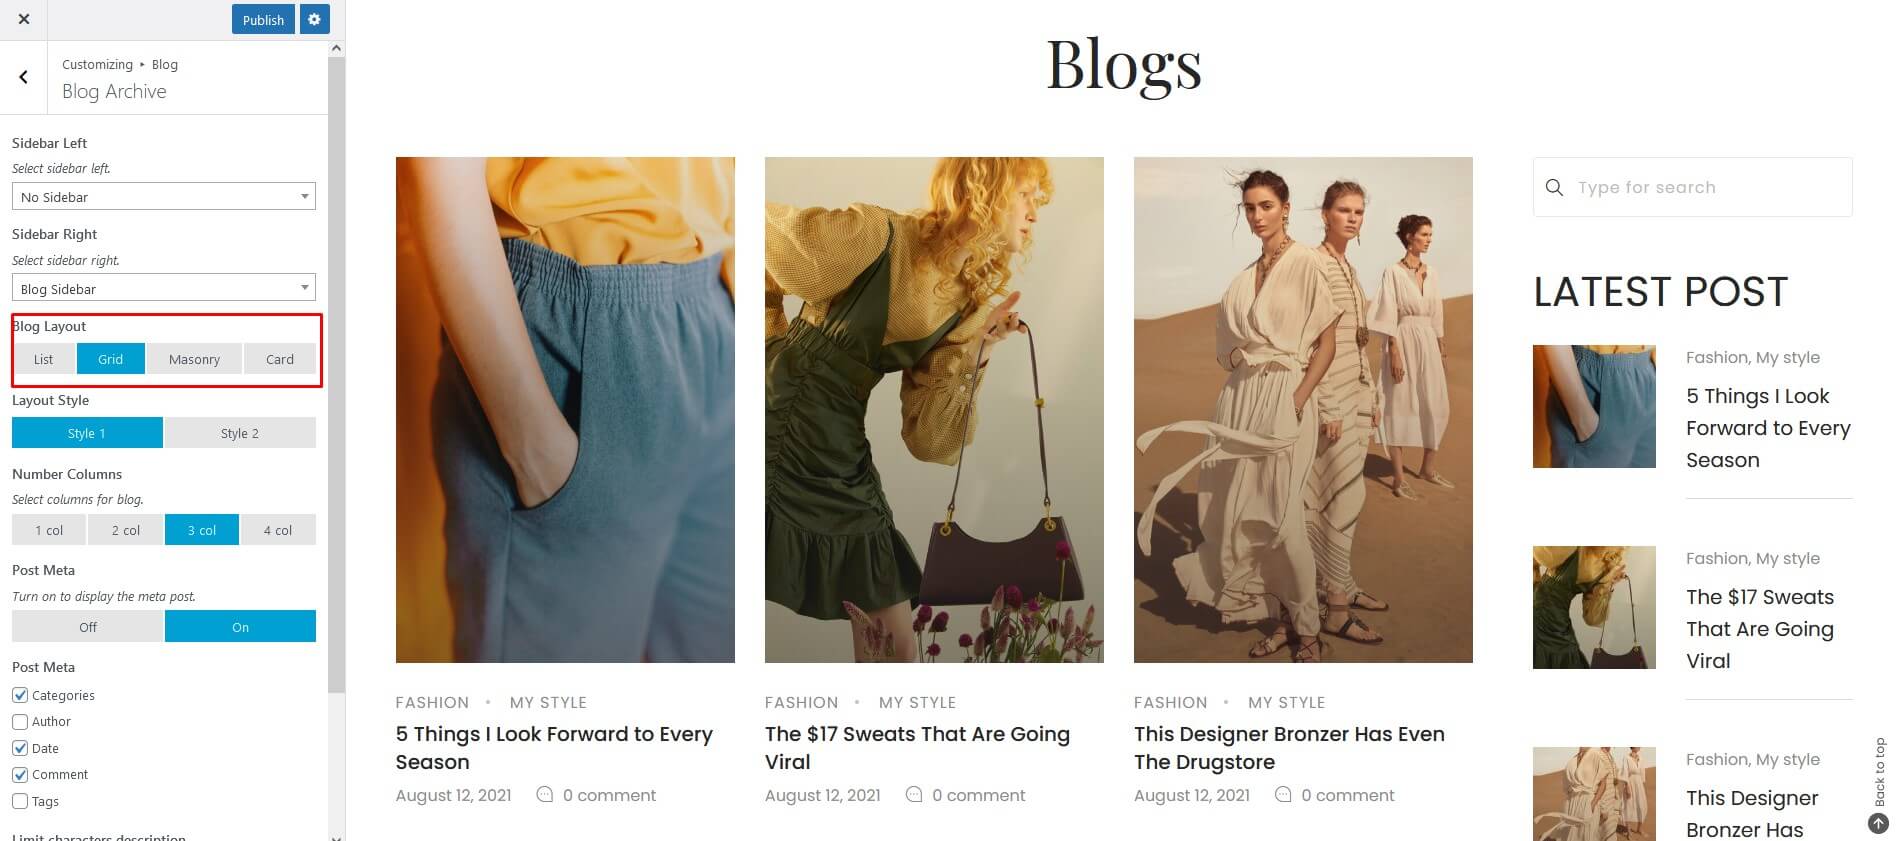
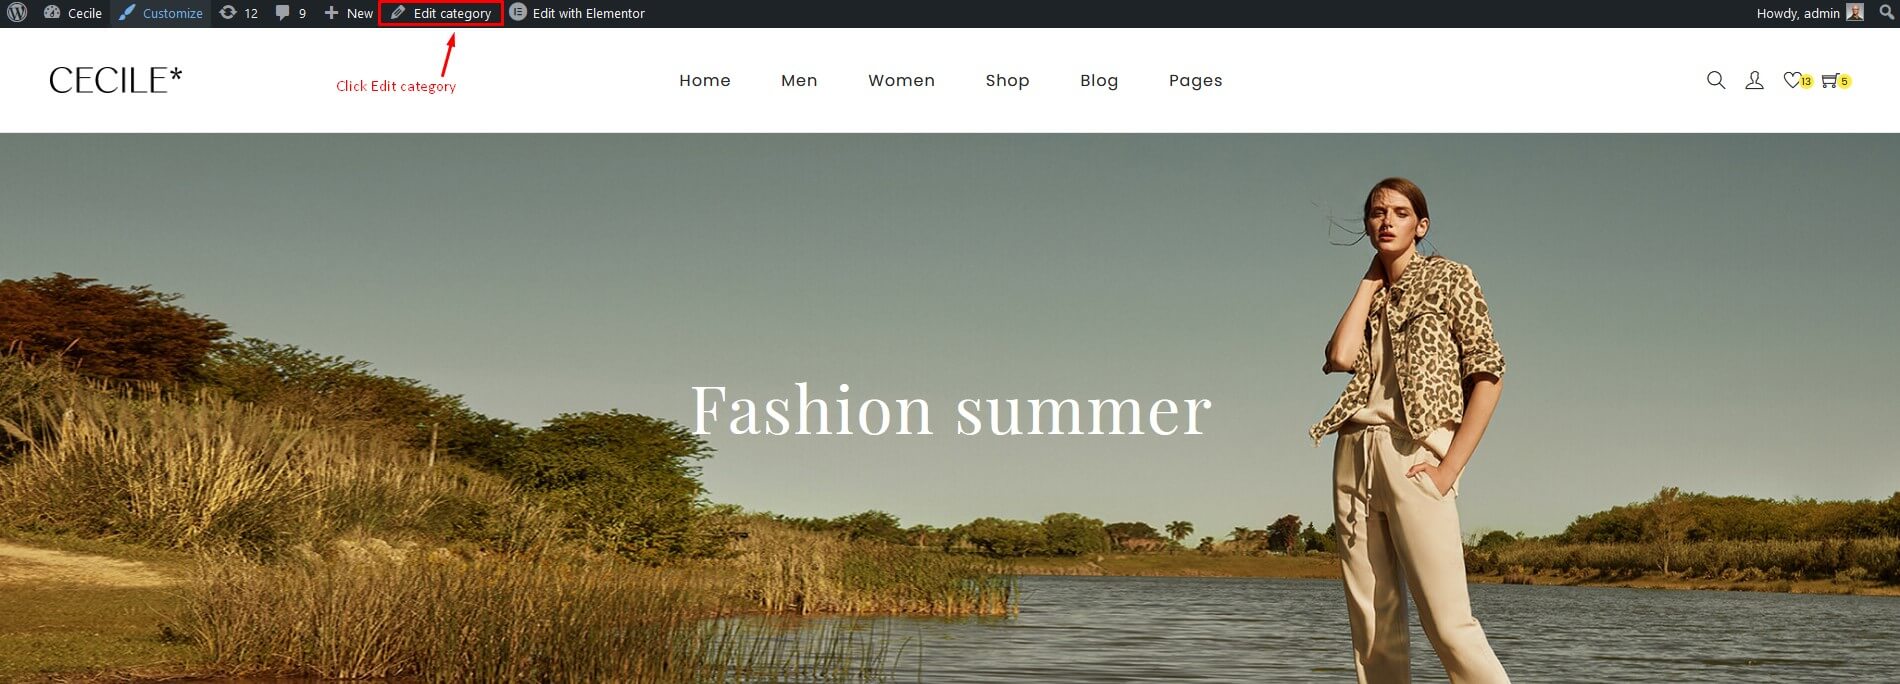
If you want to have settings for each category then you can go to the Edit category then you can set the options available if you want.

4.4.3 Blog Single Post
You can easily setting option like choose layout, choose sidebar, post meta,... single post.
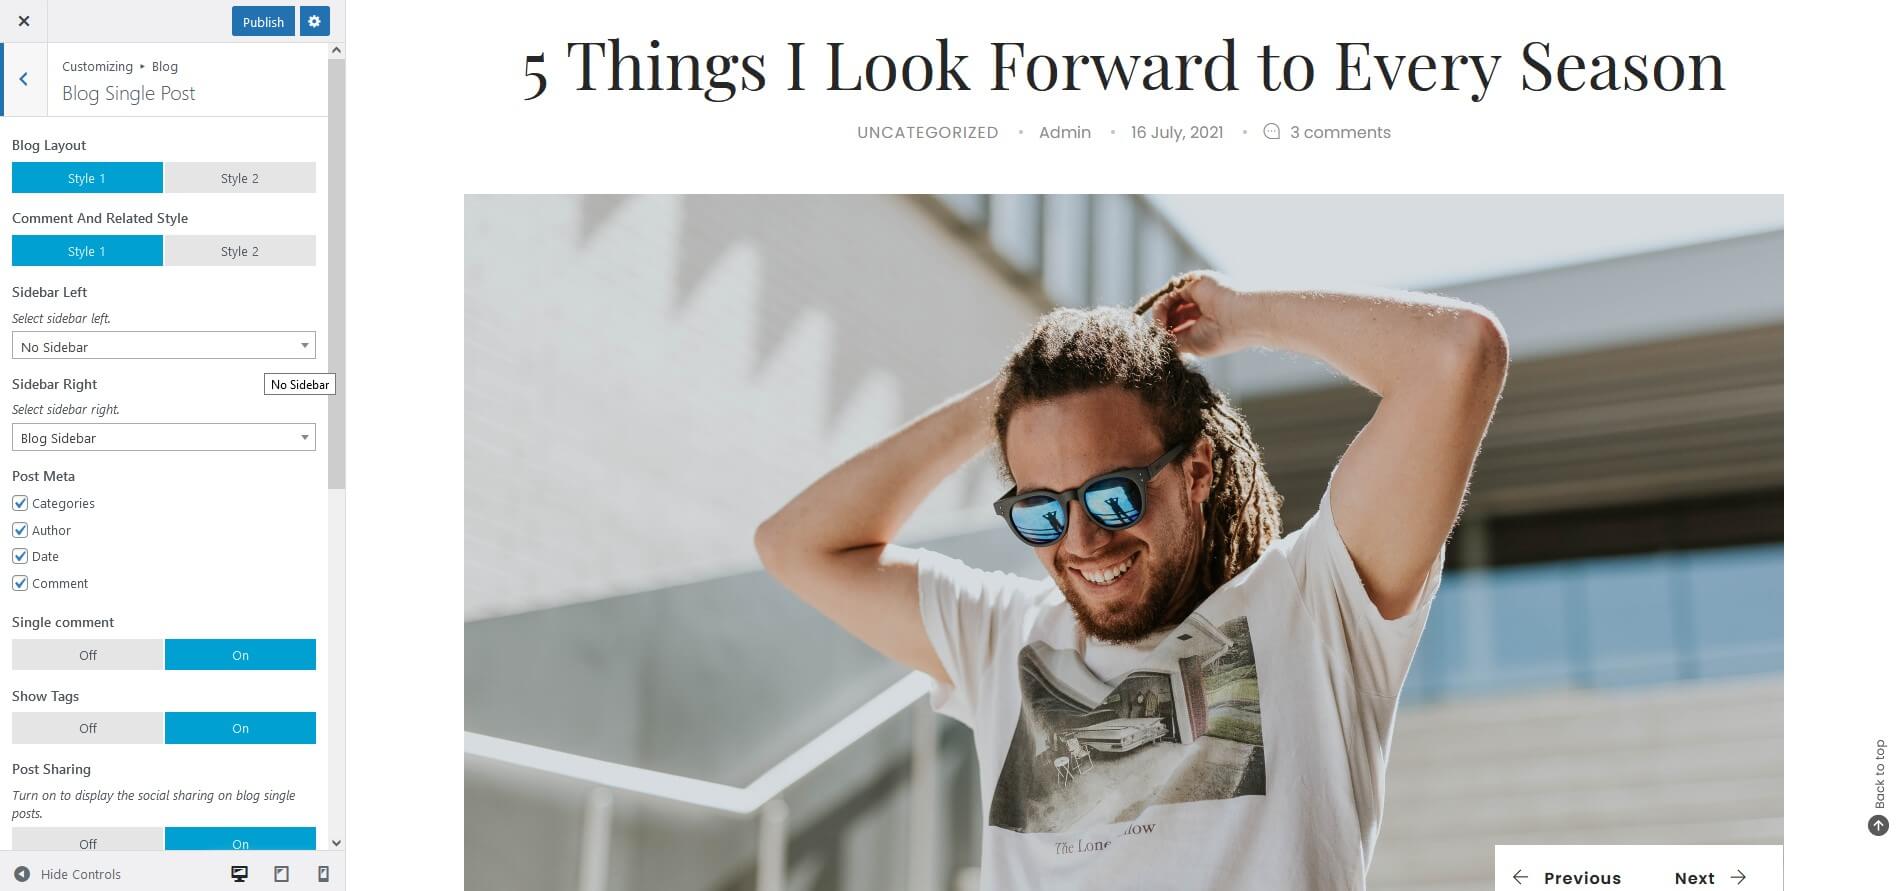
If you want to have settings for each post then you can go to the Edit Post then you can set the options available if you want.
4.5 Shop
Customization for Shop pages and Shop single.
4.5.1 General
With the config options in Customize, it will be displayed in all the categories of the product. Select background color, show / hide button add cart, quickview... for shop pages.

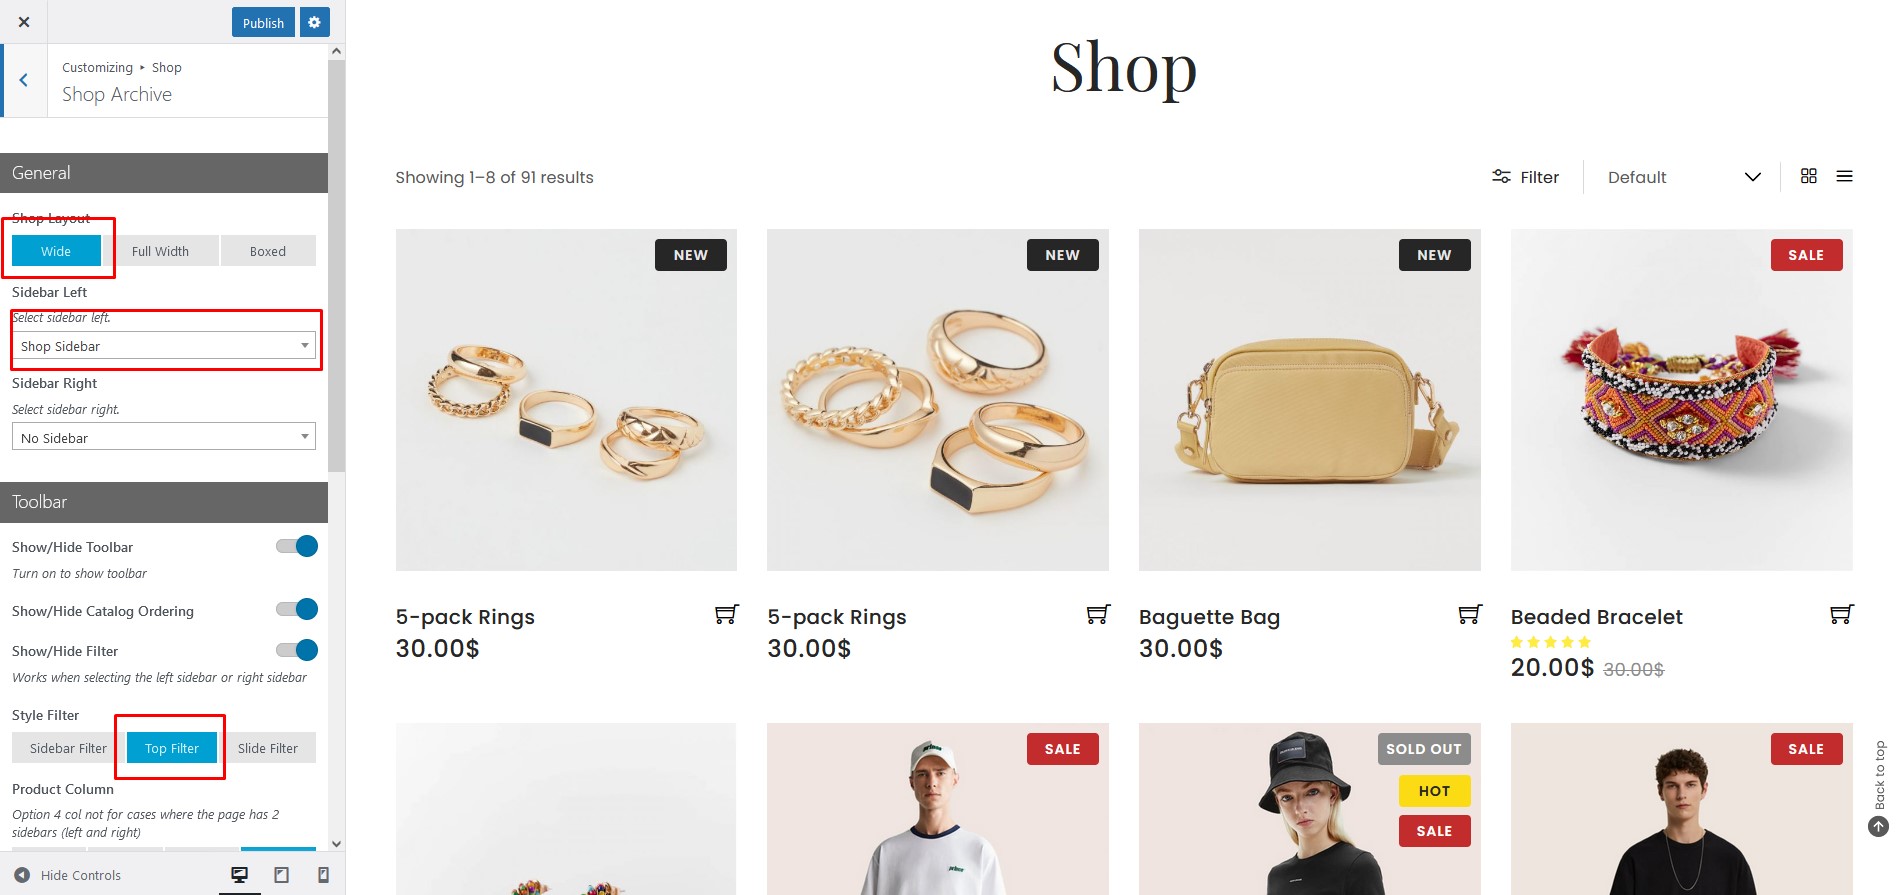
4.5.2 Shop Archive
Select layout, sidebar left / right ... for shop pages.
If you want to have settings for each category then you can go to the Edit category then you can set the options available if you want.

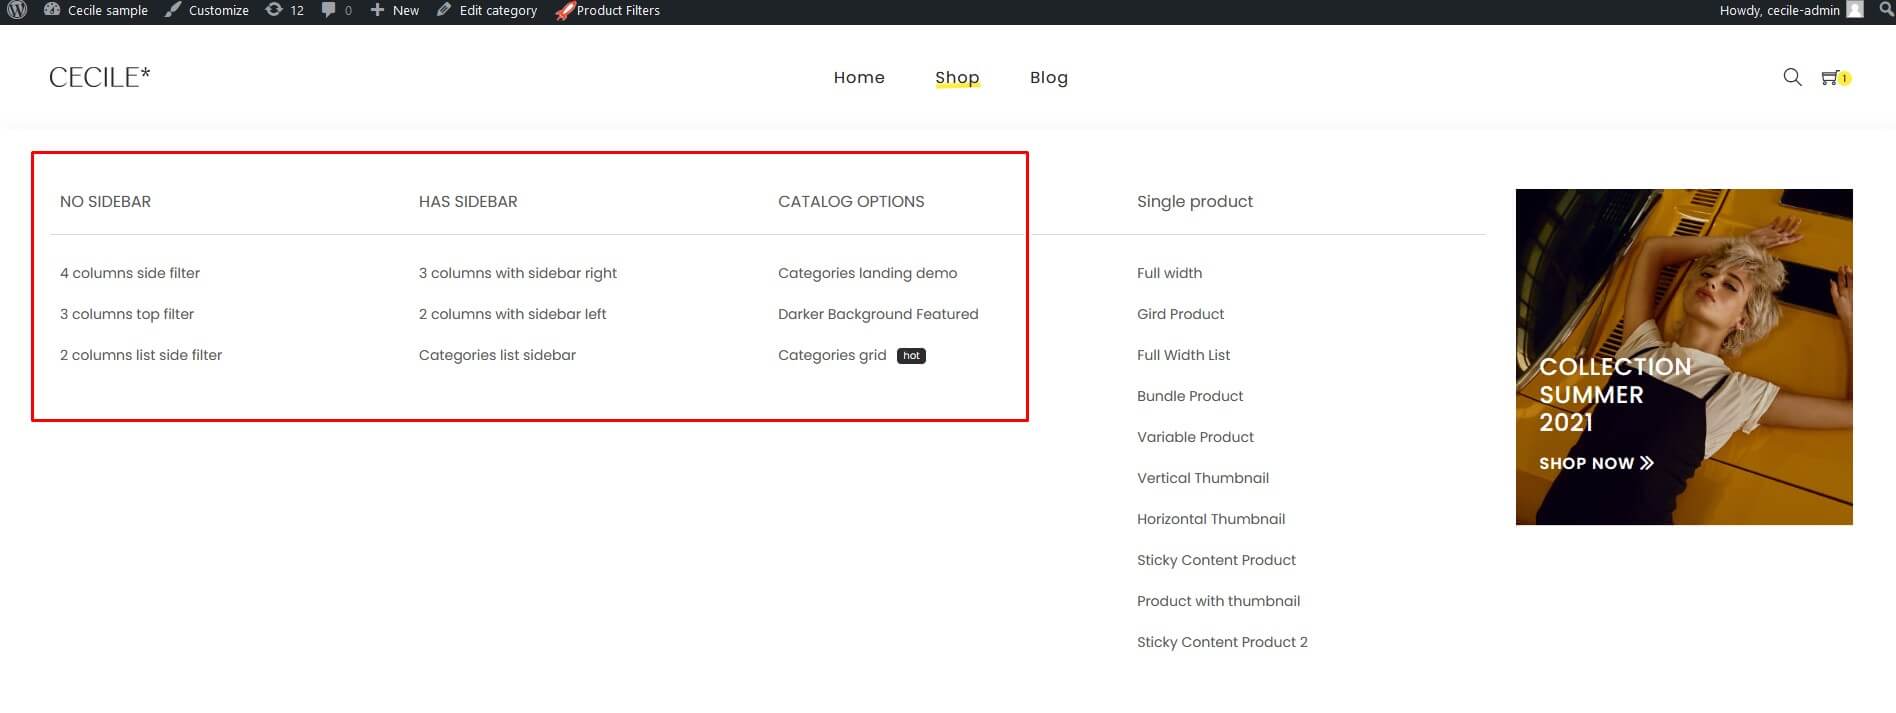
After you install demo content successfully we have set up a few layouts for each category. You can refer to the category link mounted on the shop menu.
4.5.3 Shop single
With the config options in Customize, it will be displayed in all product page. Select layout, sidebar left / right, background color ... for shop single page.
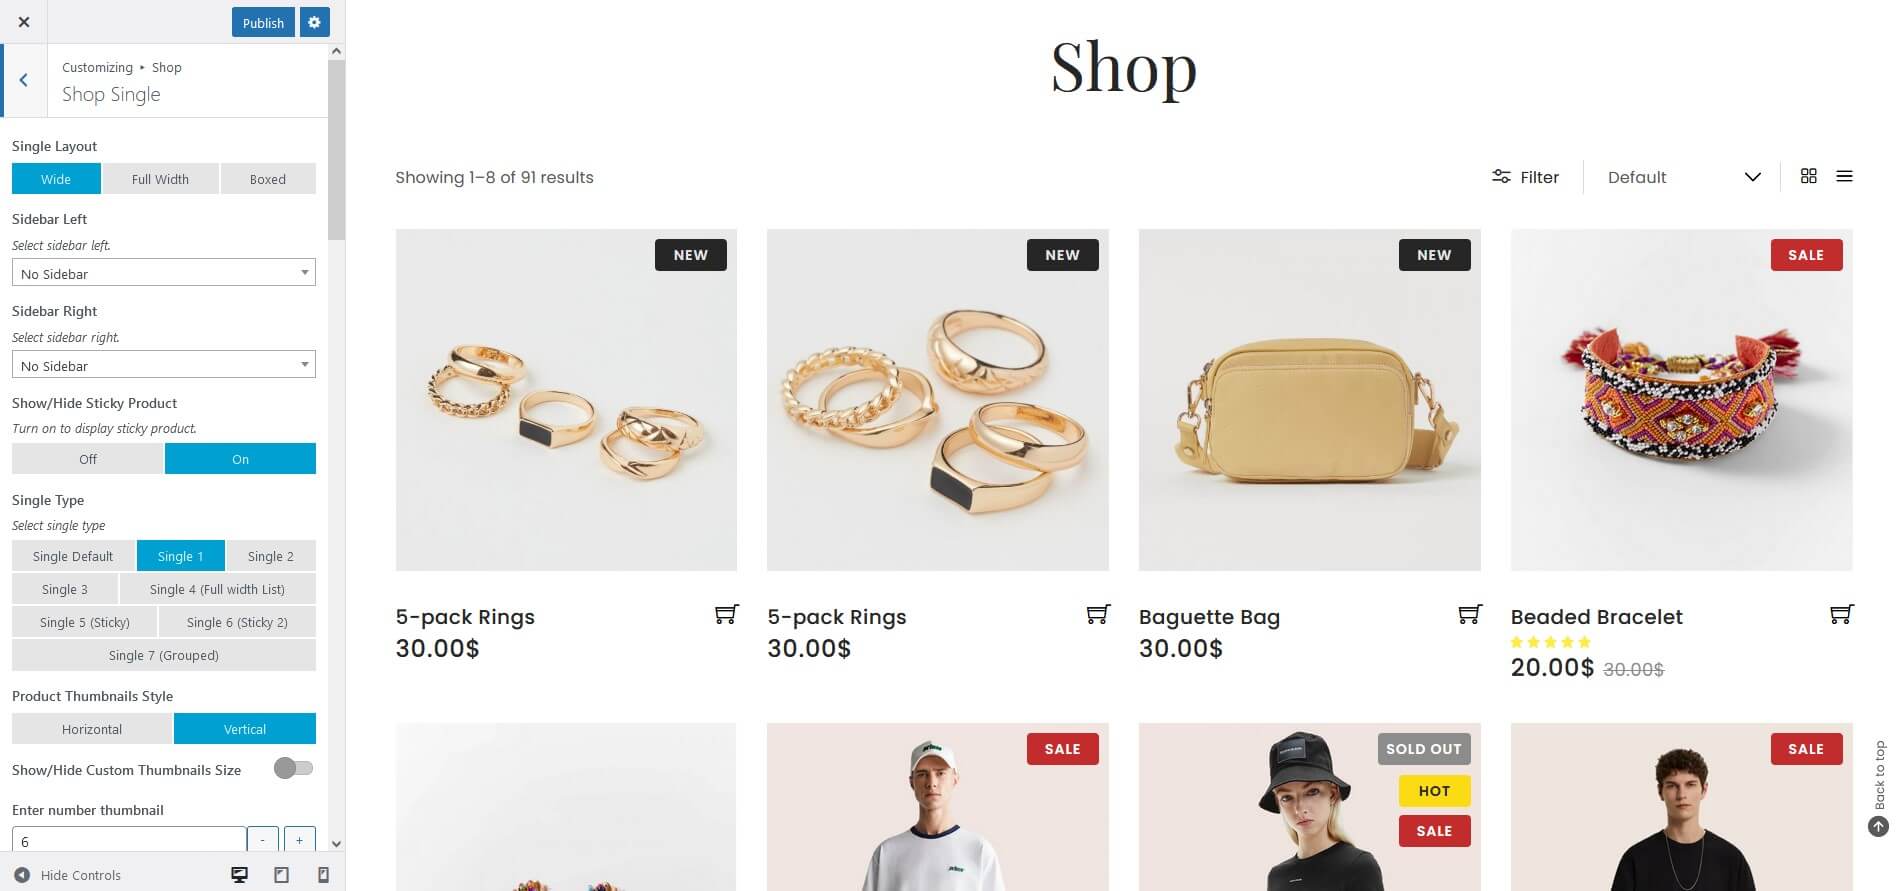
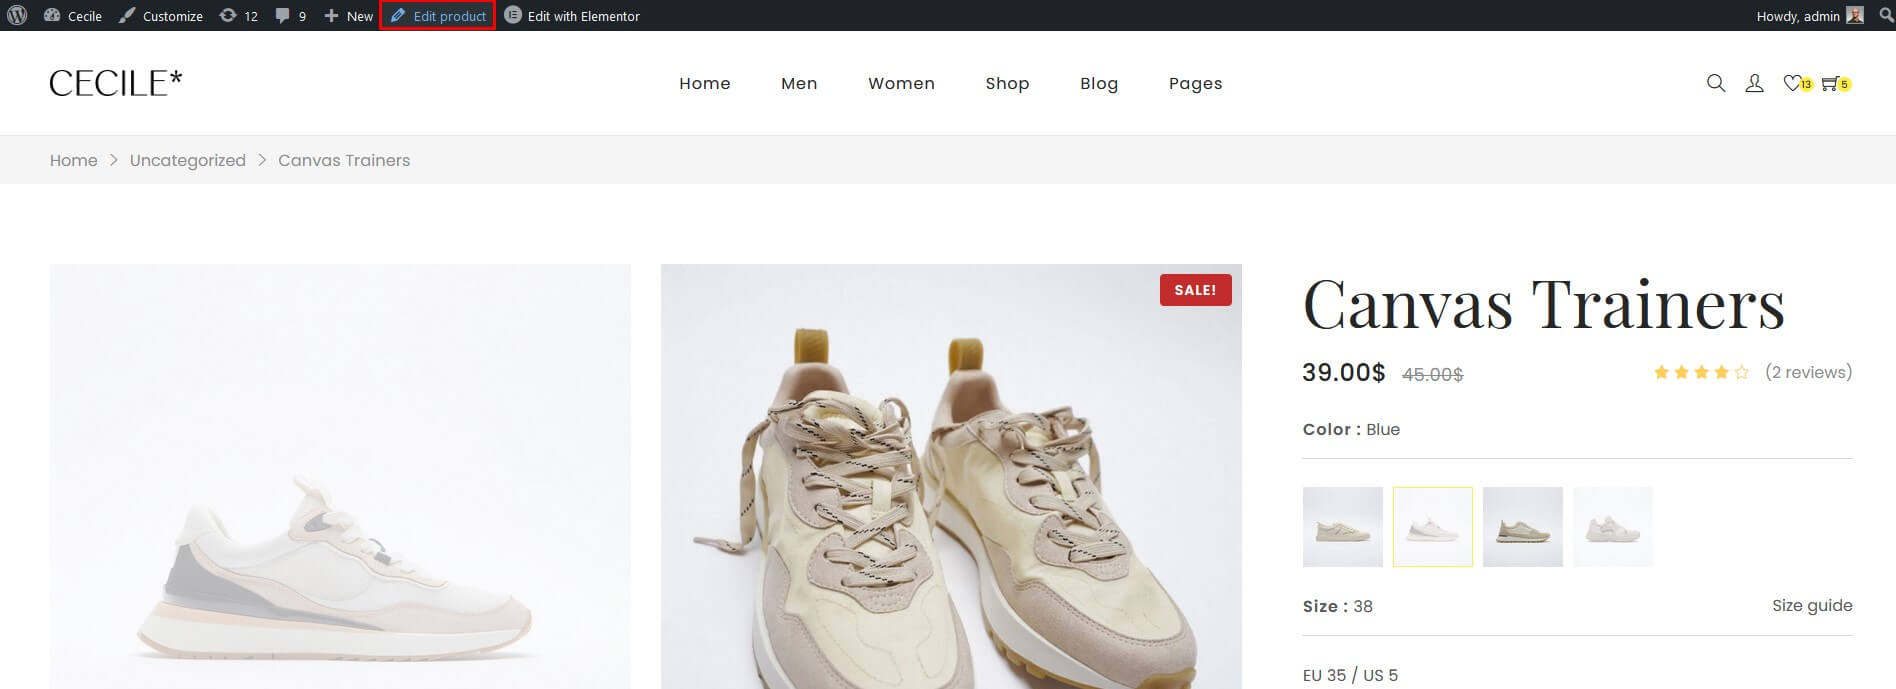
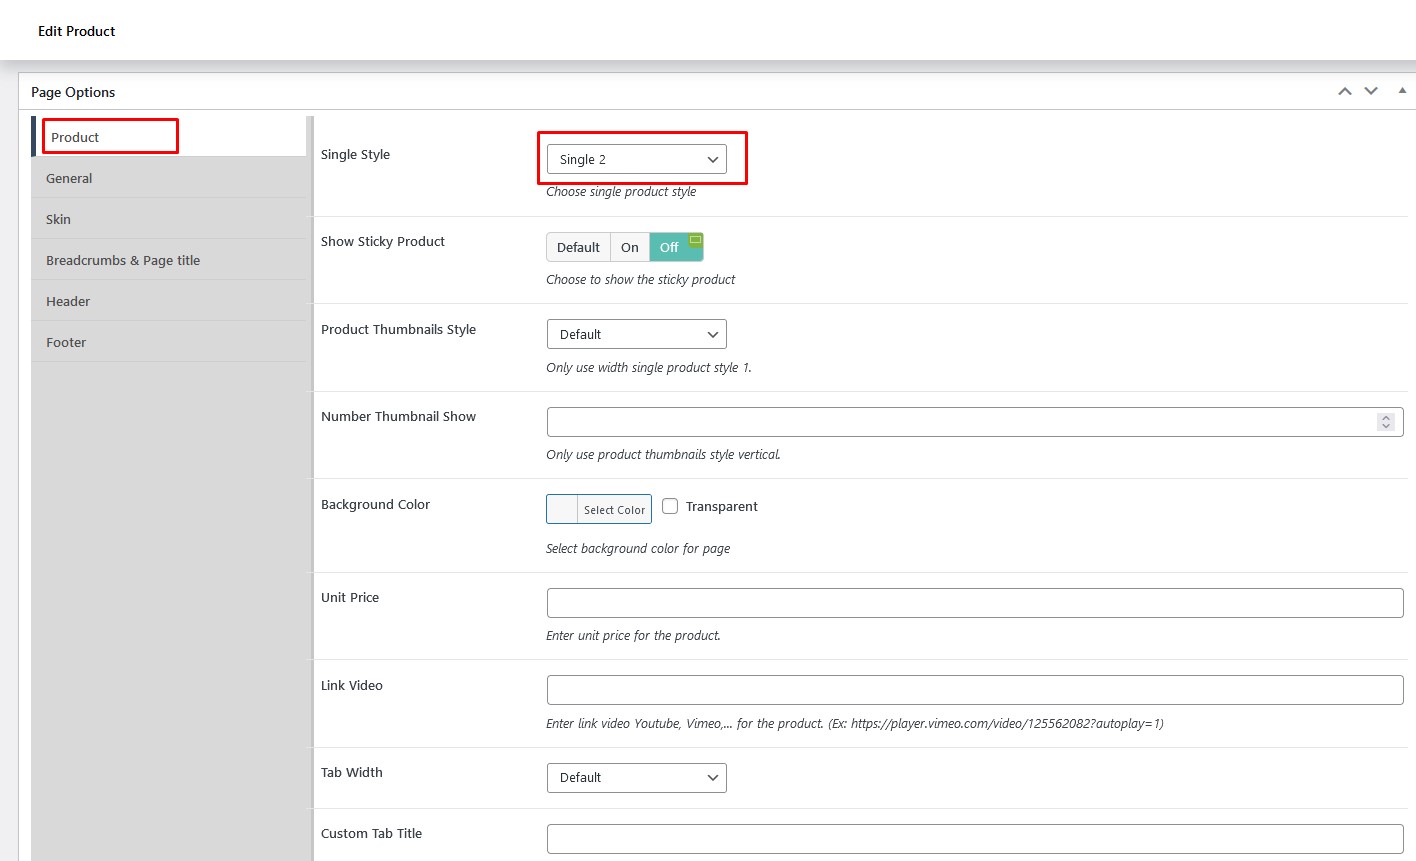
If you want to have settings for each Products then you can go to the Edit Product then you can set the options available if you want.
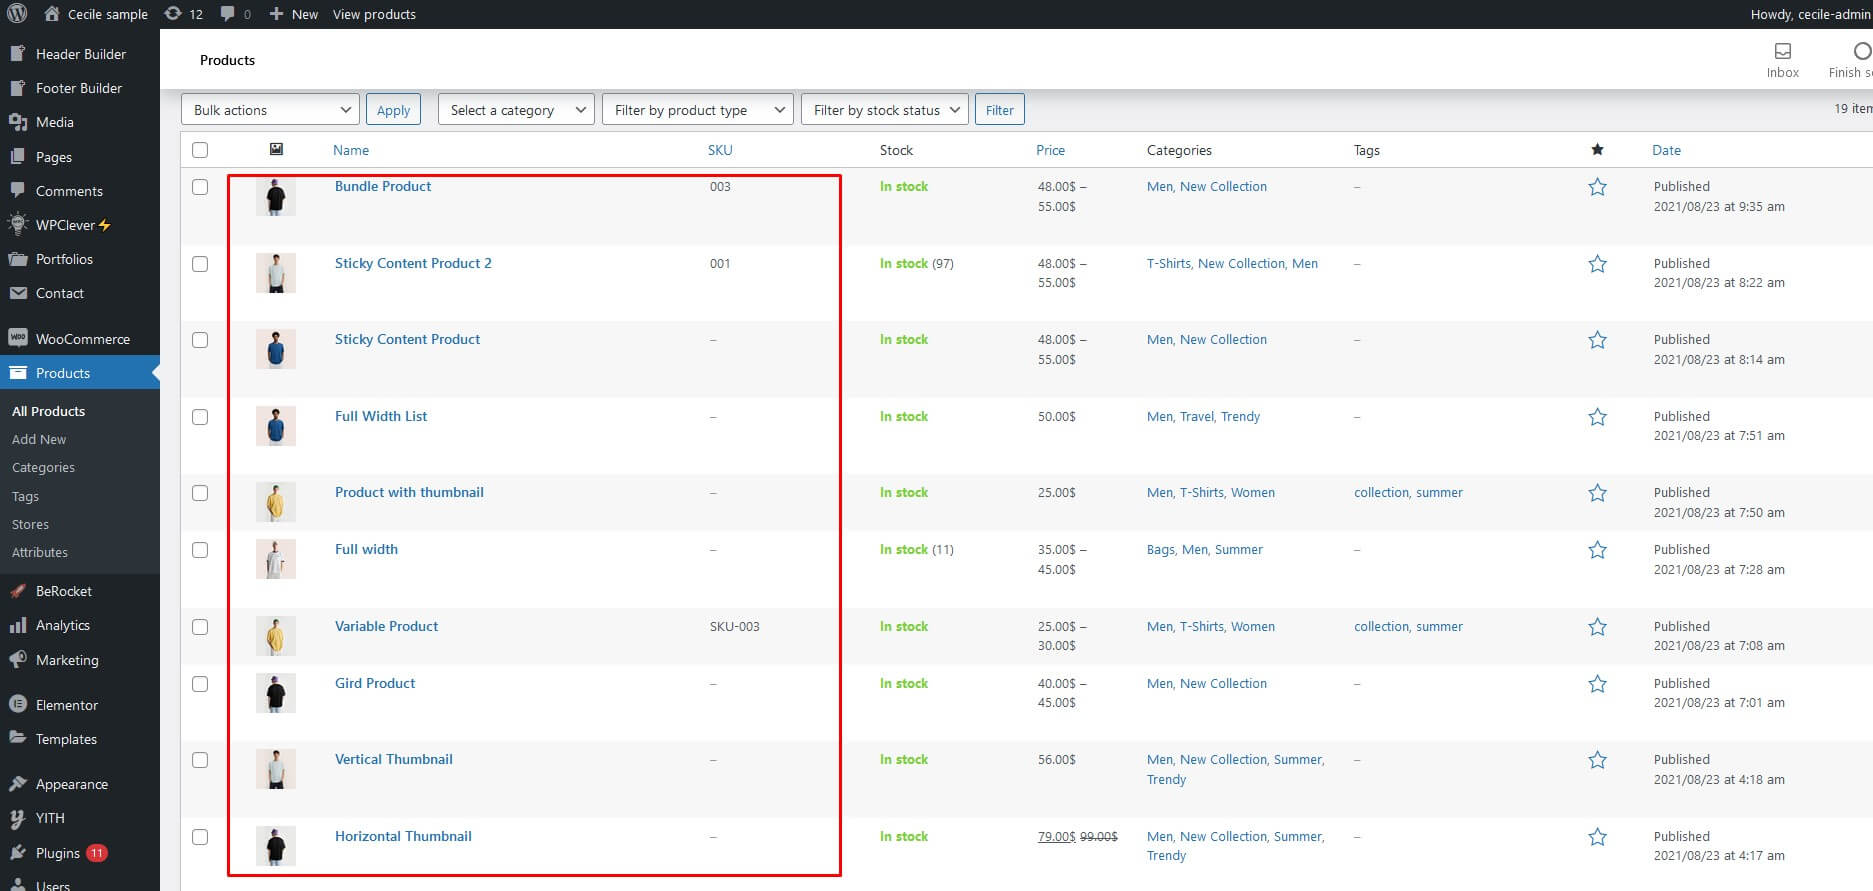
After you install demo content successfully we have set up a few layouts for each product. You can refer to the product link mounted on the shop menu.
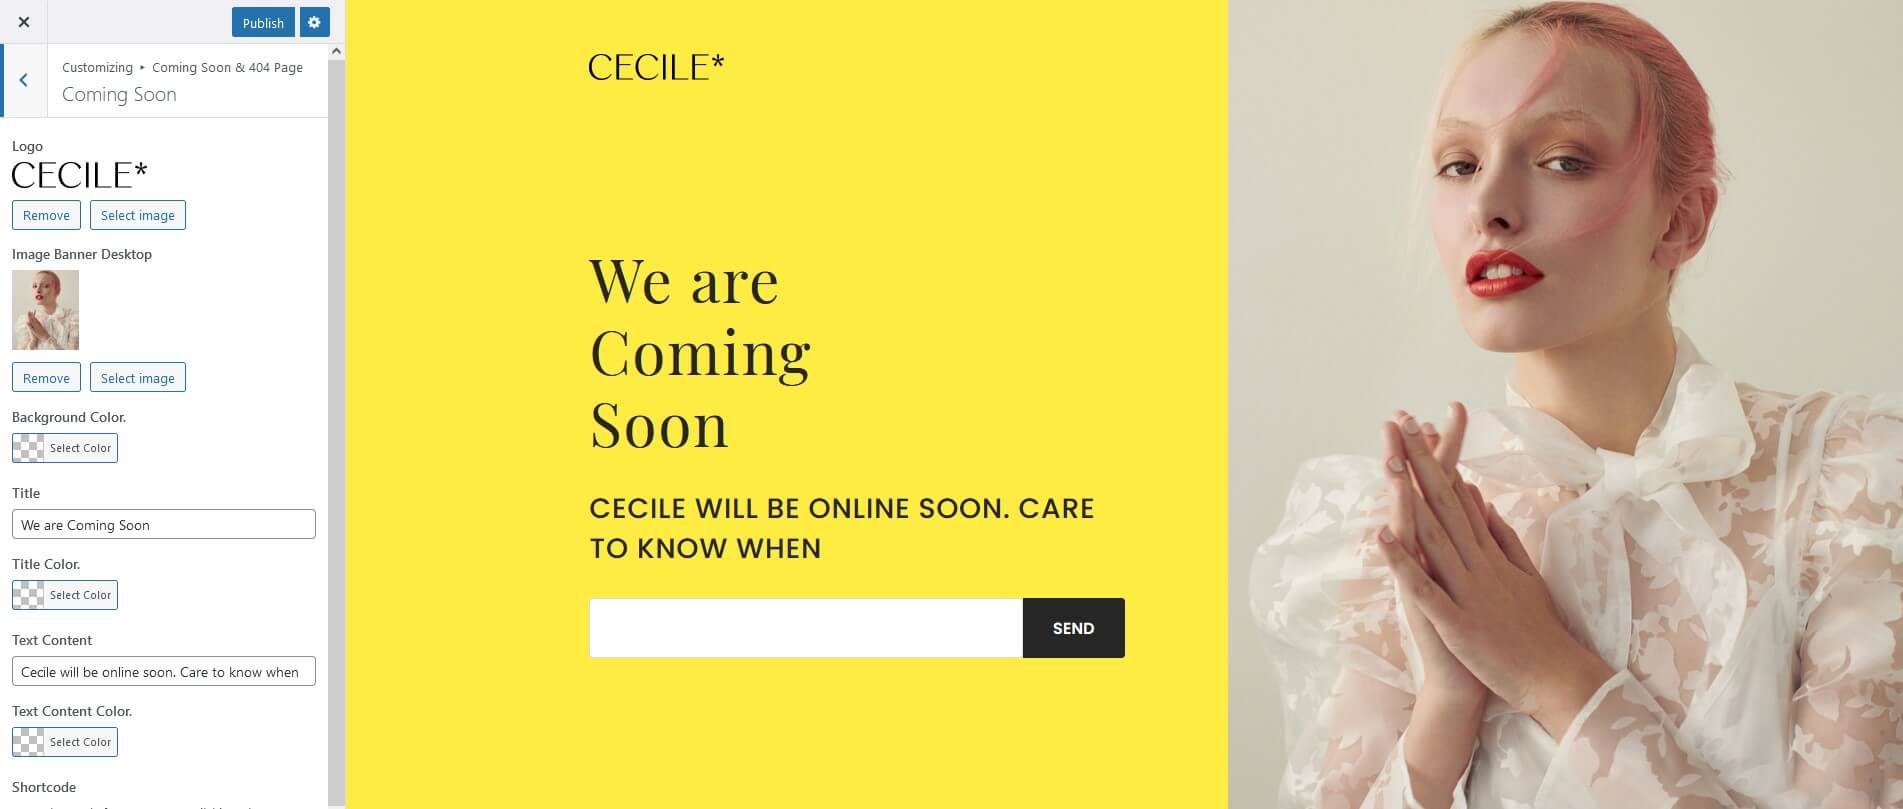
4.6 404 Page & Maintenance
Customization for 404 page.

Customization for Coming soon.
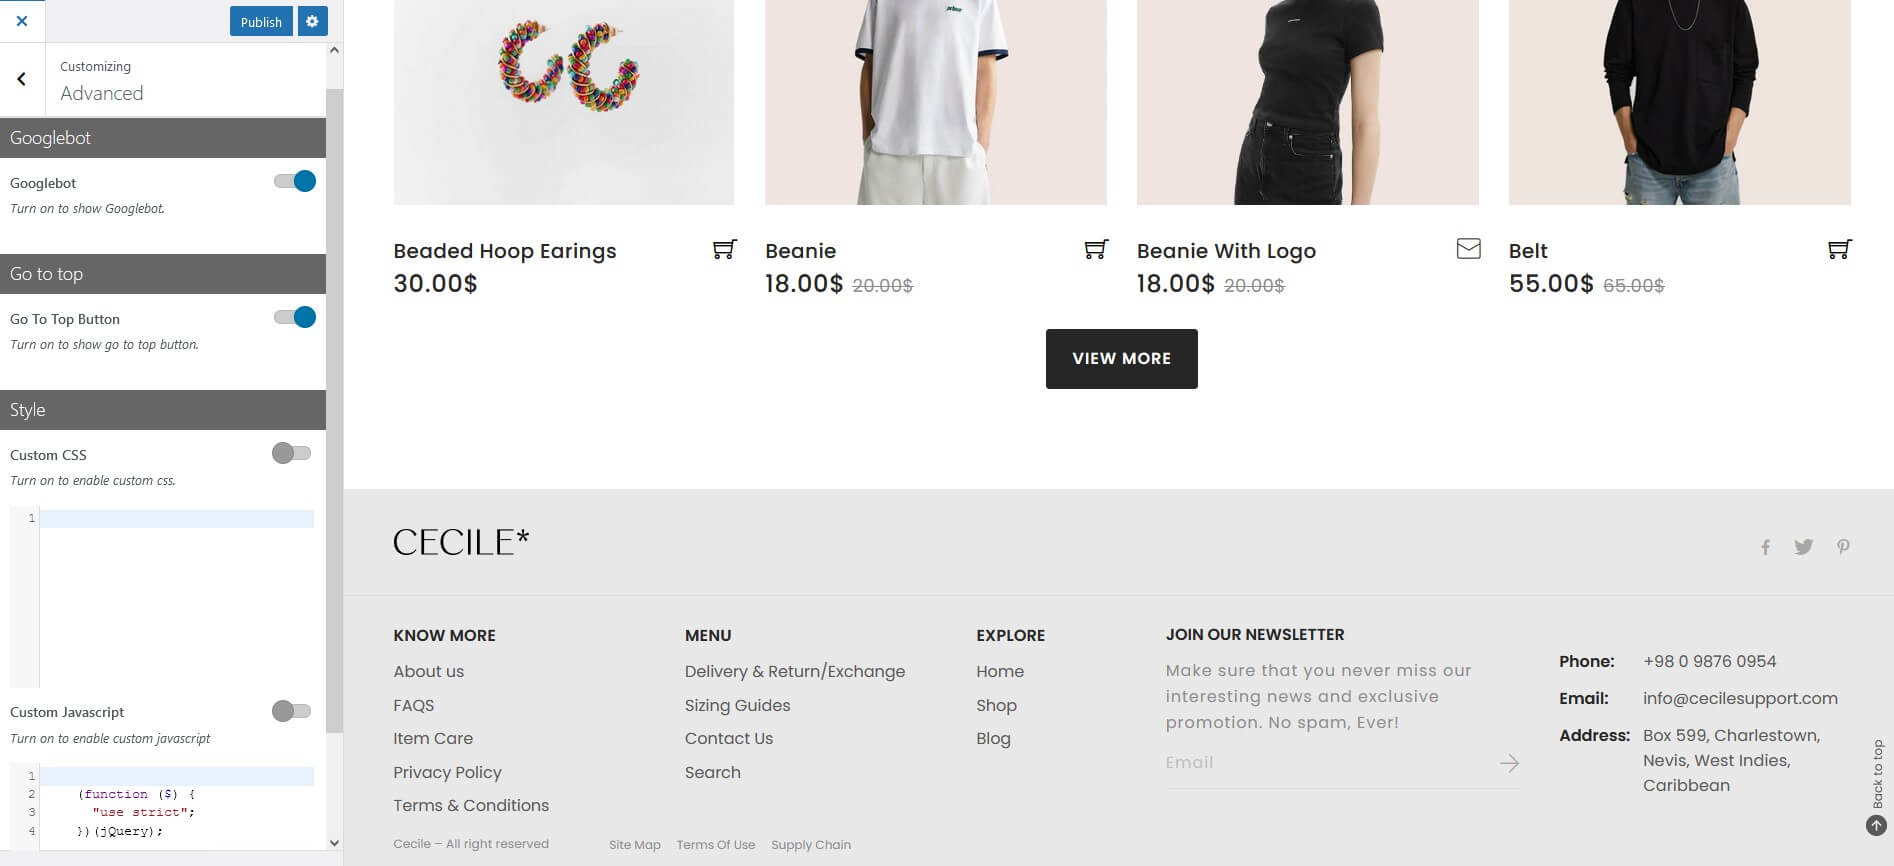
4.7 Advanced
Add Custom CSS and JS to change style, show / hide go to top button, show / hide animation for site.
4.8 Popup
4.8.1 Account
You can easily turn on / off pop up and change content with Customize account

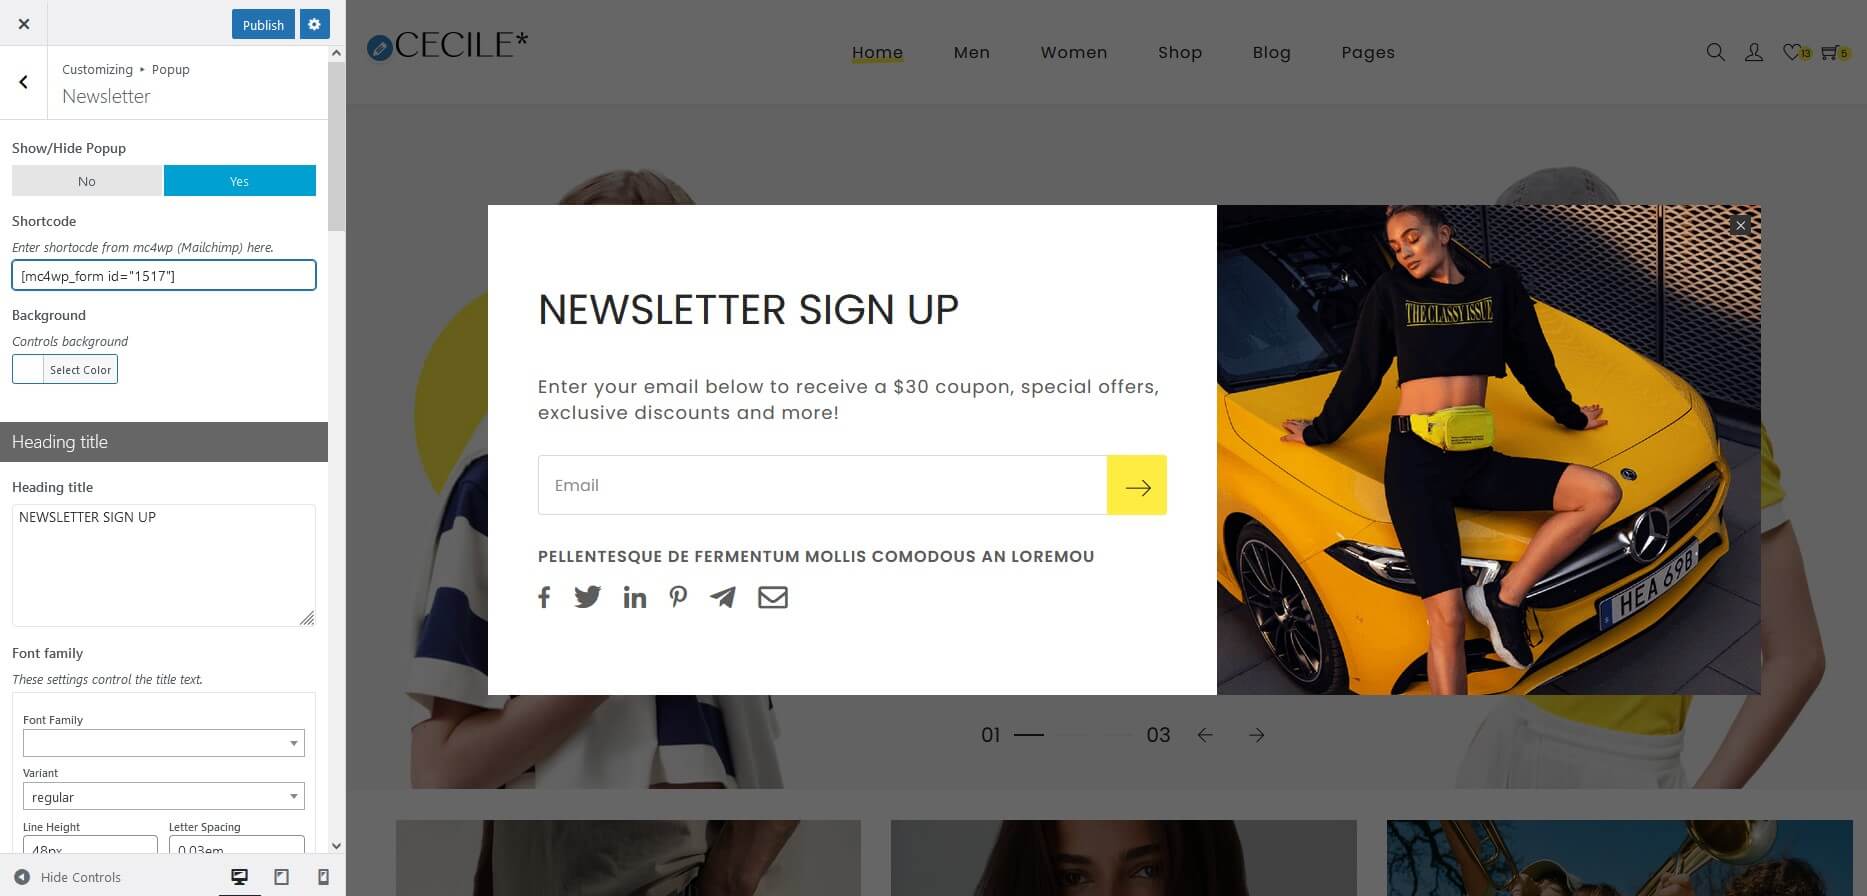
4.8.2 Newsletter
You can easily turn on / off pop up and change content with Customize newsletter
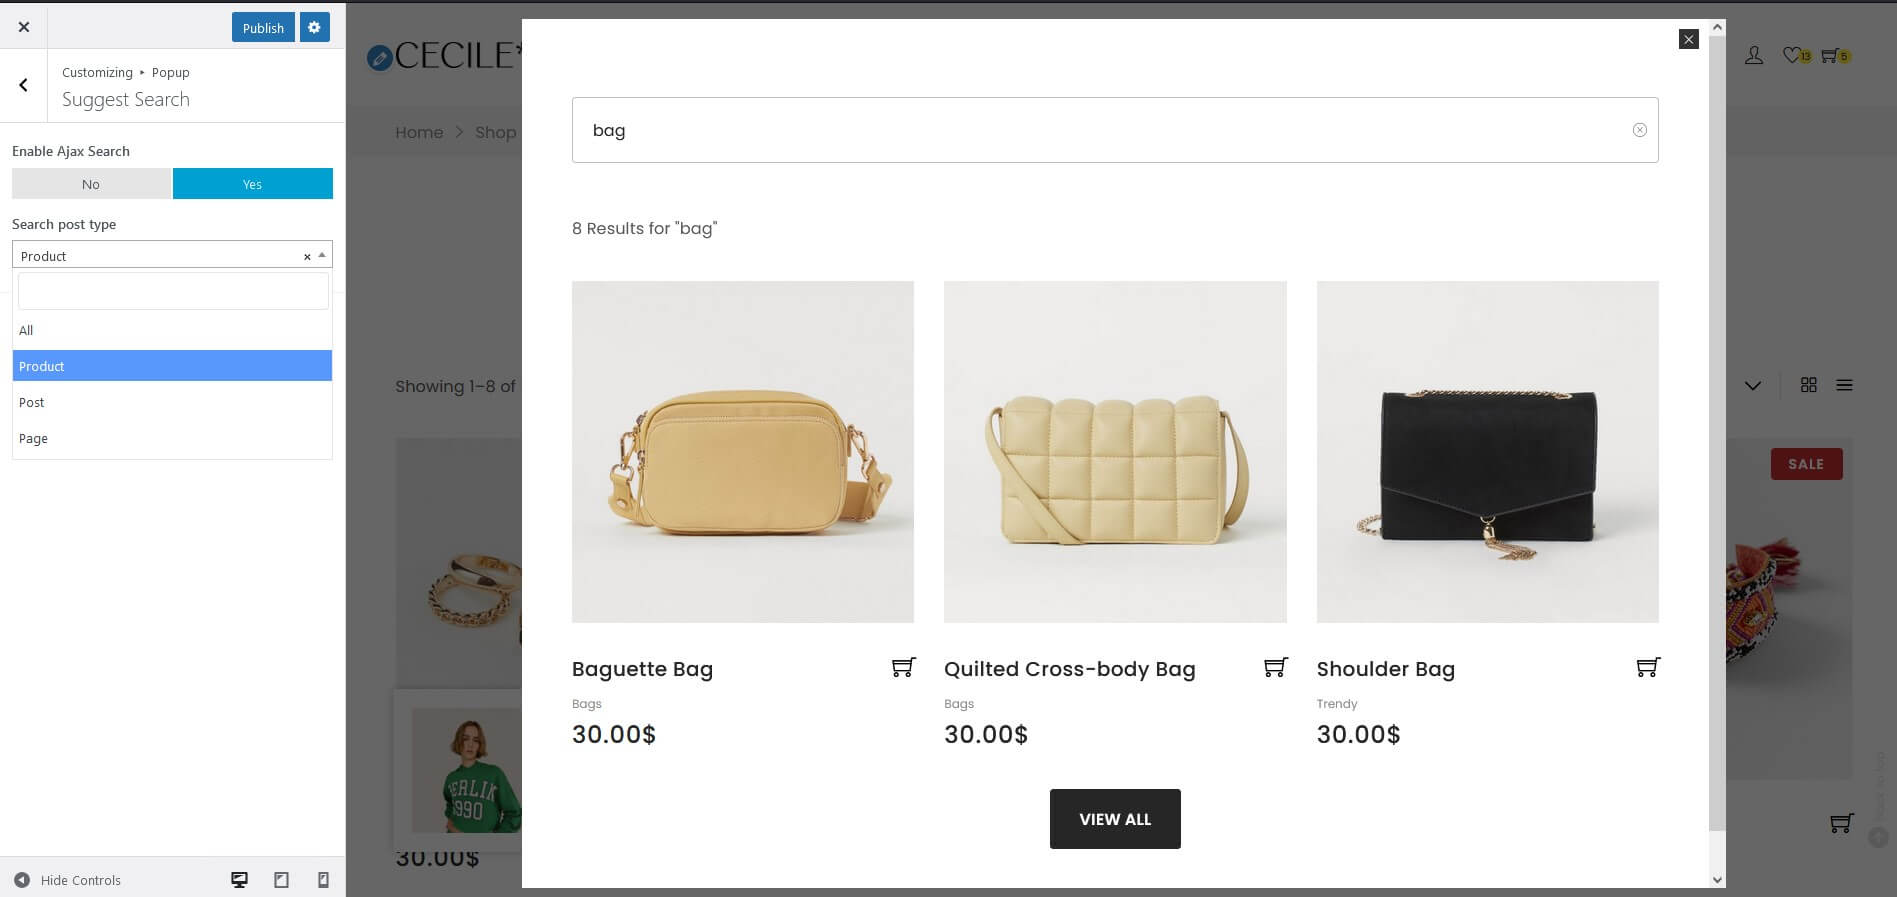
4.8.3 Suggest Search
You can easily turn on / off pop-ups and select post type search if you want.
4.8.4 Fake Sale
You can easily turn on / off pop-ups and enter ID product if you want display.
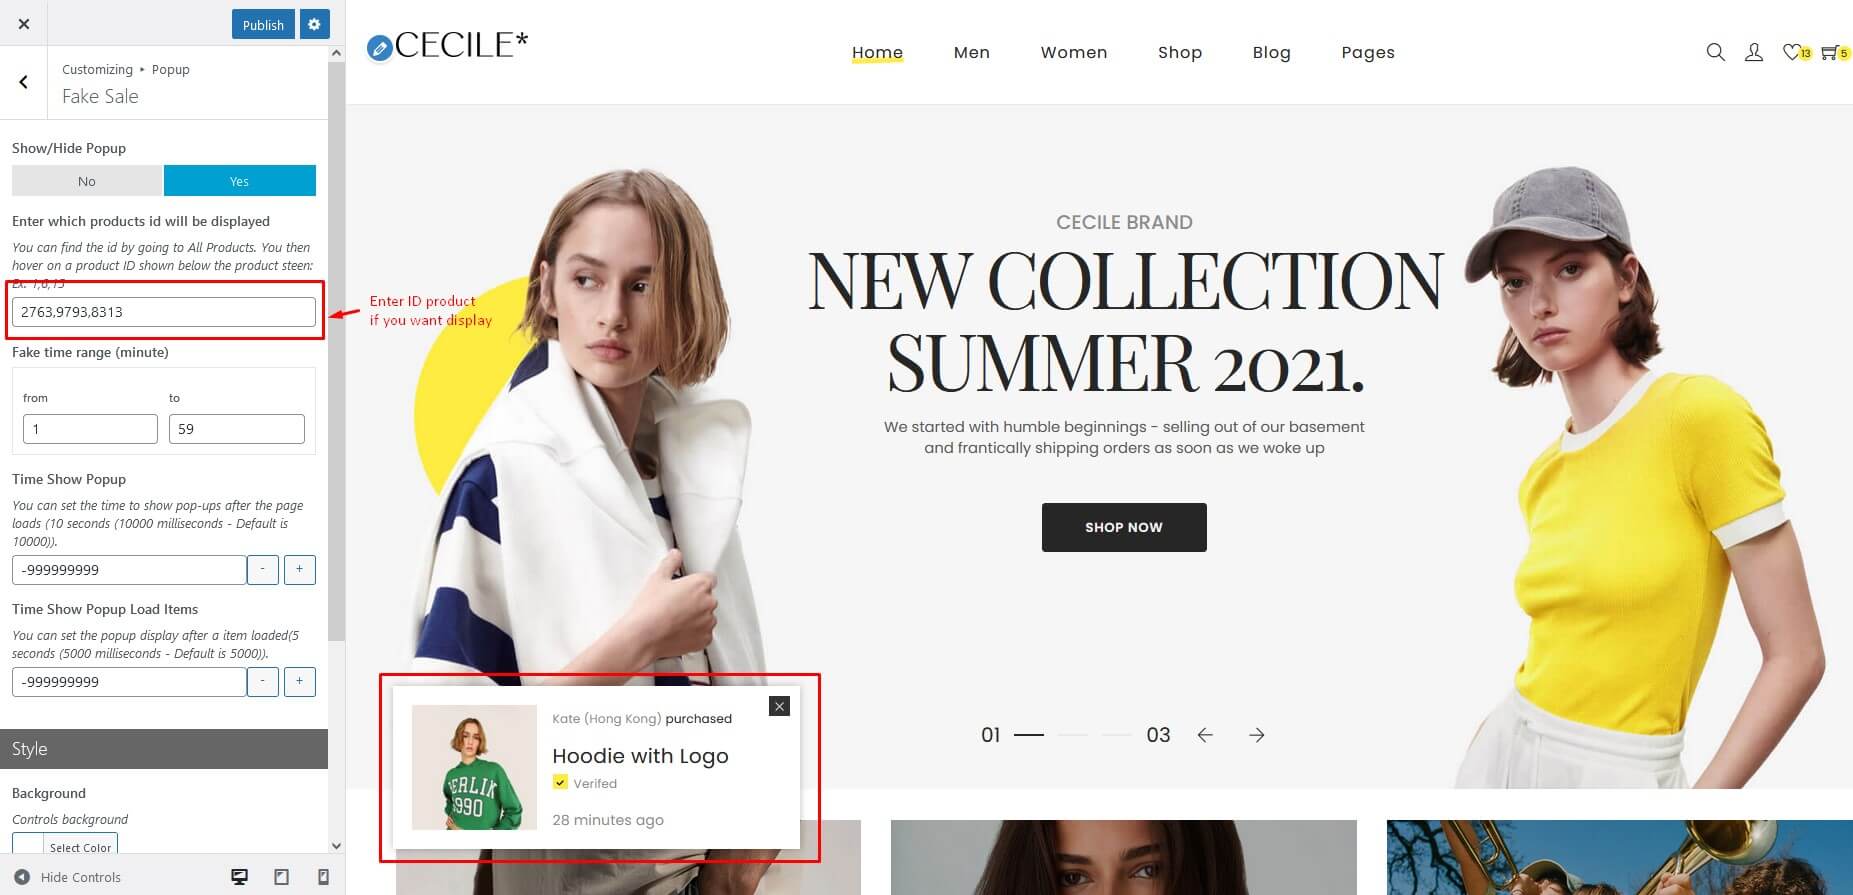
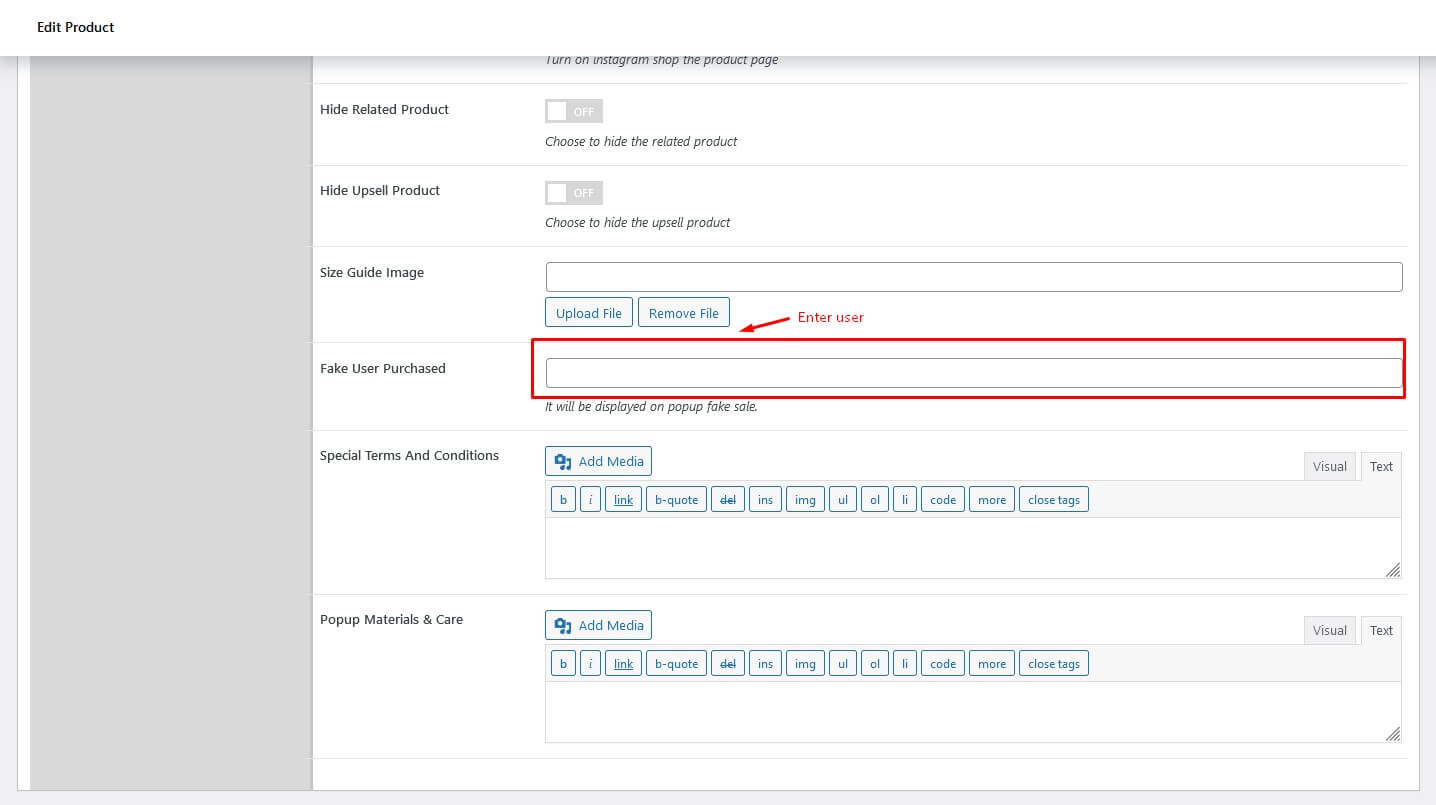
Then enter ID product you need go to Edit product and enter Fake User Purchased. Corresponding to the Product ID you want to display.
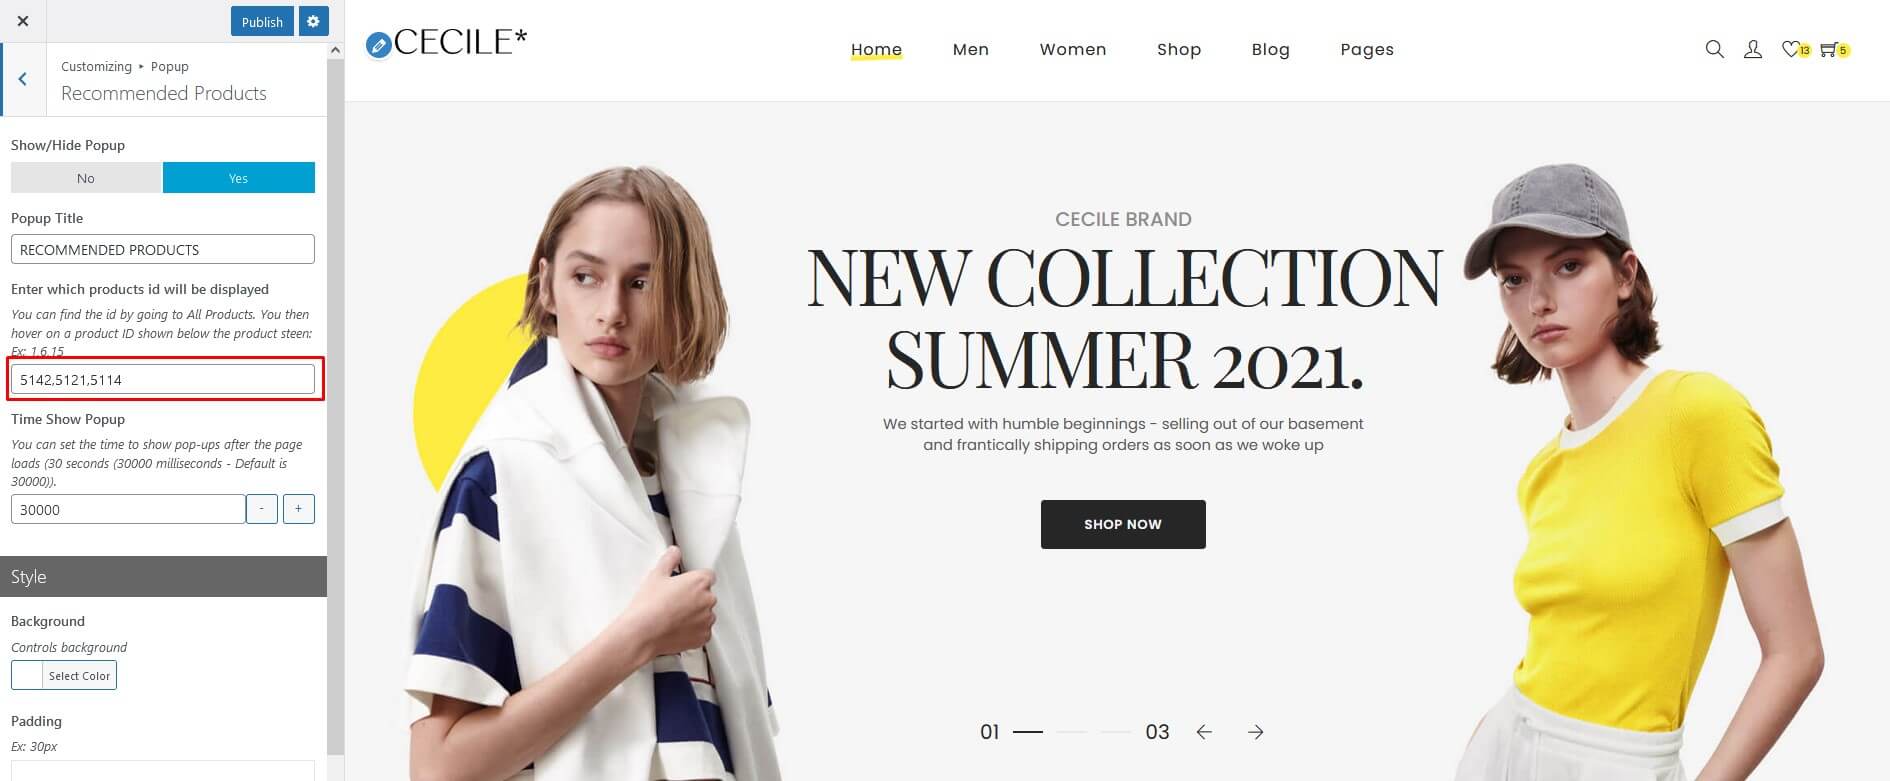
4.8.5 Recommended Products
You can easily turn on / off pop-ups and enter ID product if you want display.
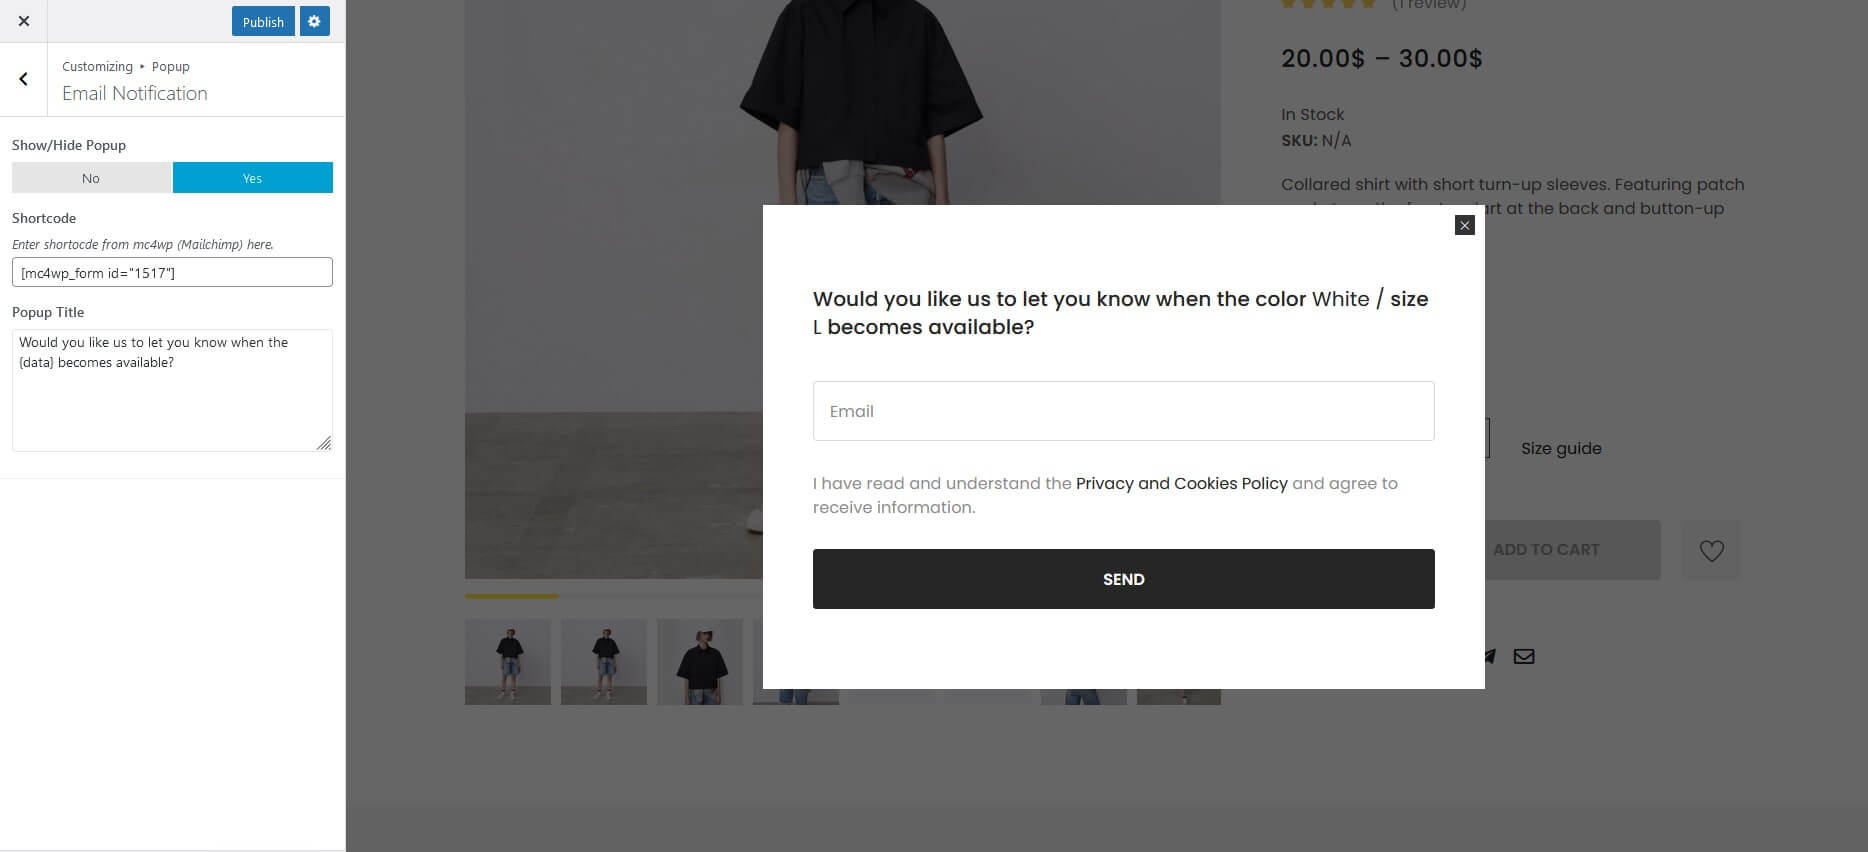
4.8.6 Email Notification
You can easily turn on / off pop-ups and you can change content.
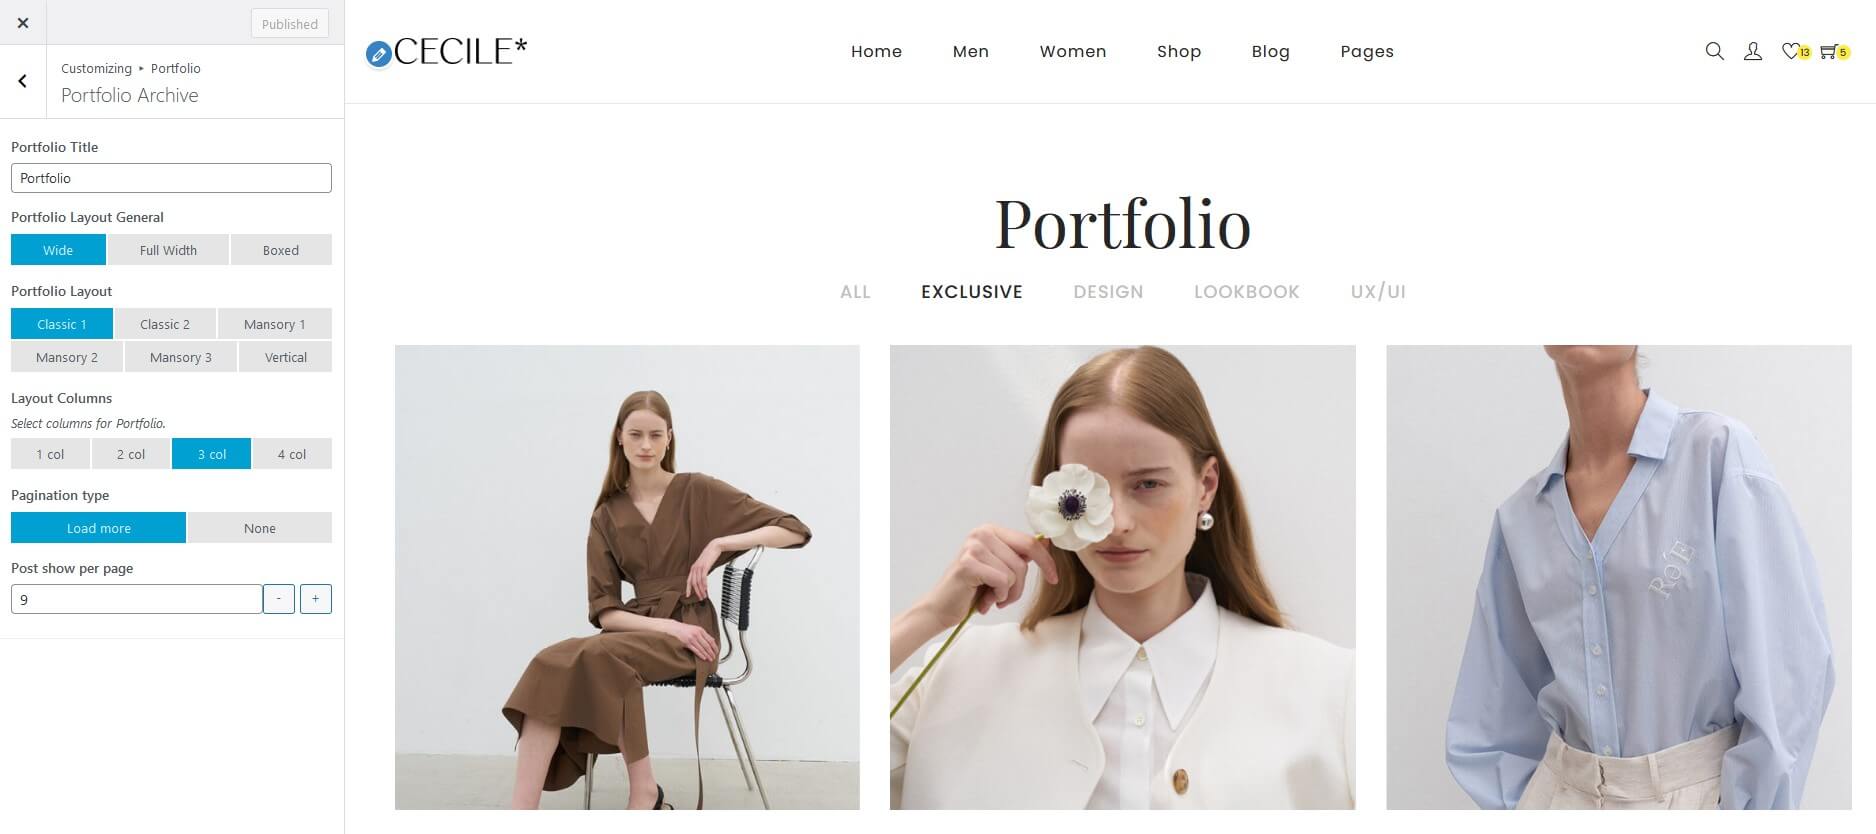
4.9 Portfolio
4.9.1 Portfolio Archive
You can easily set up and change layout with customize portfolio
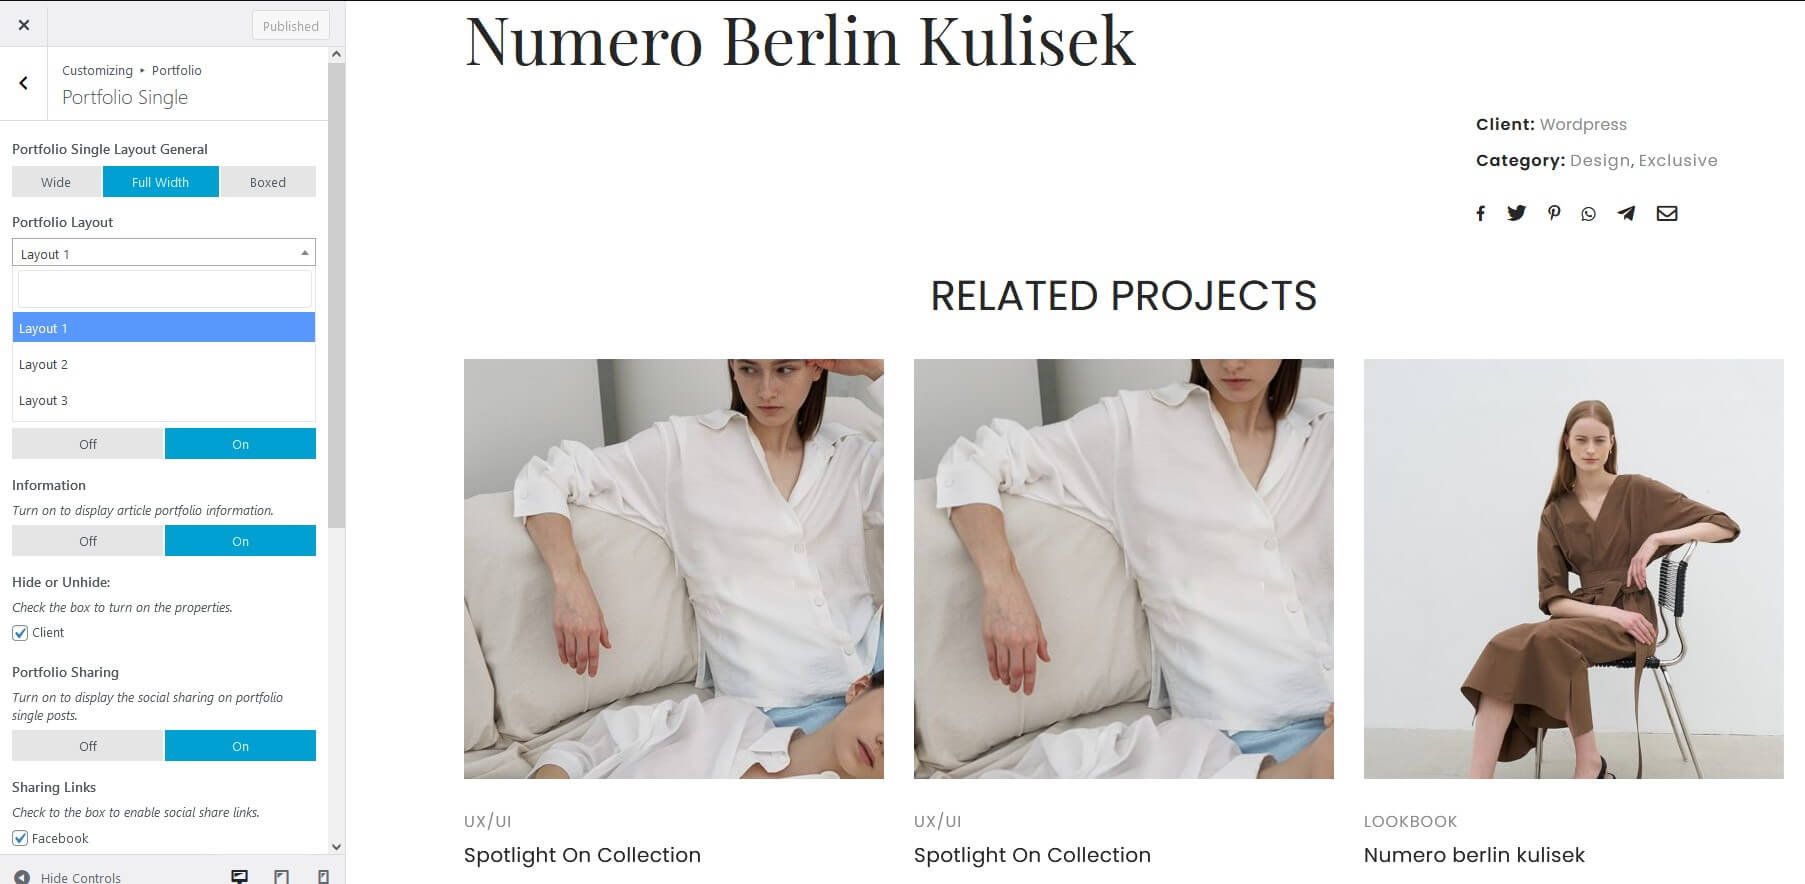
4.9.2 Portfolio Single
You can easily set up and change layout with customize portfolio single
5. Shortcode
Remember to install and activate Arrowpress Core plugin.
- Go to Appearance > Install Plugins on admin sidebar.
- You should select and install the plugin.
- You should activate plugin.
In order to add shortcodes using elementor, you should enable elementor editor and select the element
you
want to add.
ArrowTheme shortcodes
Shortcodes are some of the easiest ways to add customized content to your site.
In general, We have been making efforts to provide you the most simple and convenient way to help with your content adding process.

As a whole, each shortcode has 3 basic tabs: contents, style and advance. The two first tabs in every shortcode is different in options, aiming to provide flexible selection for building content process. Almost all shortcodes have the same advanced tabs.
For tab Advanced setting:
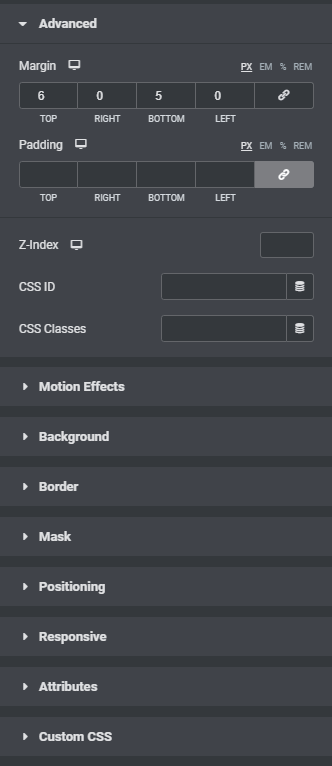
- Choose advanced to expand: There you can input the number of px for margin and padding you want your section to have, also the z-index number (how many items that your section will float higher than). You can name your section by both unique ID or class to make it easier to style
- Choose background to expand the setting of background: normal or hover, background type: classic or gradient.
- Choose border to expand this setting: normal or hover, type of border, or border radius, box shadow
- Choose responsive to expand this setting: hide on desktop, on tablet or on mobile.
- Tab custom CSS allows you to add your own css code, which is available on Elementor
Here are the instructions
- Choose your desired shortcode
-
Navigate your desired shortcode, all you need to do is holding and dragging to the area you have created. And boom! it's no need to do anything else, all things are served for you. Discover and enjoy!
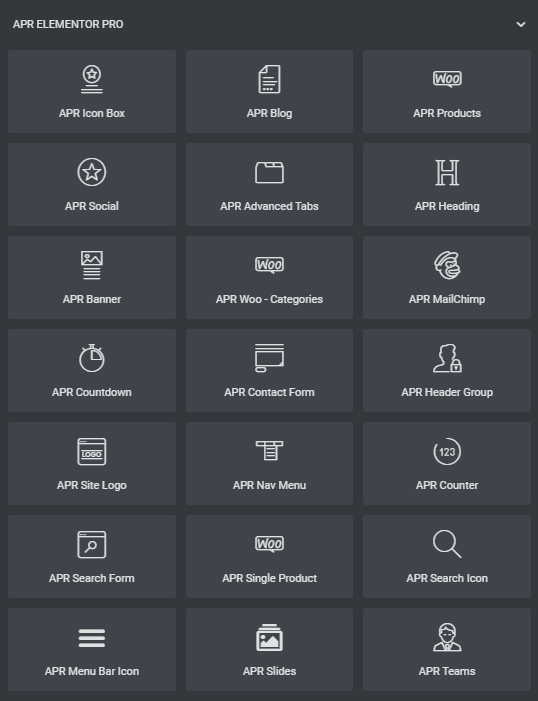
We gave you a plenty of shortcodes that are additional things in pro version of elementor - APR Elementor Pro, you just take advantage of it.
With APR Elementor Pro we have an additional icon set, it is not fontawesome like Elementor.
A little note when you use this icon is that you should use it for shortcode of APR ELEMENTOR PRO, with the Elementor shortcode we don't guarantee it will get options in the style tab.
5.1 APR Icon Box
Icon boxes come in very handy when building websites. The most common usage is for sections that list features of products or services. You will see the various options you get to customize every element of this widget: the icon, the headline, and the description. The icons are derived from the Font Awesome Icons, and you are able to search through them and pick the right one.
After 1 drag and entering neccessary information, here is the result:
5.2 APR Blog
This shortcode will display list of blogs in grid style, you can have options to adjust the content of those blogs by choosing number of column, blog's category, order, number of posts you want to display. Beside, animation option is also available for your blog to display vividly.
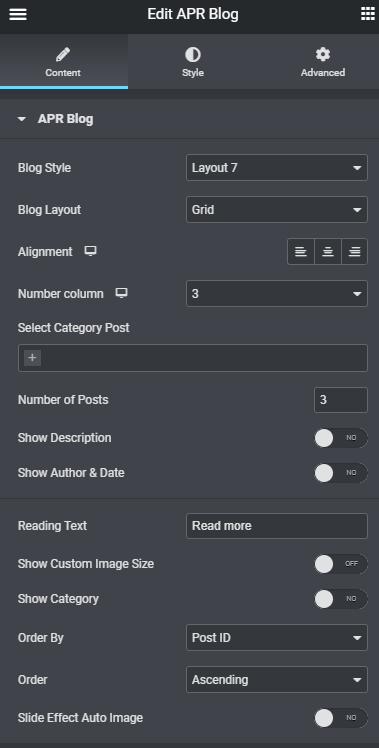
There is 1 kind of displaying a number of blog:
Type 1

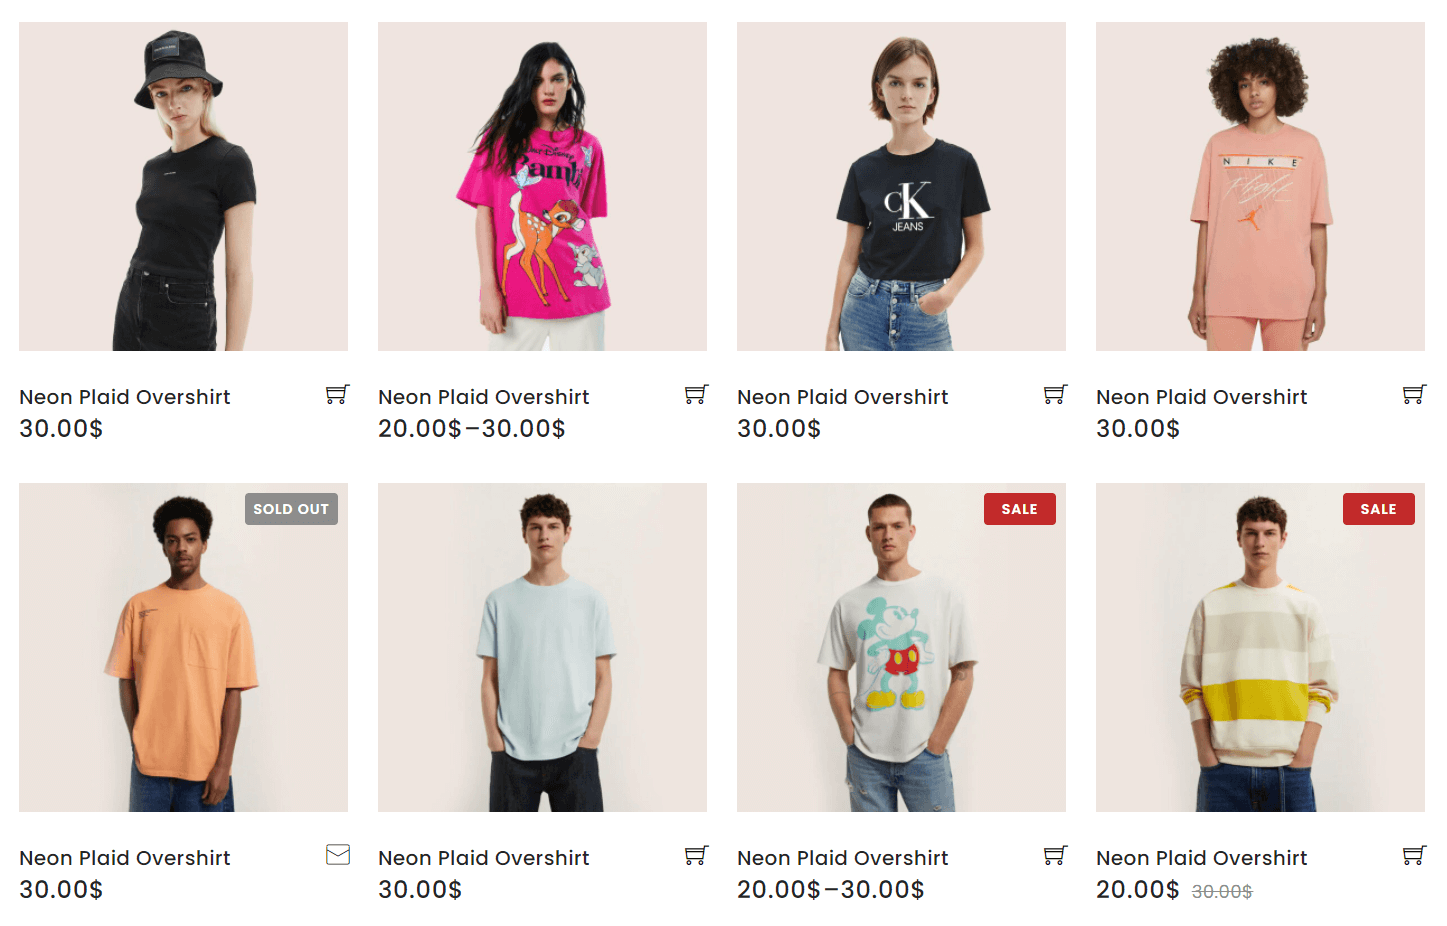
5.3 APR Product
If you have no idea about displaying a number of products, this shortcode'd help you. No need to think!
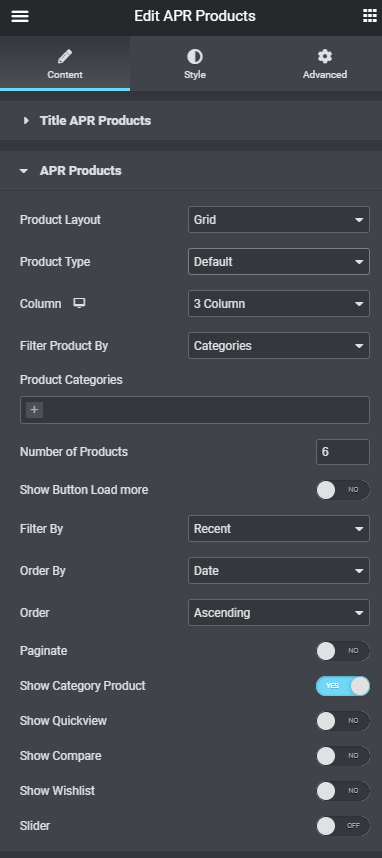
There is 1 kind of displaying a number of products:
Type 1
5.4 APR Heading
This shortcode includes several useful options for you to adjust the heading.
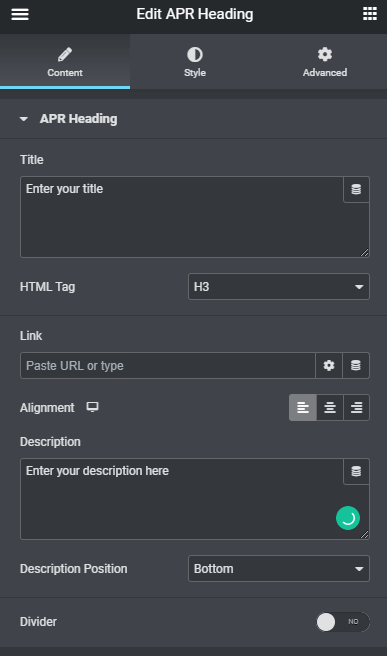
- Frontend:


5.5 APR Banner
This is how to show a banner. You have a lot of options to adjust your banner in general, for example: banner type, banner image, image size, content position and also alignment of your image.
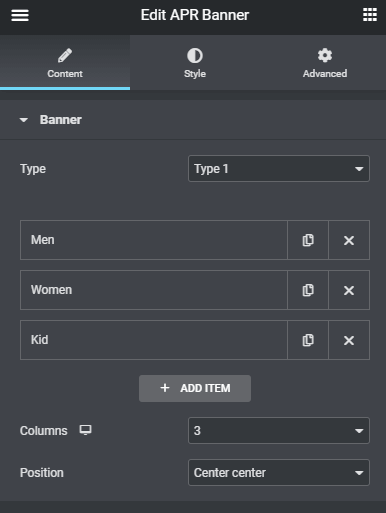
There is 1 kind of displaying a number of Testimonial
Type 1:

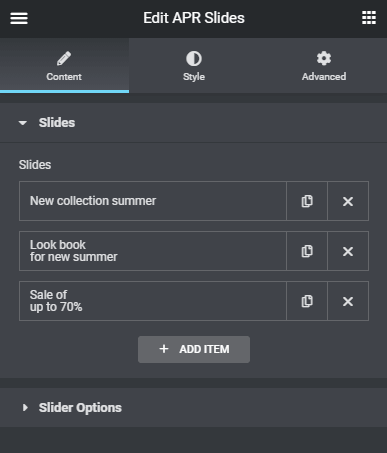
5.6 APR Slider
Whenever you found that the slider is quite dull and boring to show in default way, you can make exclusive use of your own styled slider and APR slider will help you with add an exellent slider without spending much effort.
In the content section, there are 3 parts: Background, content, style going along with it's options.
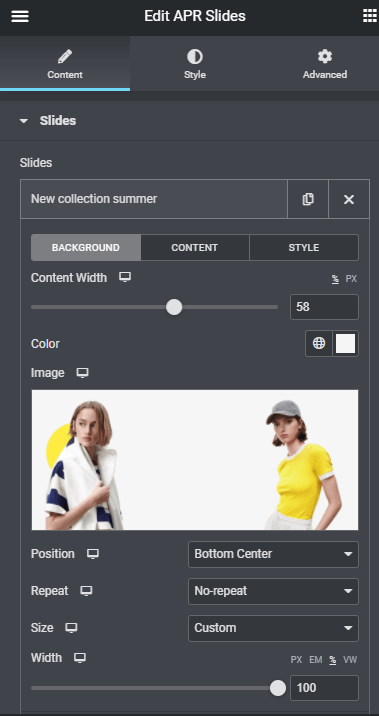
Remember that we support you some animation for the slide, there are a various of selection for you to explore.
In content part, it has fields for you to enter, Title fields is splited into 3 sections to style it conveniently: before title, title, after title.
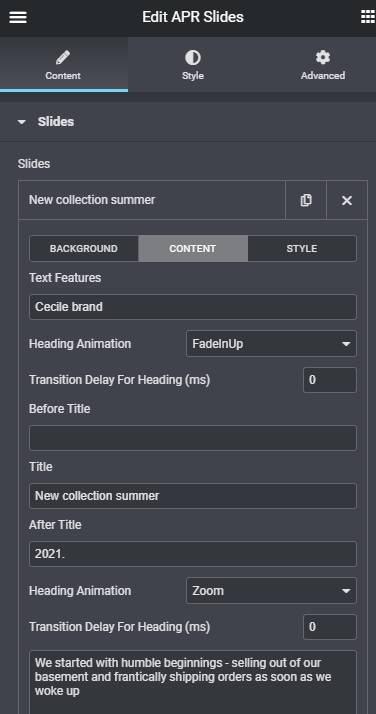
In syle part, there are many different options for styling the whole setting slide, title, description, button, navigation to choose
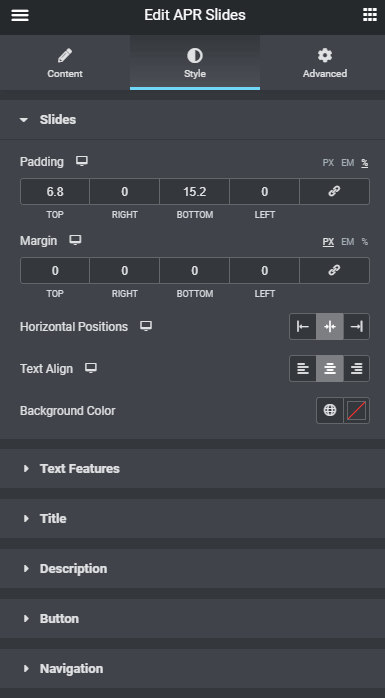
- Fontend:

5.7 APR Our Team
To introduce with visitors about how qualified your employees are.
There is a kind of displaying:
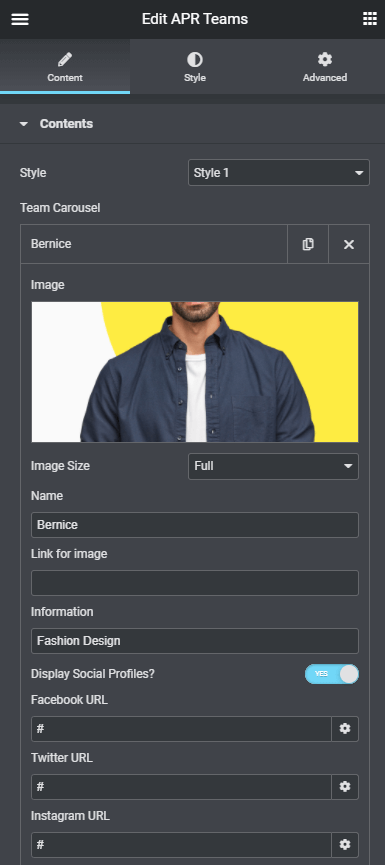
Frontend:

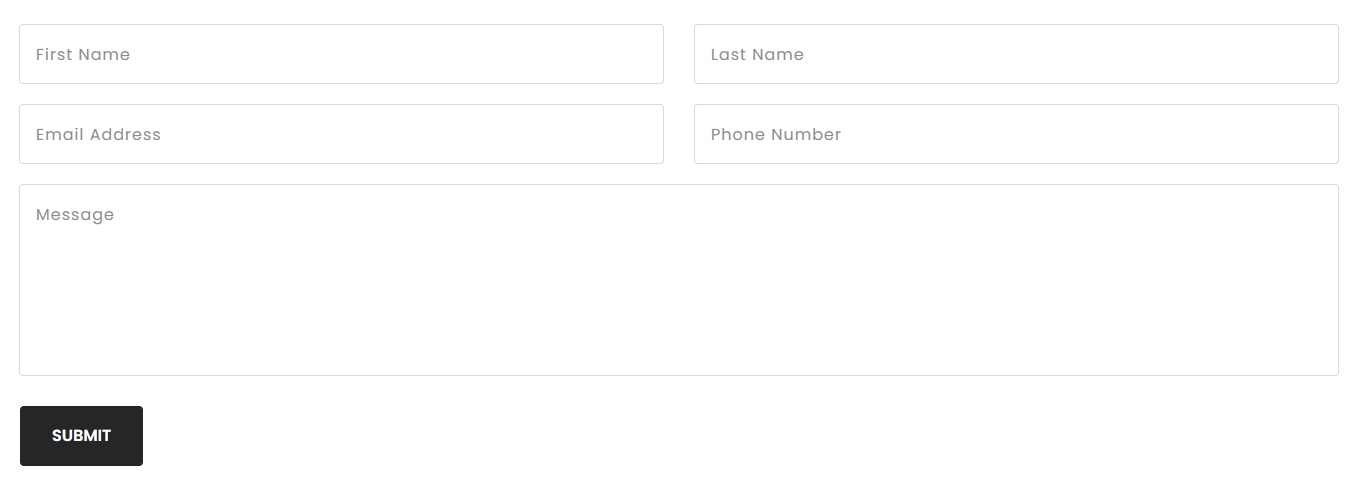
5.8 APR Contact Form
You prefer a form to contact with customers, visitors, APR Contact Form is regarded to be the most convenient and easy to use.
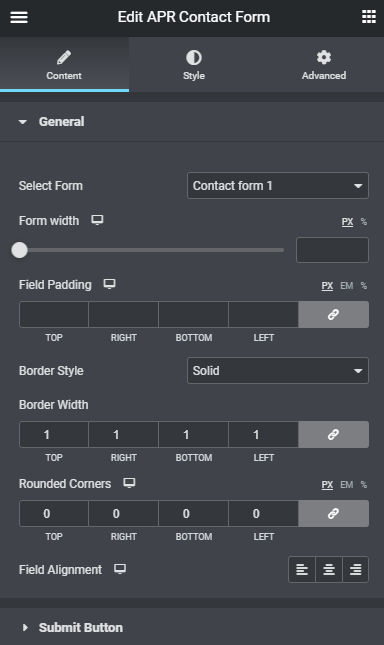
Frontend:
5.9 APR Header Group
Partially make up your header, here you can show / hide options and create style in tab style.
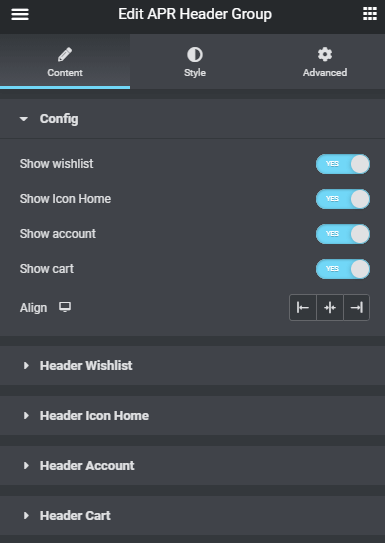
Frontend.

5.10 APR Site Logo
Use in the position where you need to display the logo.
Frontend.
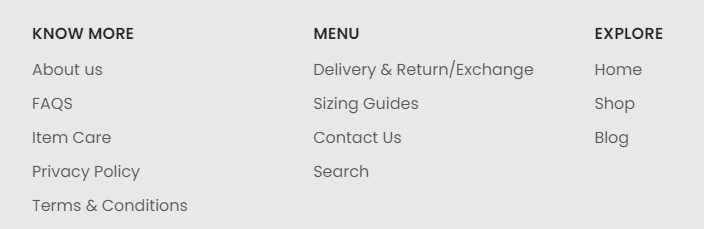
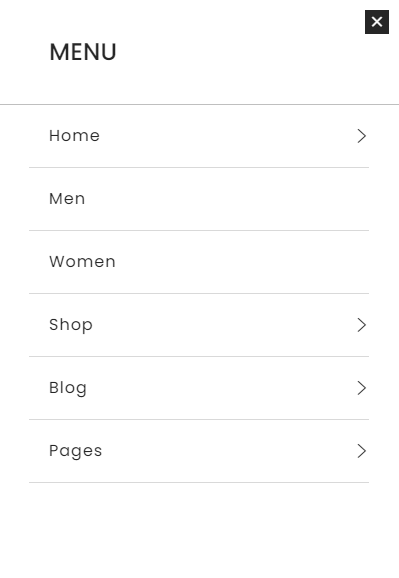
5.11 APR Nav Menu
You can select the type of menu.
There are 2 kinds of layout: Horizontal, Vertical
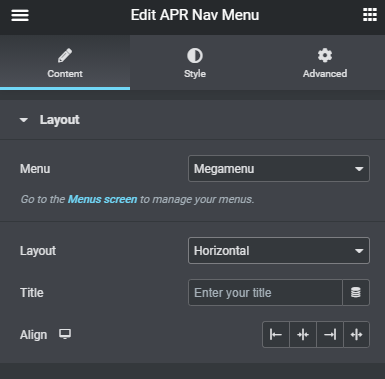
Front end look like :

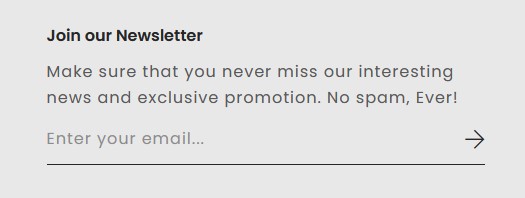
5.12 APR Mailchimp
This shortcode will display the form mailchimp
There
Layout1:
5.13 APR Social
This shortcode will display the social icon
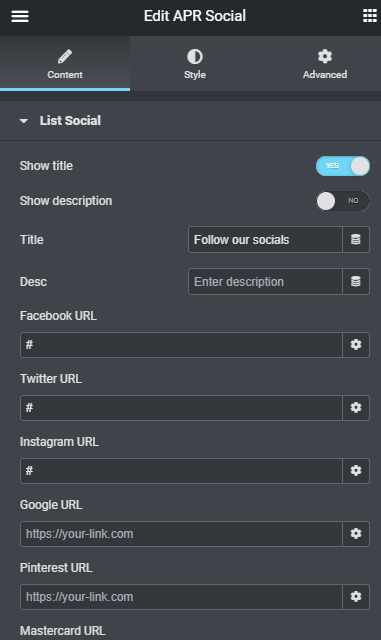
Frontend:

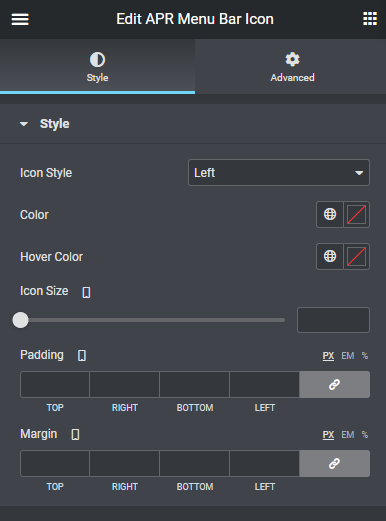
5.14 APR Menu Bar Icon
This shortcode will display the menu bar icon
There
Layout1:

Layout2:

6. Widgets
In order to add Widget to sidebar, you should click to the widget which you want to add and select sidebar..png)
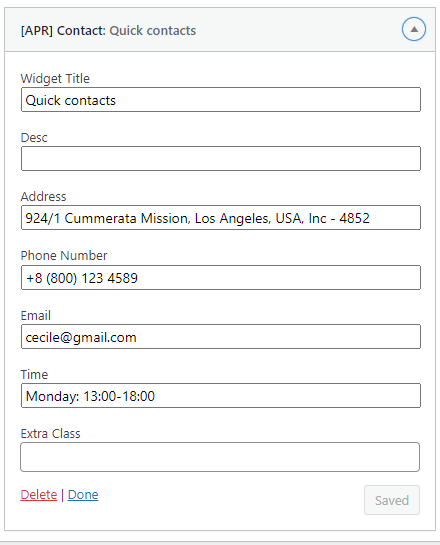
6.1 Widget Contact
This widget provides options for you to enter some informations such as address, phone number, email and website link:
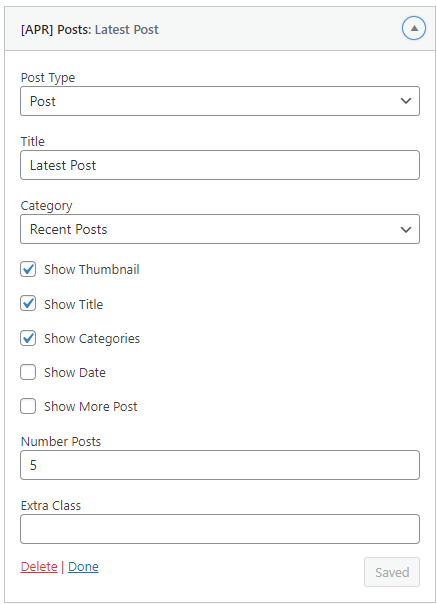
6.2 Widget Post
Make sure the post has been created
7. Update
7.1 Update Theme
Before updating the theme, we want you to know that updating the theme doesn't affect to your site data. All of your content and theme settings are preserved.
To avoid the unwanted problem, you should backup the theme files or even theme options you select in Cecile Options. Normally, the theme options you select in Cecile Option won't change after updating the theme
Backup Theme Files
- Backup of the theme folder (cecile) which located in wp-content/themes/
Backup Theme Options
-
You need to install Customizer Export/Import plugin
-
Then, go to Cecile Options > Import/Export
-
Click Export backup customize option.
Update using FTP
-
Go to http://themeforest.net/downloads and find cecile theme.
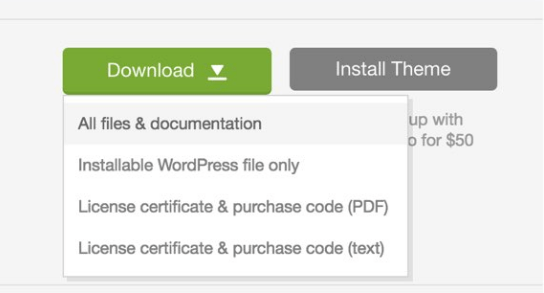
-
Click the Download button next to Cecile theme and choose to download the "Installable WordPress File only" which is just the WordPress file, or choose the "All Files and documentation" which is the entire package that contains everything.
If you download "All Files and documentation", you should extract it and you will find theme folder named cecile.zip which is located inside "Theme files" folder. Unzip the theme zip file(cecile.zip) to get the "Cecile" theme folder. .
- Replace the old theme folder in wp-content/themes/ with new theme folder you extracted in previous step.
-
If you made changes anything in the theme files in wp-content/themes/cecile, you will need to update the changes again to the new theme files.
-
If the options you'd selected in Cecile Options are lost, you need to install Customizer Export/Import plugin then you can go to Appearance > Customize > Export/Import > Export the content and download Backup Theme Options. Click Import to import theme options.
7.2 Update Plugins
For some plugins like WPBakery Page Builder, Ultimate Addons, ArrowTheme Core, ArrowTheme Importer, you should update manually these plugins.
-
Please go Plugins.
-
Select and deactivate these plugins.
-
Select and delete these plugins.
-
Please go Appearance > Install Plugins.
-
Select and install these plugins.
-
Select and activate these plugins.
8. Translation
If you want to use only one language in the site, you can use Loco Translate plugin, otherwise, you can use WPML or Polylang plugin for multilingual website.
8.1 Use Loco Translate
Please read Loco translate installation
Translate theme
Install and activate the plugin Loco Translate
Go to Loco Translate > Theme. Select Cecile theme.
Click the “+ New language” button.
Select The language you want the texts to be translated and continue.
On next screen all the “English text strings” that are inside the theme will be listed. Select text string from the “Source Text” list and then Add your translated text in the textarea below.
Click the Save button.
Translate plugins
Install and activate the plugin Loco Translate
Go to Loco Translate > Plugins. Select plugin you want to translate such as ArrowTheme Shortcodes.
Click the “+ New language” button.
Select The language you want the texts to be translated and continue.
On next screen all the “English text strings” that are inside the theme will be listed. Select text string from the “Source Text” list and then Add your translated text in the textarea below.
Click the Save button.
NOTE: You need to set your language in Settings > General to display translated text in frontpage
8.2 Use WPML
WPML is the most popular plugin for multi language support. Below you will find documentation their team created for using WPML plugin. If you've purchased WPML and have any questions or issues, please check the links below.
- WPML Plugin - The highly recommended plugin to manage multi-lingual sites
- WPML Forum Support - If you bought WPML then you get free support from their amazing team
- Translating Widgets - Tutorial recommended by wpml team for translating widgets
9. Site Speed Up
We recommend some following plugins:
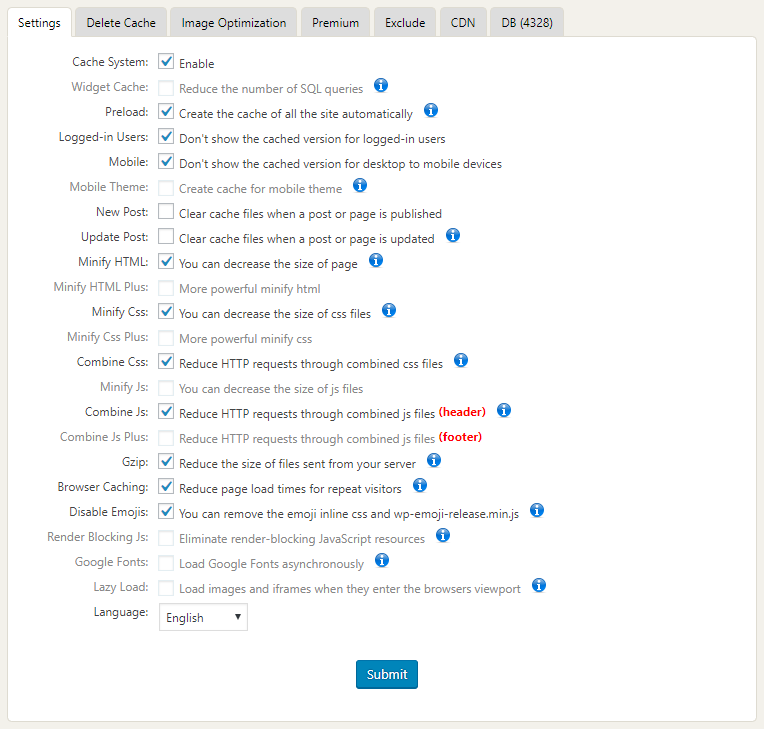
- WP Fastest Cache plugin to cache the site.
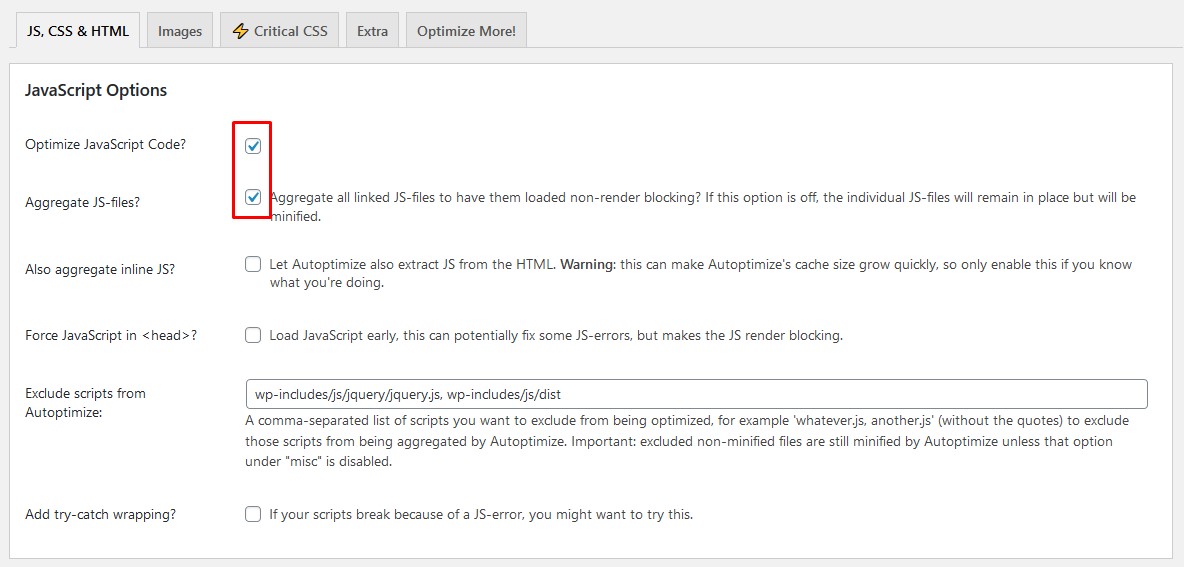
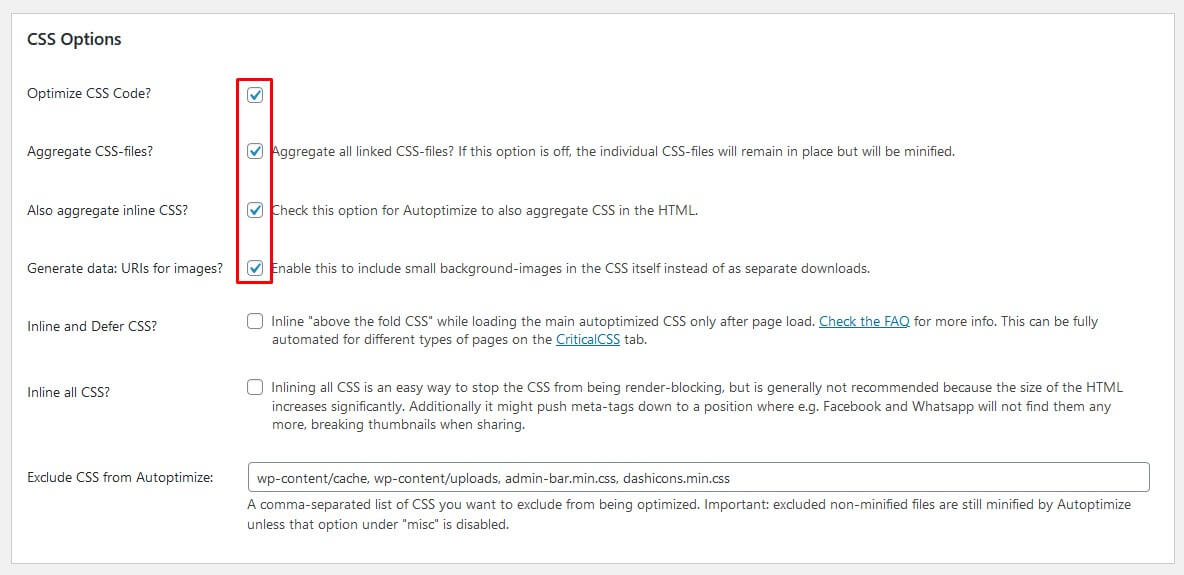
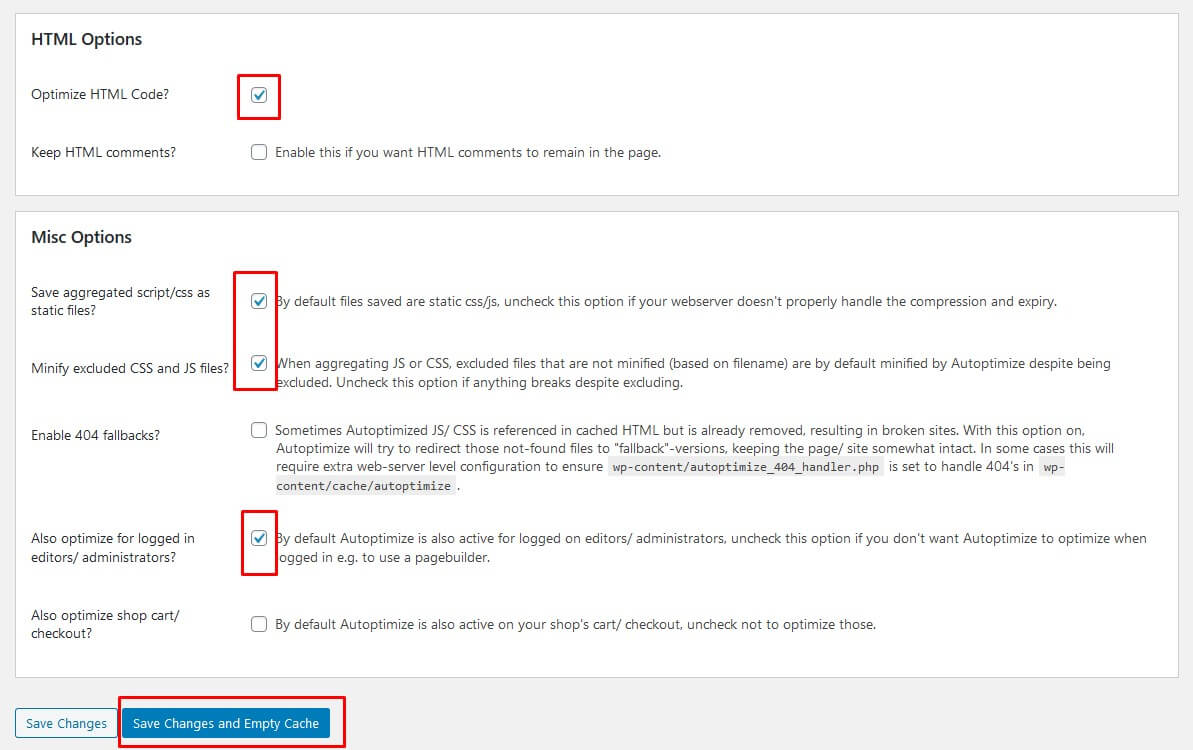
- Autoptimize plugin to minify HTML, CSS, JS the site.
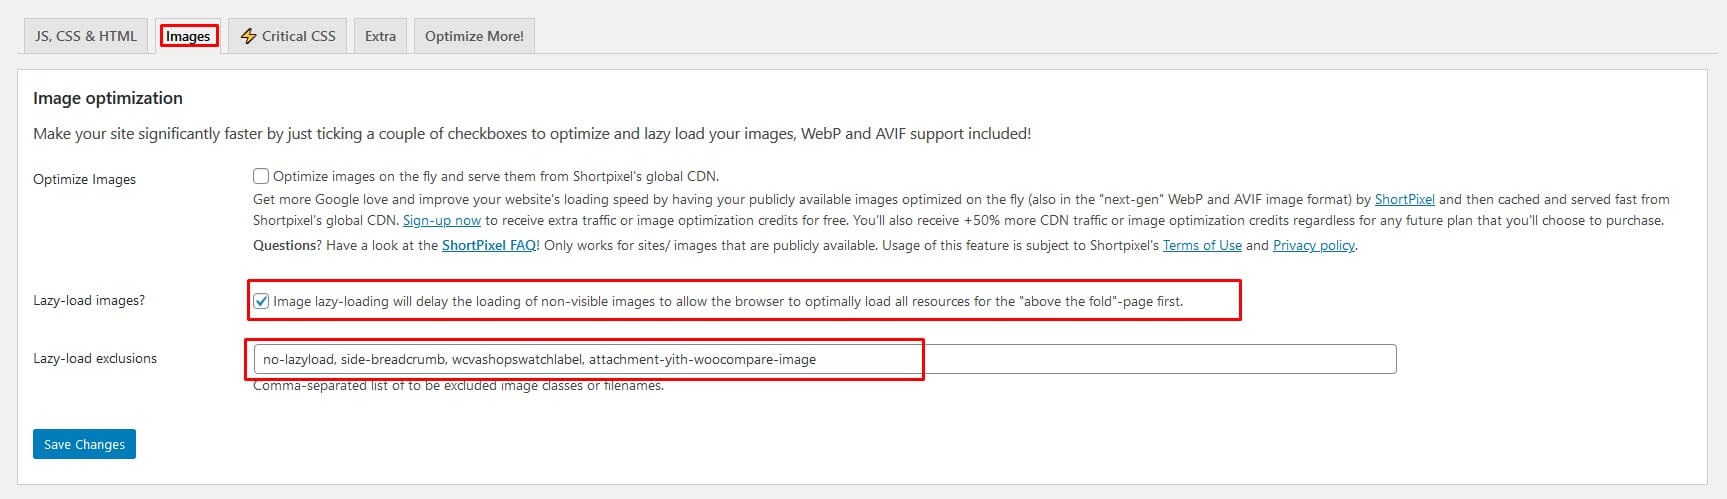
Turn on option Image lazy-loading will delay the loading of non-visible images to allow the browser to optimally load all resources for the "above the fold"-page first.
Add class in option Lazy-load exclusions: no-lazyload, side-breadcrumb, wcvashopswatchlabel, attachment-yith-woocompare-image
- EWWW Image Optimizer plugin to reduce image sizes.
You can convert from jpg, png to WebP format to improve site loading speed
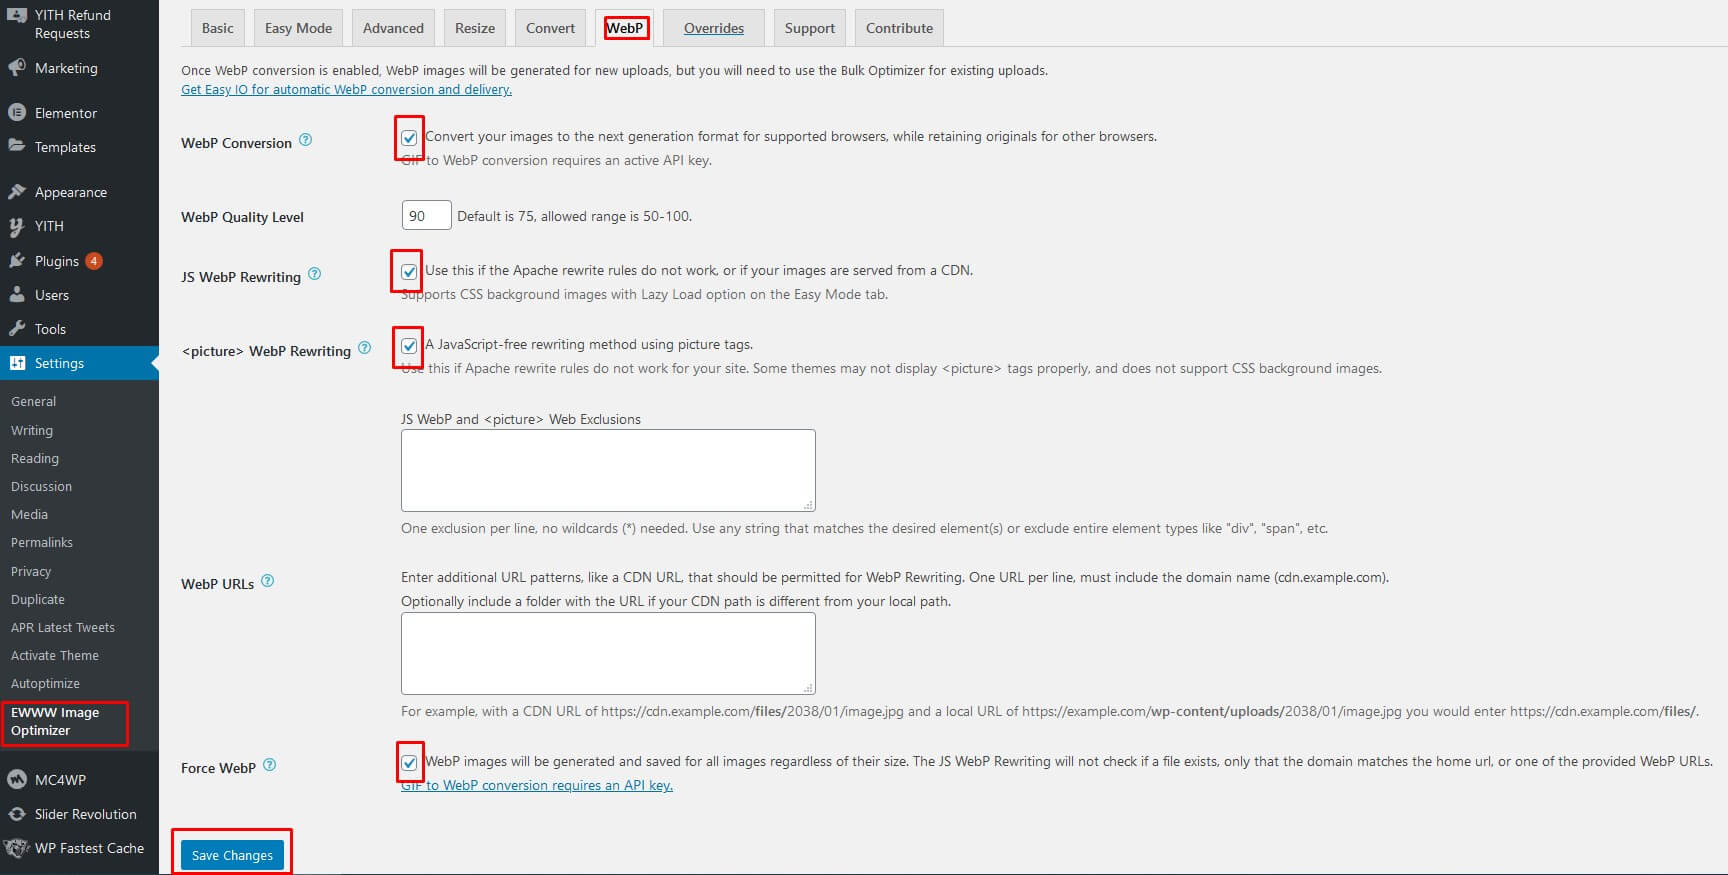
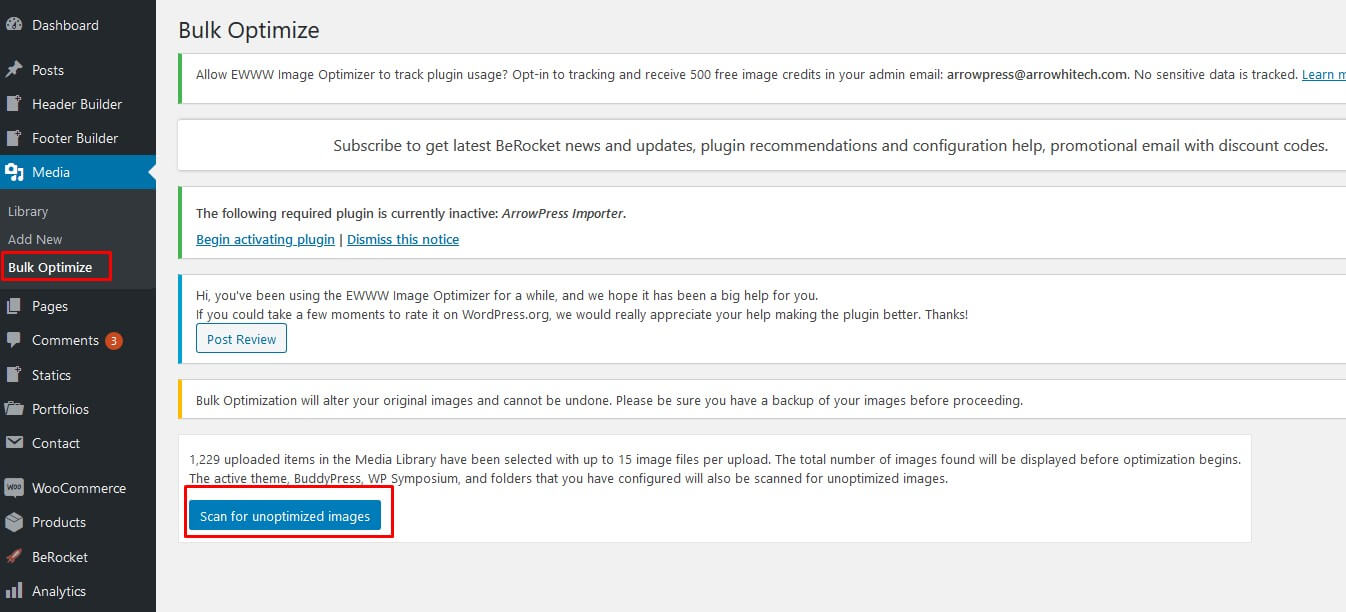
Then, You can go to Media -> Bulk Optimize -> Optimize image
10. Support
If you don't find the answer for your issues in this document and you want to contact us for support, please contact us by creating new topic in our website ArrowTheme Support Site or send an email to our email [email protected]